Author:
Alice Brown
Date Of Creation:
24 May 2021
Update Date:
1 July 2024

Content
- Steps
- Method 1 of 3: Installing an electric hob
- Method 2 of 3: Installing your gas hob
- Method 3 of 3: Choosing a hob
- Tips
- Warnings
The idea of installing your hob yourself can be a bit daunting. After all, you will have to deal with either electricity or gas and at the same time work with rather expensive kitchen equipment. However, none of the steps to install the hob is particularly difficult. You just need to do everything carefully and in the correct sequence from the beginning to the end.
Steps
Method 1 of 3: Installing an electric hob
 1 Remove the old hob, if any. If you are replacing an old hob, first you need to remove it. Cut off the electricity in the switchboard. Remove any attachments from the hob and clean off any existing sealant. Disconnect the wires, remembering how the old hob was connected, and remove the hob from the hole in which it sat.
 - You must know for sure that the electricity supply to the hob is turned off. To check, you can use a tester by probing all the wires. If the light on the tester comes on, there is still electricity.
- Be sure to remember how the wires of the old hob were connected, as the new hob will be connected in the same way. You can sign the wires and take pictures before unplugging them so that you can remember later more easily.
- Seek help from someone to remove the hob from its seat, as it will be quite heavy.
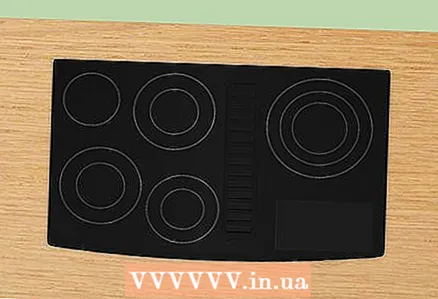
 2 Make sure you have enough space in the location chosen for the hob. Ideally, you should have a gap of 76 cm above the hob and approximately 30-60 cm on either side of the hob.You should also make sure that there is enough space under the worktop to accommodate your new model. hob.
 - Check the manufacturer's instructions supplied with the hob.
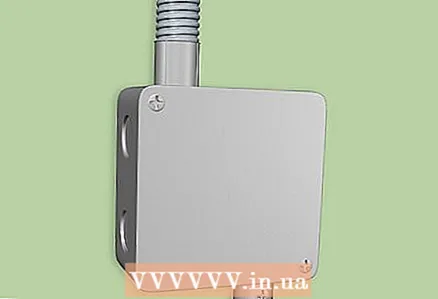 3 Make sure there is a junction box near the location you choose to connect the hob to the mains. Most electric hobs require a direct connection to the mains via a 220 V junction box. If you are replacing the hob, you probably already have a junction box.
 - If there is no junction box, then you need to contact a professional to install it.
- You should also check that the old hob has the same amperage requirements as the new one, otherwise it may take a professional to connect it. Many older hobs have only a 30-amp electrical circuit, while newer ones often run between 40-50 amps.
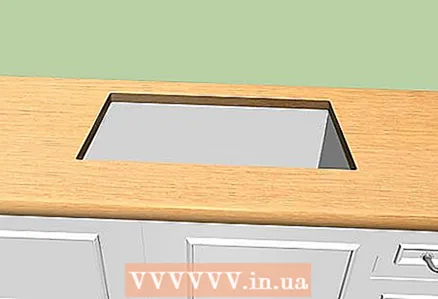
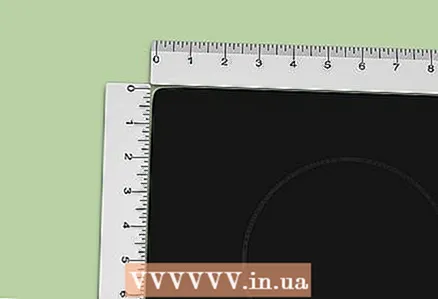 4 Measure the hob and make sure it fits into the old hole. If you are replacing the hob, there should already be a hole in the worktop and you just need to make sure it fits the new hob.
 - Measure the length and width of the hob and subtract 1.5-2.5 cm on each side to determine the hole for the hob.
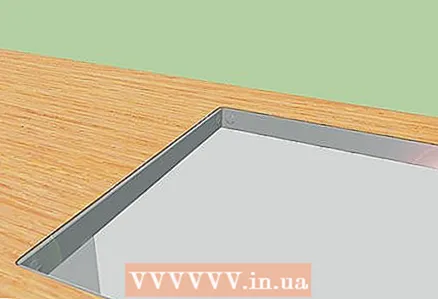 5 Adjust the hole for the hob so it can fit into it. The hole on each side should be 1.5-2.5 cm smaller than the hob. If you do not already have a hole for the hob, or it is too small, then you will need to cut it to the desired size. If the existing hole is too large, sheets of metal can be screwed on the sides to reduce it.
 - You may need to remove the tiles from the countertop (if tiled) around the work area before starting to cut the hole.
- To cut through a granite countertop, you need a water-powered circular saw. Alternatively, you can hire a professional for the job, as granite is difficult to cut accurately. Also, after cutting the hole, the stone should be sealed before placing the hob into the hole.
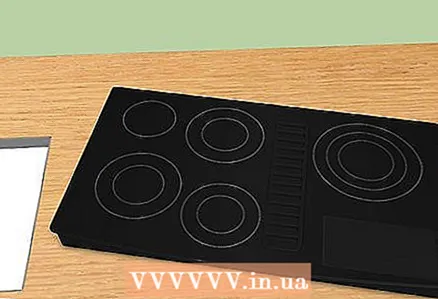 6 Remove all removable parts from the hob to make it easier for you to put it back in place. The hob may have removable burners, protective screens and other parts that should be temporarily put aside. Also, remember to remove all packing materials from the hob.
 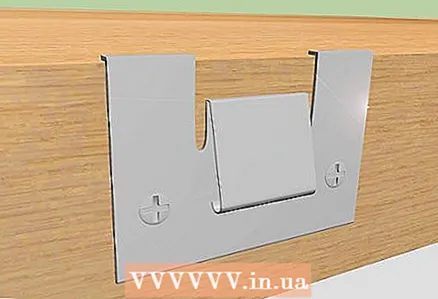 7 Install the clamps. They are designed to fix the hob. You should hang them from the top edge of the slot and then screw them down.
 - If you have a granite countertop, then attach the clamps to double-sided duct tape, not screws.
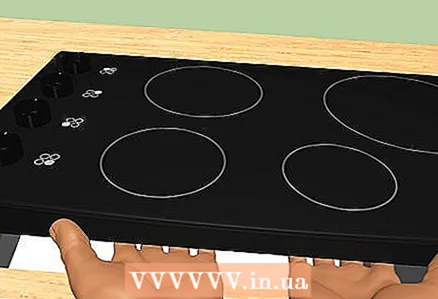
 8 Lower the hob into the opening. Lower the new hob into the hole, making sure to insert the wires first. Press down on the hob until you hear the locking clips click.
 - If you have had to remove tiles, then you will first need to re-lay the tiles back to back on the surface of the hob before replacing the latter. You will have to wait up to 24 hours for the mortar to harden before placing the hob back in place.
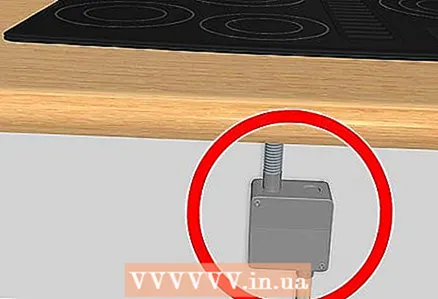 9 Connect the hob wires to the mains. Electricity should still be turned offwhen you do this so as not to get an electric shock. Connect the hob wires to the corresponding wires in the junction box.
 - The red and black wires (colors may vary) must supply the hob with electricity. Connect these wires to the corresponding phase wires in the junction box.
- The white wire is neutral and serves to close the circuit. The neutral wire of the hob must be connected to the neutral wire in the junction box.
- Usually the green wire is for grounding. Connect the ground wire of the hob to the ground in the junction box.
- Connect the wires to each other using insulating wire twist caps. Line up the pair of wires to be connected and twist the stripped ends. Screw the cap over the twisted wires. An insulating cap will keep them from touching other wires and potentially keep you safe from fire.
 10 Refit the previously removed removable parts on the hob. Replace the burners, protective shields and other removable parts.
 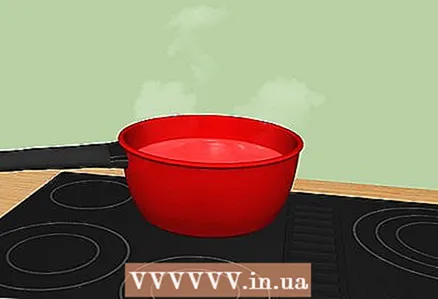 11 Turn on the electricity and check the hob is working. Turn on the power to the hob to check that everything is working properly.
Method 2 of 3: Installing your gas hob
 1 Make sure you have gas lines. To install a gas hob, you need a gas source.If you are replacing an old gas hob with a new one, you have already connected the gas supply line.
 - If you do not have a gas line yet, then you should contact an authorized organization for its installation. It is very important to properly route the gas line, as gas leaks can lead to fires and poisoning of people.
 2 Remove the doors and drawers on the cabinet under the hob. Removing doors and drawers makes it easier to access the space under the countertop. The contents of the cabinet should also be removed to allow access to the gas line and the hose coming from it.
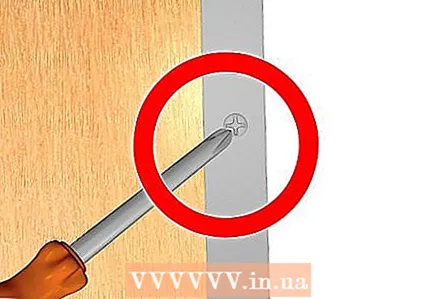
 - To remove the doors from the hinges, you can unscrew the screws that fix them on the hinges.
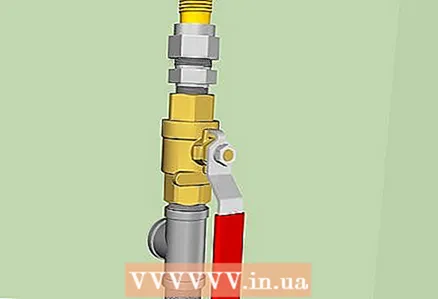
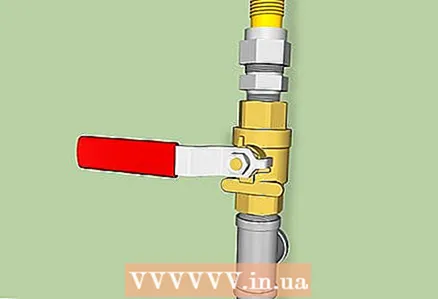 3 Disconnect the gas supply to the hob. There will be a tap where the hose connects to the gas line. Close it by placing it in a position perpendicular to the pipe, or so that it sticks out to the side.
 - Failure to close the valve properly will result in gas leakage after disconnecting the hose, which could cause poisoning and / or fire.
- If the gas supply is on, the valve handle indicates the direction of the gas supply. It is very important to turn the tap 90 degrees to close it.
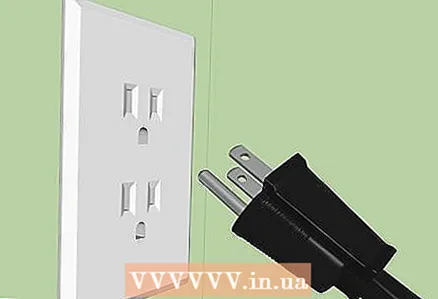 4 Unplug the power cord. Many gas hobs have wires for connecting the electric hob ignition system. You should disconnect the wire from the mains before proceeding further.
  5 Open all cooking zones for a few minutes. Despite the fact that you have turned off the gas, it may still remain in the hose. Open all burners to release gas. Don't light it on fire. All gas will be released in a few minutes.
 - Turn on the hood while deflating gas.
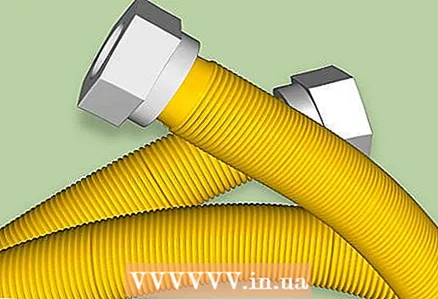
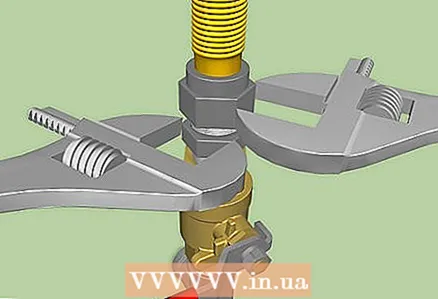 6 Disconnect the flexible gas supply hose from the stationary gas line using two wrenches. Take one wrench and install it on the hose nut and the other wrench on the fixed gas line nut.
 - Keep the wrench attached to the fixed gas line in one position.
- Turn the wrench installed on the hose nut counterclockwise. Continue turning the nut until the hose is detached from the pipe.
- In some cases, there are fittings between the stationary gas pipe and the hose. You should leave the fitting in place and remove only the hose.
 7 Remove all removable parts from the hob. Remove hotplates, protective shields and other removable parts before proceeding further. This will make it easier to move the hob.
  8 Remove the clips holding the existing hob in place. Unscrew the clips on the underside of the old hob.
 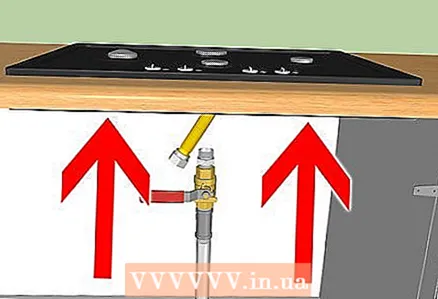 9 Push the hob from below to raise it. Remove the hob from the worktop and put it in a safe place. Remember that the gas hose is still connected to it.
 - Place the hob face down when stowing it to the side to protect it from damage.
 10 Disconnect the gas hose from the old hob. If you will be using an old gas hose to connect a new hob, you must disconnect it from the old hob. Use two wrenches to do this, placing one on the hob and the other on the hose nut.
 - To disconnect the hose, turn the hose nut counterclockwise.
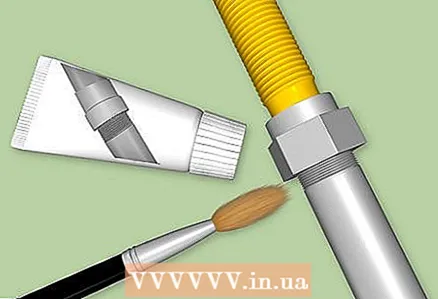 11 Connect the gas hose to the new hob. Use a gas sealant by applying it to the threads where the hose and the hob join. Apply sealant generously to the threads, but so that it does not get into the hose. Use a wrench to screw the gas hose nut onto the hob.
 - Make sure to seal all threads with sealant, as this will avoid gas leaks later.
- Some hobs come with a gas regulator to maintain a constant gas pressure. If your hob has such a regulator, remember to first connect it to the hob and then connect the gas hose to it.Be sure to apply gas sealant when screwing the regulator and hose into place.
- Use a small brush to apply the sealant, if the product you purchased did not come with one.
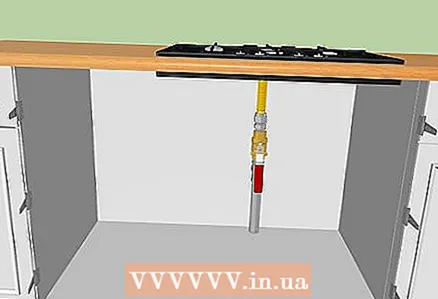
 12 Place the new hob in its place. Lower the hob carefully into the opening to avoid damaging any connections on the bottom. Before lowering the hob into the opening, you must pass the gas hose through it forward.
 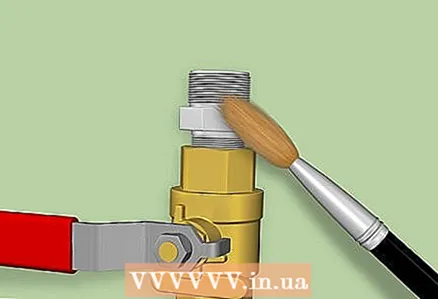 13 Connect the gas hose to the stationary gas pipe. Apply sealant to the threads of the gas pipe fitting. Then tighten the gas hose nut with a wrench. Be sure to tighten the nut tightly.
 - Be sure to completely seal the threads with thread sealant to prevent gas leaks.
 14 Prepare a soapy solution. Prepare a solution of 1 part dish soap and 1 part water to check for gas leaks. Stir the solution thoroughly and then either spray it on the gas connections or apply with a brush. Turn on the gas supply valve by placing it in the position in which its handle indicates the direction of gas supply.
 - Check if soap bubbles appear at the gas connections. You should also make sure you don't smell the gas. Both that, and another is a signal of gas leakage through the joints.
- If a leak is found, shut off the gas supply immediately. Disconnect the gas connections and reapply the sealant and then reconnect. Retest with soapy water.
- Check everything several times to make sure there are no leaks. You should definitely check all gas connections you have worked with.
 15 Switch on the cooking zones and test them. If a soapy water test reveals no leaks, try lighting the burners. It may take a few seconds for the gas to come up and ignite, as normal air must first come out of the hose.
 - You can smell gas even before it ignites, so remember to turn on the cooker hood before lighting the burners.
- If the hotplate does not light up after 4 seconds, turn it off and wait a few minutes before trying again.
 16 Attach the hob mounting brackets to the worktop. When you are sure that the hob is working, attach it to the worktop using the fixing brackets. Your hob is now fully installed.
 - Replace the doors and drawers of the cabinet under the hob and all of its contents.
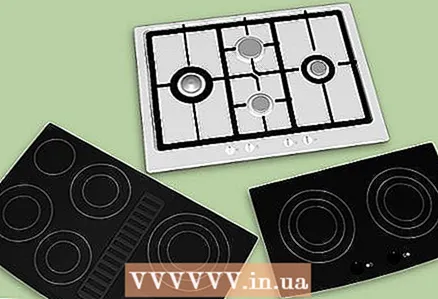
Method 3 of 3: Choosing a hob
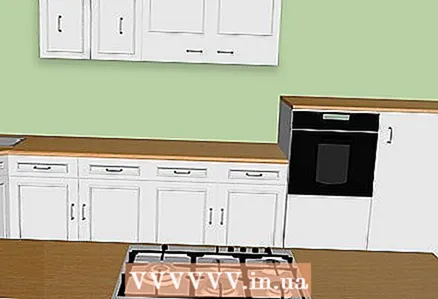 1 Purchase a hob when you want to have a separate oven and hob. The hobs are very handy when you need to install them on freestanding islands. Also, separate hobs are required when you want to have a built-in oven (which is more convenient than a conventional gas stove with an oven).
 - Separate hobs allow you to cook food on different devices at the same time.
- The hobs are also less conspicuous than conventional hobs, as they can be installed flush with the worktop surface.
- The hobs are easier to clean than conventional hobs.
 2 Install a hob with a downward hood to avoid installing a bulky hood dome above the hob. If you want to install the hob on a freestanding island and do not want to mount a massive hood above it, purchase a hob with downward ventilation.
 - This type of ventilation draws in air from the surface of the hob and blows it down.
- Some hobs are equipped with telescopic ventilation, which opens above the hob during cooking, and can be removed under the hob between cooking.
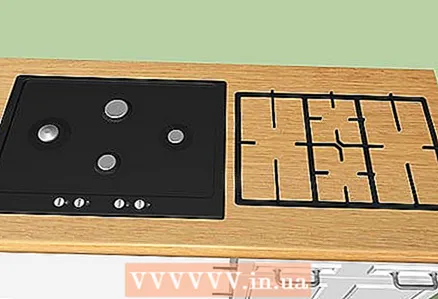
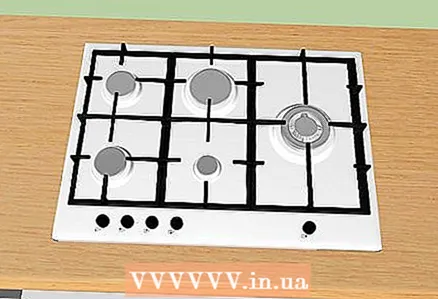
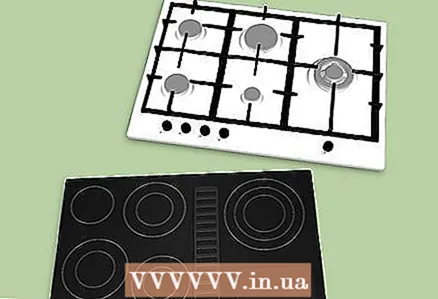 3 Choose between an electric and a gas hob. Traditionally, gas hobs have been preferred because they provide an immediate return of heat after the burner has been ignited. However, some modern electric hobs can also heat up very quickly.
 - When choosing a hob, you should pay attention to the style of execution, size, number of burners, color, price, material of manufacture and safety.
- Consider the cost of ownership when choosing between a gas or electric hob. Compare the prices of gas and electricity that will be used to operate the hob.
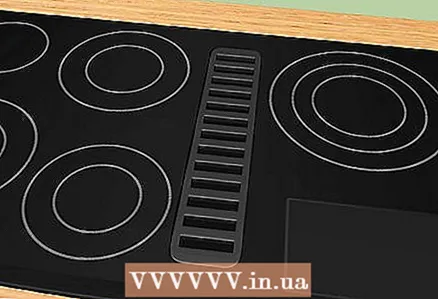
 4 Decide how many hotplates you need. In most cases, four cooking zones are sufficient for family cooking. However, if you often throw parties or family gatherings, or you just have a lot of people living at home, then additional burners will be very useful. Decide how many hotplates you need for your normal needs.
 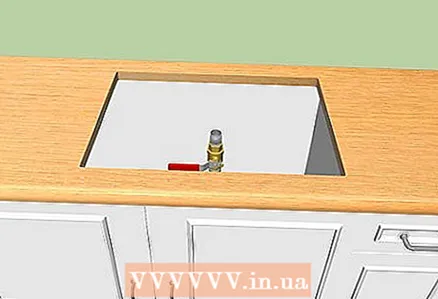 5 Choose a hob that will fit into the available space. If you are replacing an old hob, make sure that the new hob you are considering will fit in place of the old hob. If the new hob has a different size, then you will need to accurately cut a hole for it in the worktop.
 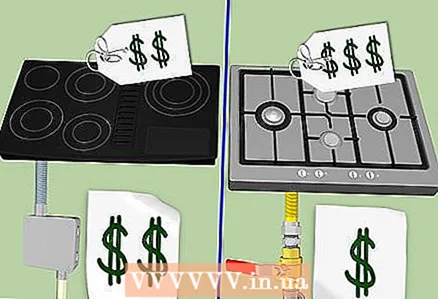 6 Consider the financial side of the issue. Gas hobs will be more expensive, but will be cheaper to operate, since gas is cheaper than electricity.
 - You should also consider the cost of wiring (for an electric hob) or gas line (for a gas hob) if you don't have either.
Tips
- Get the help of another person when lifting or lowering the hob to avoid damaging it.
- Try to choose a new hob that is the same type as the old one to make it easier to install. For example, replace the gas panel with a gas one, and the electric panel with an electric one.
- When replacing the electric hob, make sure that the required amperage for the new hob is the same as for the old one. Many older hobs use 30-amp circuitry, while newer ones usually run 40-50 amp. Get the help of a professional if you need to change the amperage in the connection for a new hob.
Warnings
- If you feel unsure about connecting the hob to the mains or gas line yourself, hire a professional for this. It will ensure the safety of connection and subsequent operation of the device.
- Be sure to apply sealant all over the threads of the gas connections to avoid lethal leaks.
- Be very careful not to leak gas or stick out bare wires, as both can cause a fire.


