Author:
Joan Hall
Date Of Creation:
3 July 2021
Update Date:
1 July 2024

Content
Installing piles in water to support a dock or jetty can be done by "infusion" of water or by hammering, as long as the submerged soil is not too rocky but strong enough to withstand such loads. Pile driving is a heavy machinery process, so in this article we will focus on the pile infusion process.
Steps
 1 Define the characteristics of the soil in your lake, pool or stream where you are installing the piles. In rocky ground, this technology will not work, and silty soil will not be able to support the structure of the pier. Sandy material is ideal for pouring piles, but the technology can be applied to any type of soil.
 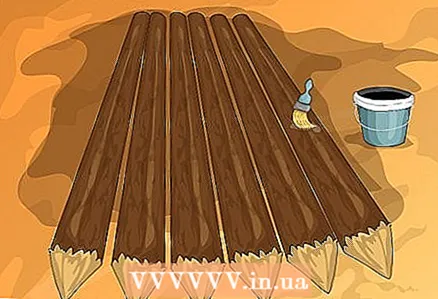 2 Prepare your piles. They must be chemically treated to resist rot, usually 0.25% sodium pentachloride, 0.25% chlorinated copper arsenate, or creosote. You will need piles that are large enough to attach your anchoring beams and are long enough to allow them to be sunk deep enough to support the weight you have planned.As you load, different bottom materials can be used, there are no rules that govern the depth of the piles, but this length must be at least 4 feet (1.2 m) for the structure to be rigid and safe. Try going 6 feet (1.8 m) into the sand. Mark the piles with spray paint at 12 in. (30 cm) intervals to know the depth of the immersion. Piles ranging from 6-8 inches (15-20 cm) in diameter are used for small jet ski docks (up to 10,000 lb or 4,500 kg).
 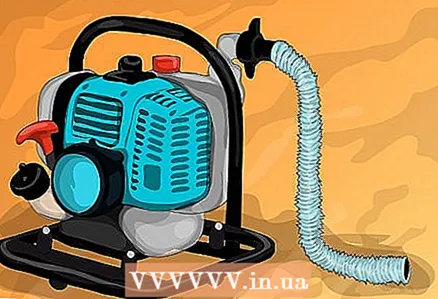 3 Rent 2-3 inch (5-8 cm) gasoline water pump, suction or lift hose long enough to draw water from a lake or sea for piling. Also get a drain hose long enough to reach the end of the pier from where you plan to install the pump. An alternative to the pump might be to connect a fire hydrant if your local situation allows this action, but in this case you will have to use reverse flow.
 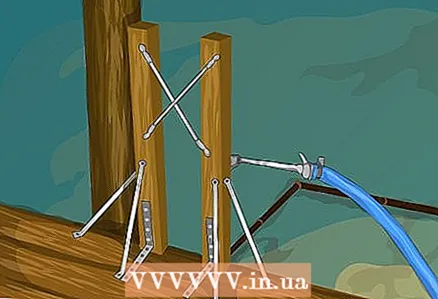 4 Build an infusion pipe. Depending on the depth of the piles, sections from 6 "to 12" (15 to 30 cm) can be used. It can also be a ¾ in. (17 mm) pipe with a fitting at one end to connect the hose from the pump. This design will be able to supply water for the jet. Connect the reducer sleeve or flatten the opposite end. This will provide a flow of water for your jet to flush out and blow out the pile hole.
 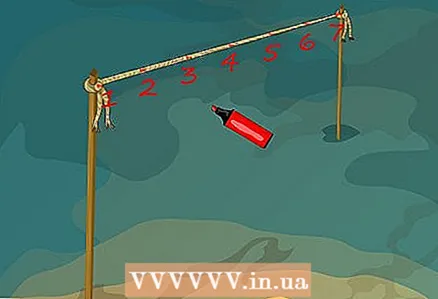 5 Pave the pile areas with 2x4 '' (5x10cm) wood planks inserted into the soil near the shore, and place others at the bottom of the pool outside of the last pile location. Tie both scaffold piles (onshore and in the water) with construction tape, measure the distance from block to block, mark the tape with an alcohol marker. The tape should hang above the water at the height of the tops of the piles to be installed. Set a plastic square with a 45 degree angle and cut to the length of the bamboo tackle tied to it.
 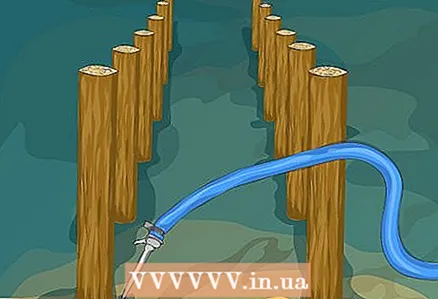 6 Install piles in the water, lifting the jet pipe next to them with the pump on. Water, escaping through a small jet nozzle, will "blow out" the hole under the pile, and the pile should gradually sink. By moving the jet around the lower part of the structure, it is possible to determine the direction of the hole formed. By moving the jet from one side of the pile to the other, you can "control" the pressure. In good soil (sand), you can make a hole in a few seconds if you have sufficient water pressure. The sand is rarely clean, and there is usually root, dirt, etc. trapped in, so use a 6-inch (15 cm) scraper to break through. Roots can drive piles in the wrong direction. The piles will float, so you will need to push them down to achieve the desired depth (see tips below). 12x6 "(30x15) or 16x6" (35x15 cm) piles can be easily inserted by one or two people (up to 12x8 "(30x20 cm)). Piling large piles will require the use of a crane. they weigh over 500 pounds (25 kg) (20 x 8 inches in diameter (50 x 20 cm)). The crane can be built from a 24 "(60 cm) pontoon, 2" (10 cm) steel water pipe, steel cable and a 12 volt car winch. Design and manufacture must be checked for safety before actual operation. When using a crane, you will need a jet operator, one guide and one crane operator. Try working in calm water. However, if the pile is not installed along the guide, it is easy to blow it out and place it correctly. About 10 piles can be installed per day. Use protective rubber suits, boots, and gloves to prevent chafing while in the water.
 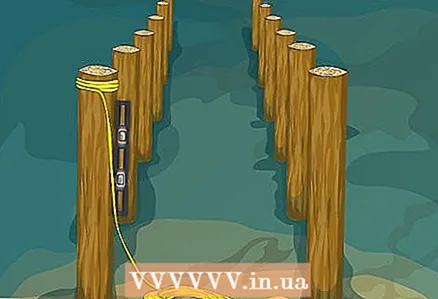 7 Make a plumb line with two levels and a rubber plummet to quickly make sure the piles are upright before the soil settles back into the hole. After compaction of the soil, it will be difficult to change the position of the piles.
  8 Wash off piles from sand and dirt using a jet stream after the piles are installed. This is not necessary if you have worked in sand, as he will fall off rather quickly.
Tips
- If you are using a steel jet, you can flatten the end with a sledgehammer to restrict the flow of water and increase the speed of the jet. You can also screw the threaded fittings to restrict the flow.
- Always wash out more soil. This creates an extra anchor, which will protect the winter lifting of the piles under the ice.
- Most waterways, rivers and bays require different permits for the construction of jetty berths.
- Some river mouths are quite hard (clayey, covered with shell rock). Installing piles by washing out will also require turning. Do this: Take a huge C-clip (or cut it out of half and re-boil it to widen it), scald it with a few tenacious pieces of iron to grab onto the wood, and make a long handle. Use this to twist the piles, cutting through the soil underneath. In difficult places, you need to cut out the "digging" ends for the piles, but not as thin as a pencil, rather more like a flat screwdriver. This way, when you twist your C-clamp, the "blade" will push through the ground.
- Mark the piles so you can keep the pipe at the same depth as at the bottom of the pile. The water jet should be close to the bottom of the pile for best results.
- Your jet pipe should be slightly smaller than the pressure hose and the connection clamp or threaded fittings should be secure. The outlet may need about 3/8 - 1/2 "(1.2-1.5 cm) for the jet to be fast and cutting. It depends on the capacity of the pump, so try a few different sizes.
- The piles can float and lose the weight required to push them down to more than 5-6 feet (1.5-1.8 m). In places where ice rises high, piling deeper is a real challenge. To do this, drive a nail into the top of the pile before placing it vertically. Temporarily attach two small chains and S-hooks, letting them dangle. After the piles are laid, attach a pair of cinder blocks filled with soil to the chains. This will create additional weight for shrinkage.
- Move the jet pipe around the pile as if you were flushing a hole large enough for the pile to fall there. If the pump is powerful enough, or if the soil is soft enough, the jet does not even need to be moved, only downward, such a jet will blow out a sufficient hole.
- This method is simple enough for shallow water, but it is very difficult to do something like this from a boat.
Warnings
- Any lifting equipment must be checked by a qualified safety engineer.
- Use common sense when pouring piles, as well as any action on the water.
- Be careful when making the hole with the jet. The jet can wash out a large hole, which can cause the pile to sink.
What do you need
- Pier Permit
- Water pump or hydrant
- Discharge pipe
- Piles


