Author:
Bobbie Johnson
Date Of Creation:
2 April 2021
Update Date:
1 July 2024
Content
- Steps
- Method 1 of 4: Windows 7 and 8 HomeGroup
- Method 2 of 4: Windows Vista and 7
- Method 3 of 4: Windows XP
- Method 4 of 4: Mac OS X
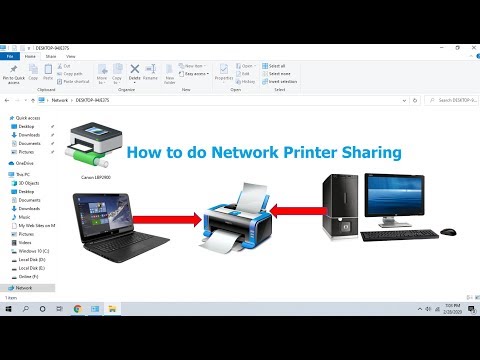
Printer sharing is one of the most useful features of a home network. After setting up a network printer, you will be able to print to it from any computer in your home. Follow this guide to set up a network printer on Windows or Mac OS X.
Steps
Method 1 of 4: Windows 7 and 8 HomeGroup
 1 Create a home group. If your computers are running Windows 7 or Windows 8, you can make it easier to share your printer by creating a homegroup. It is a password protected network that makes it easy to exchange data.
 - If you have computers running other versions of Windows (XP or Vista) or Mac OS X, see other ways to share a network printer.
- If you have computers running other versions of Windows (XP or Vista) or Mac OS X, see other ways to share a network printer.
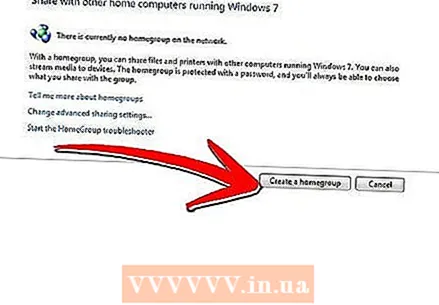
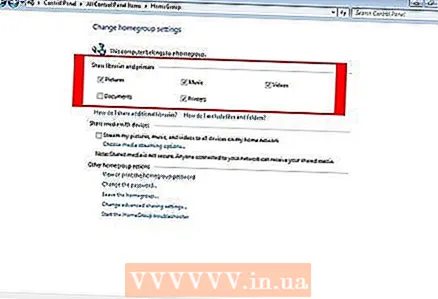
- 2 Create a homegroup in Windows 7. Click on "Start" or the Windows key and open "Control Panel". Select "Network & Internet", then "Homegroup". Windows will automatically detect the homegroup on the network.
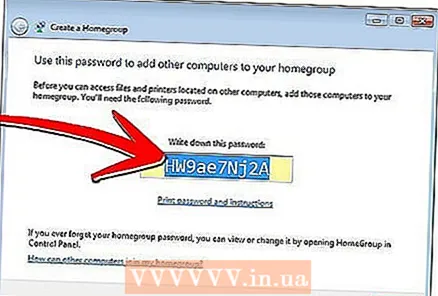
- To create a new HomeGroup, click on "Create HomeGroup". Choose what exactly you want to share. If you want to share your printer, make sure the checkbox next to Printers is checked. Click next to create a homegroup.
- Make a note of the password that is generated to connect other computers to your homegroup.
- To join an already created homegroup, open the homegroup program and Windows will automatically ask you to join an existing group. You will need to enter your homegroup password.
- To create a new HomeGroup, click on "Create HomeGroup". Choose what exactly you want to share. If you want to share your printer, make sure the checkbox next to Printers is checked. Click next to create a homegroup.
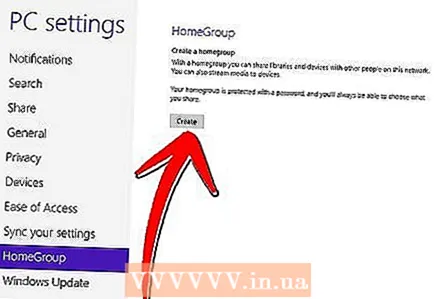
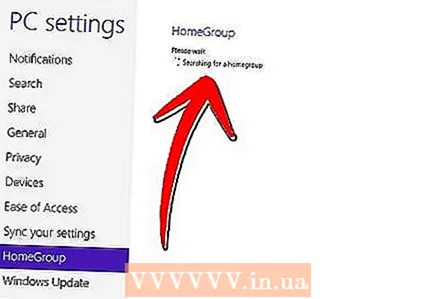
 3 Create a homegroup in Windows 8. Open the computer settings menu by moving the cursor to the upper right corner of the screen. A menu will pop up on the right side of the screen. Click on "Settings", then click on the link "Change computer settings". Select "Homegroup" from the menu.
 - Click "Create". Choose what exactly you want to share. If you want to share your printer, make sure the checkbox next to Printers is checked. Click Next to create a homegroup.
- Make a note of the password that is generated to connect other computers to your homegroup.
- To join an already created homegroup, open the homegroup program and Windows will automatically ask you to join an existing group. You need to enter your homegroup password.
- Click "Create". Choose what exactly you want to share. If you want to share your printer, make sure the checkbox next to Printers is checked. Click Next to create a homegroup.
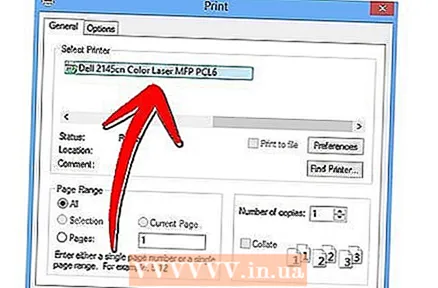 4 We print the document. Once connected to the homegroup, the attached printers will automatically appear in the options when printing a document. To print to a shared printer, the computer to which it is attached must be turned on and connected to the network.
Method 2 of 4: Windows Vista and 7
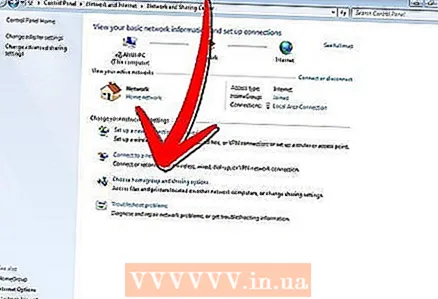
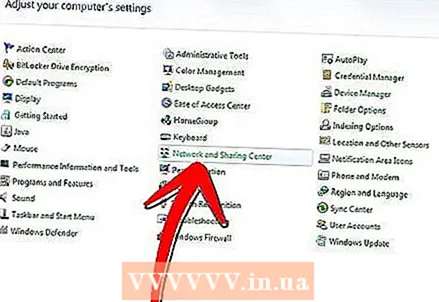 1 Open the "Network and Sharing Center". Click on Start / Windows Key. Open the "Control Panel" and click on "Network and Internet". Select "Network and Sharing Center".
 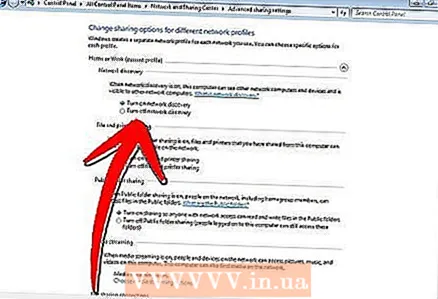 2 Share your printer. Expand the Printer Sharing section by clicking the arrow. Click the “Enable Printer Sharing” link and click “Apply.” You may be prompted for an administrator password.
 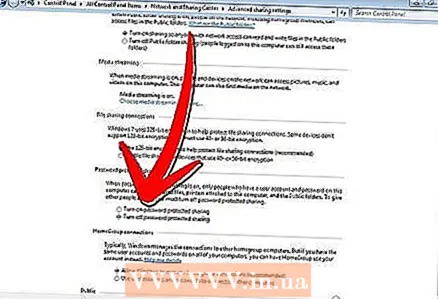 3 Make sure password protection is turned off. If you want to easily share your printer, disable password protection. Clicking on the arrow will expand the Password Protected Sharing section. Select the Off option and click Apply. You may be prompted for an administrator password.
Method 3 of 4: Windows XP
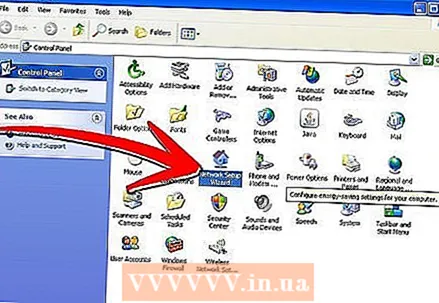 1 Set up your network. Windows XP computers must be in the same workgroup to share the printer. Click on the "Start" menu and select "Control Panel". Go to the "Network and Internet Connections" section.
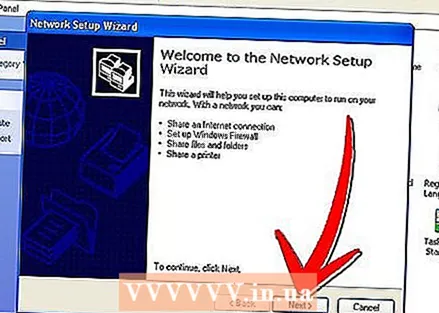
 - Open the "Network Setup Wizard" and follow the instructions to set up your home network.
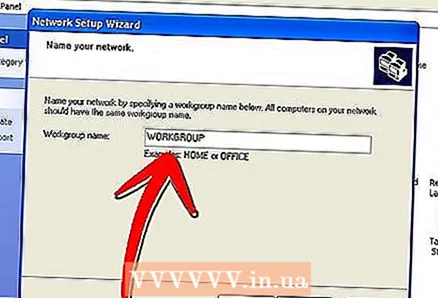
- In the "Set a name for your network" window, enter the same workgroup name as you would on other computers on the network.
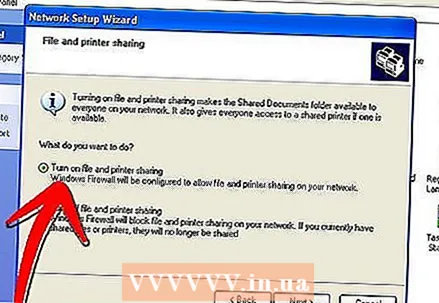
- In the File and Printer Sharing window, select Turn on File and Printer Sharing. Click OK to save the settings.
- Open the "Network Setup Wizard" and follow the instructions to set up your home network.
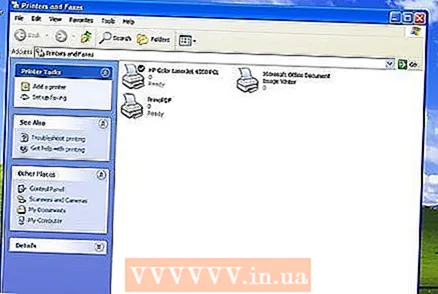
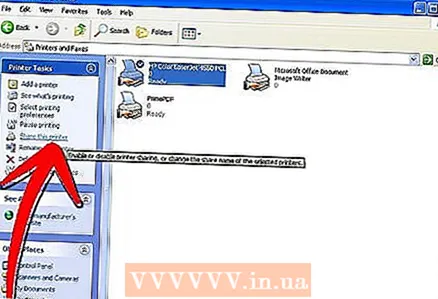 2 Share your printer. Open the "Control Panel" and select "Printers and Faxes". Right click on the printer you want to share. Select "Share" from the menu. Select "Share this printer" and click OK.
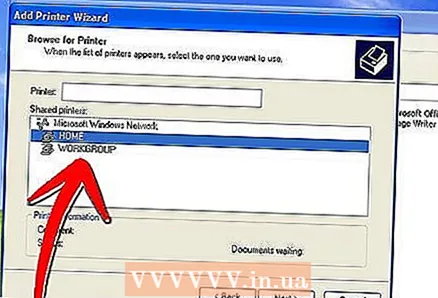
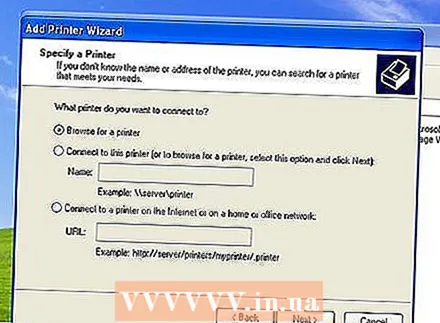
  3 Add a network printer. To add a shared printer to the list of available printers, open Printers and Faxes in Control Panel. On the left side of the screen, select Add Printer. Click Next and select Network Printer.
 - Windows will detect the presence of network printers on the network. Double click on the printer you want to add.
- You may be prompted to install drivers for the selected printer. Windows will try to download the drivers automatically. If this does not work, you need to manually install the drivers using the installation disc that came with the printer, or download the drivers from the manufacturer's website.
- Windows will detect the presence of network printers on the network. Double click on the printer you want to add.
Method 4 of 4: Mac OS X
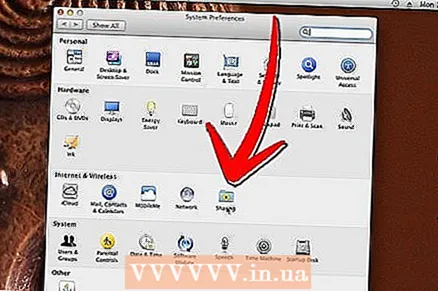 1 Open "System Preferences". Click on the Apple button in the upper left corner of your screen and select "System Preferences" from the menu.Under Internet & Networking or Internet & Wireless Networking, select Sharing. The Sharing window will open.
 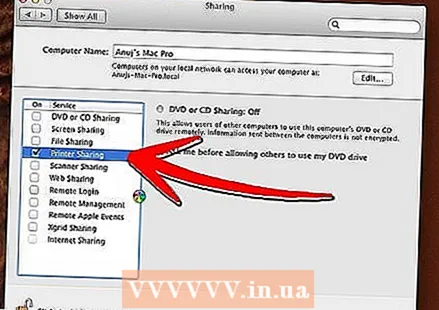 2 Turn on printer sharing. On the left side of the Sharing window, check the box next to Shared Printers. All connected printers will be shared (within the network) automatically.
 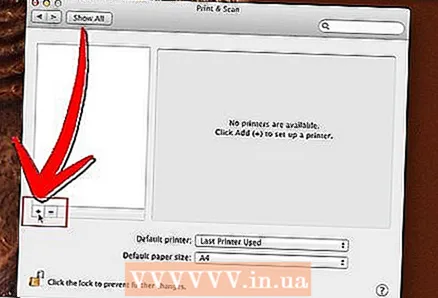 3 Add a network printer. Click on the Apple menu and open System Preferences. Under Hardware, select Print & Fax. Click the Add (+) button. Select the network printer you want to add from the list. Click the Add button.


