Author:
Gregory Harris
Date Of Creation:
13 August 2021
Update Date:
1 July 2024
Content
1 Disconnect power to the installed ceiling fan. All electrical projects should be started by turning off the power.- You don't just need to use a switch on the wall that can accidentally turn on during operation. Instead, the entire circuit must be shut off at the switchboard. If you do not know which circuit you will work with, then it is better to play it safe and turn off the entire shield. Safety is more important than a few minutes without electricity.
 2 Determine the presence of a cover at the bottom of the fan. This is the area in the center of the fan where our lighting fixture will be located. Unscrew all the screws on the site and remove the decorative overlays or covers that hide the fixing points of the lamp and wires.
 - Some ceiling fans do not support the installation of an optional lighting kit, but some do. When designing a ceiling fan, the installation of a luminaire is often envisaged. So the manufacturer can use the same parts for both a cheaper version without a lamp and for more expensive models with lighting. For this reason, installing a luminaire on a ceiling fan can be quick and easy.
- If there is no cover or removable parts in the center of the ceiling fan, then you will not be able to install the lighting fixture on it. Before giving up, finally make sure that there is no cover, as very often it can be hidden from prying eyes by decorative elements.
3 Check the presence of wires inside the housing for connecting the luminaire. Since it is more convenient to turn on the fan and the lamp separately, there must be separate wires in the case for the lighting device to work. You need to find several wires in the case with plugs at the ends. They can be of various colors, but they are usually black (power) and white (zero). - Under the right circumstances, the wires in the housing will be labeled "lamp power" or something like that. In this case, you can definitely install the lamp.
4 Measure the mounting location on the ceiling fan. With the power supply to the luminaire, now you need to know the size of the correct fixture. Measure the hole diameter, paying attention to the location of the threaded holes on the luminaire in order to fix it to the fan. - Also note the manufacturer's name and the model or number of the ceiling fan. Parts from the same manufacturer are more likely to be suitable for installation.
5 Look for a suitable lighting fixture at hardware or home improvement stores. If you cannot find a suitable device, then contact your consultant for help. - Many companies sell universal fixtures that fit most of their product range. Check that your fan model or number is on the list of compatible products.
- If you can't find a suitable fixture at a hardware store, then look elsewhere. Today in many cities there are companies selling used equipment and reselling it to general buyers. Also visit the website of the ceiling fan manufacturer. They can sell devices directly or provide contacts for distributors.
- The luminaires are of different designs. You will need to choose a luminaire with one, two or three lamp holders.
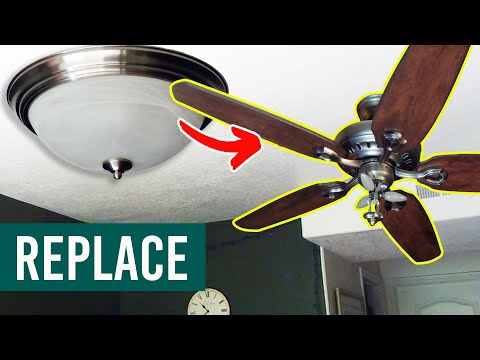
Part 2 of 2: Installing the lighting fixture on a ceiling fan
- 1 Disconnect the power supply for the ceiling fan. It is possible that in the time between checking the fitting of the luminaire and the actual installation, you have turned on the power again at the switchboard. Don't forget to turn off the power!
- 2 Remove the cover that hides the wires. Follow the order in which parts are removed. You will most likely not need the cover, but the mounting screws may come in handy.
- 3 Connect the wires from the lighting fixture to the wires in the fan. To do this, simply align the two required wires in parallel and screw the connector in the same way as the cap on the bottle.
- In most cases, you will connect wires of the same color. For example, if there are black and white wires inside the fan, just like on the lighting fixture, then simply connect them according to the colors. At the same time, we remind you that it is best to follow the instructions in the documents for the lighting device, if any.
- 4 Attach the light to the fan. Installation should be easy and effortless, especially if you've purchased a luminaire specifically designed for your fan model.
- 5 Install the bulbs, lampshade and switch circuit following the manufacturer's directions. Typically, the lampshade for ceiling lights is secured with thumbscrews, which, once installed, simply hold the lampshade in place without exerting significant pressure on the mounting points.
- 6 Turn on the breaker, pull on the chain and test the performance of your advanced fan! Now you can enjoy the coolness of a ceiling fan in a well-lit room.
Tips
- If you are unsure if you can handle a task safely, contact someone with relevant experience or use the services of an electrician.
- If your fan already has a light that has stopped working (remember to check the bulbs), then with our instructions you can only replace the light without changing the entire ceiling fan.
- In some cases, it will be cheaper and faster for you to buy a new fan with a built-in light. If you cannot find a suitable lamp for your fan, you can simply replace it with a new one.
Warnings
- Before performing any electrical work, do not forget to turn off the power supply on the shield (or unscrew the fuse if you have an old type shield). If you do not know which fuse or machine you need to turn off, then it is better to play it safe and turn off the entire shield. A new lamp is not worth your health!
What do you need
- Lighting fixture
- Ceiling fan
- Wire connectors
- Insulating tape
- Light bulbs
- Screwdriver


