Author:
Bobbie Johnson
Date Of Creation:
10 April 2021
Update Date:
1 July 2024
Content
- Steps
- Method 1 of 5: Preparing the site
- Method 2 of 5: Installing a one-piece cab
- Method 3 of 5: Installing the pallet
- Method 4 of 5: Securing the shower stall panels
- Method 5 of 5: Installing shower doors
- What do you need
- Tips
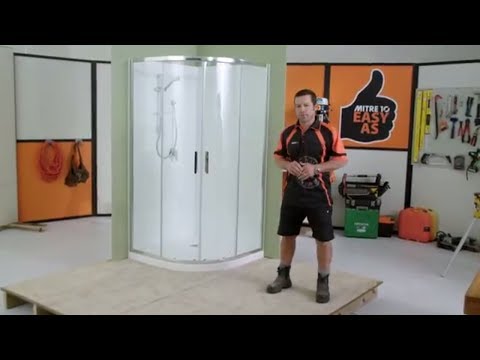
Once all the plumbing is in place, installing a shower stall is a great thing you can do yourself. You can easily learn how to prepare a place and install different types of shower stalls. This can be a one-piece cabin or one that needs to be assembled in parts. With the help of this article, you will learn how to assemble and install a shower stall without any hesitation.
Steps
Method 1 of 5: Preparing the site
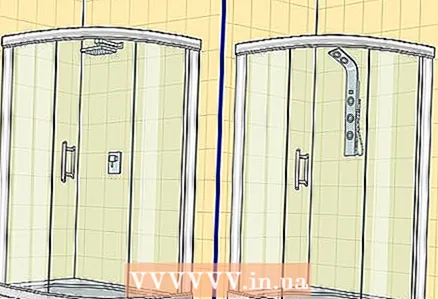 1 Decide what type of shower stall you will be installing. Most shower stalls are sold pre-assembled, making installation easy for people with basic plumbing skills. A set for installing a shower stall is of two types: a monoblock and a multi-piece set.
 - Monoblock. The advantage of the monoblock is the ease and speed of assembly. Basically, you are buying a ready-made cabin that you just need to connect to the pipes and seal the joints.
- The cabins sold in pieces consist of a separate pallet and two or more panels that are glued in place and require individual sealing of the joints. The advantage of this method is that you can install such a shower enclosure yourself.
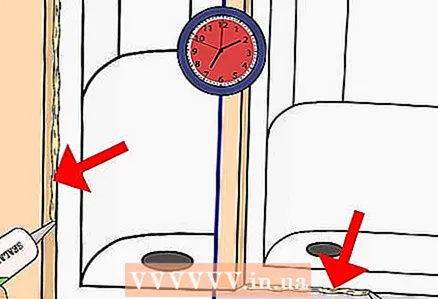
 2 Take measurements to determine the position of the pipes. After purchasing a shower cubicle of the required size, you need to mark the place in the pallet through which the pipe will pass in order to connect all the necessary elements of your cubicle, no matter what type of cubicle you have purchased. Measure the distance from the floor and the corner of the wall to get an accurate measurement.
 - Draw a schematic of your wall and plumbing, and plot measurements on it. For example: from the corner of the wall to the center of the main tap is about 20 centimeters. From the floor to the main water tap - 50 centimeters. Follow these steps for all elements that will pass through the panel. Be sure to include your measurements on the diagram.
- Use a marker or pencil to transfer these measurements to the panel of your shower stall, through which the plumbing fixtures will pass.
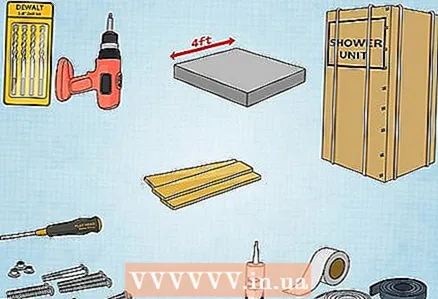 3 Mount all necessary parts. Follow the instructions included with the purchased cab. Bolts and other fasteners can also be included, but sometimes you have to buy them separately. In most cases, you will need the following tools and materials:
 - Meter device for measuring level (level)
- Sealing gasket
- Hacksaw
- Electric drill with drill 3 mm
- Phillips flat head and screwdrivers
- Cedar linings
- Your shower stall
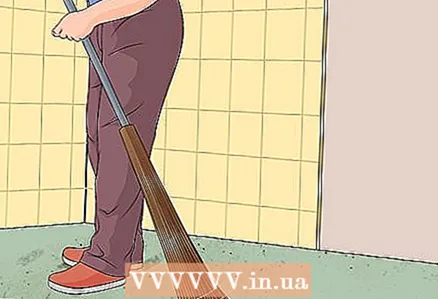 4 Clean the floor and walls of debris before installing the cab. Use a broom or vacuum cleaner to clean up debris and dust before you start installing the cab. Also, use a paint scraper or putty knife to clean up old sealer and glue, and make sure you dry the surface completely before installing the pallet.
 - If the surface is wet during the installation of the water-repellent panels or pallet, then there is a possibility of wood rot and other problems in the future. You need to make sure that the surface is completely dry before you start installing the elements of the shower enclosure, no matter what type of enclosure you have.
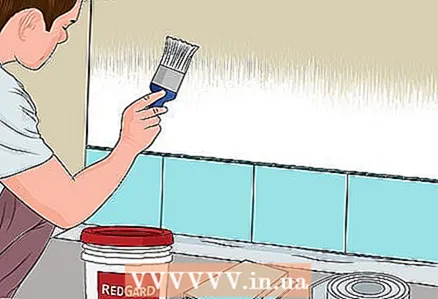 5 Waterproof the walls. Install a waterproof board that will cover the shower stall. If it is a corner booth, then there should be two boards forming the corner.A waterproof board is most often made from a fiber or cement base, usually gray, green or blue. The board can be attached to the wall with nails or bolts.
 - Never place the shower enclosure on drywall, as moisture will cause it to disintegrate.
Method 2 of 5: Installing a one-piece cab
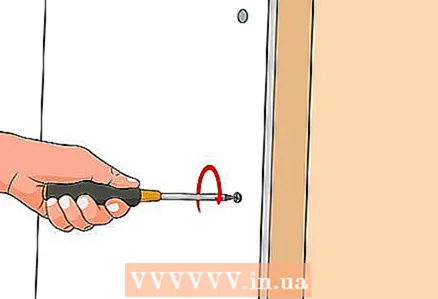
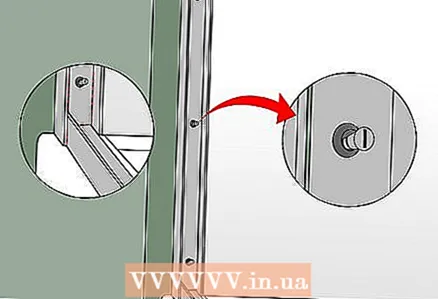
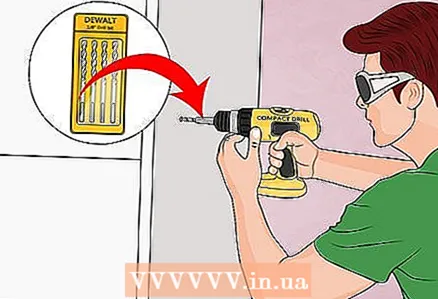 1 Drill test holes in the cab. Wherever you mark the pipe and fixing points, use a 3mm drill bit to make test holes. Drill slowly and carefully to avoid cracking the finish.
 - It is important to drill test holes at the back of the booth. This will make it easier for you when you need to cut larger holes with a hacksaw for fasteners.
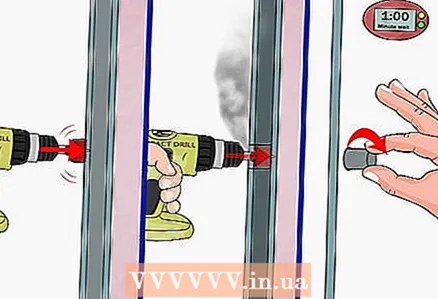 2 Cut a hole for the fasteners. Once all the test holes have been made, remove the drill bit and insert a 3.5mm hacksaw into your electric drill. The holes from the hacksaw will be larger than the ones you just drilled, which should help prevent the hacksaw from sliding over the surface as you cut the holes.
 - Start cutting holes from the inside of the shower stall. Try not to put too much pressure on the surface while the hacksaw cuts and let it do its job. Once the hacksaw has almost cut the hole through, release the pressure on it until the hole is made.
- It's okay if there is a little smoke or burning while cutting the hole, which is due to friction. The cut hole may be hot immediately after the cut is completed. After a couple of minutes, remove the cut piece from the hole.
 3 Place the cab in the desired location and secure. Most monobloc cabs come with bolts and latches that are unique to your model, so you will need to refer to the instructions to secure the cab. Most models will have three to six valves for each wall.
 - Flanges and handles will also be unique to each model, usually for quick fit models they will attach quickly and easily. If necessary, read the following installation methods for multi-panel parts for more detailed instructions.
 4 Seal all seams. Once the booth is secured, use a tub or tile sealer to seal any crevices where the booth meets the walls and floor for waterproofing. Use a thin coat of flange sealant and allow to dry for 24 hours before exposing it to water.
 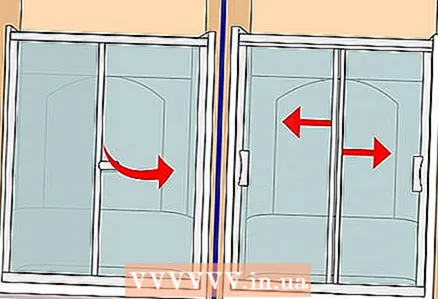 5 Install the shower door. Monobloc design should be equipped with it, while models with sliding doors can be challenging. Read the following instructions for a more detailed description of installing doors for multi-panel booths.
Method 3 of 5: Installing the pallet
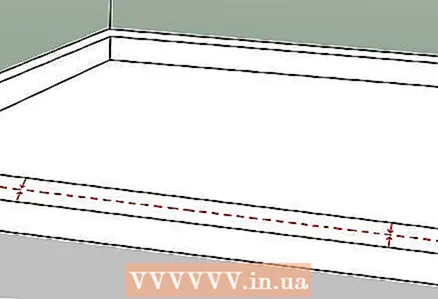
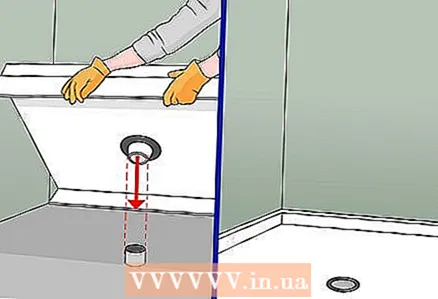 1 Place the pallet in the desired location on the floor. Line up the drain hole on the pallet with a hole in the floor. Don't use glue or fasteners, just line it up correctly and make sure the pallet fits snugly. Also, make sure the holes are lined up with the downpipe.
 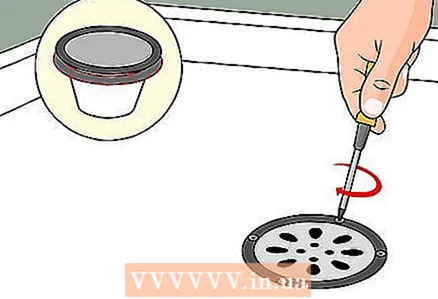 2 Screw the drain cap onto the drip tray. Some models may require a short connecting piece at the bottom of the drain to attach the drip tray. If so, insert it into a floor drain pipe and use a compression gasket (must be included) to seal.
 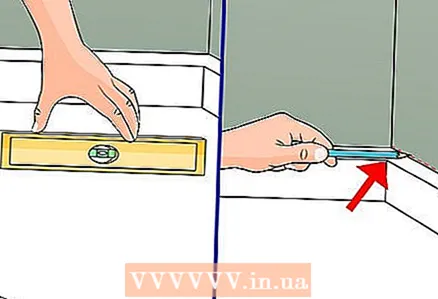 3 Align the pallet. Make sure the pallet is aligned with the walls and other elements in your bathroom layout. If you don't set it up correctly, your booth can leak, so this is especially important. Use a level gauge and wooden shims if necessary.
 - Do not use a lot of spacers and do not raise the pallet above the level of the panels. A minimum amount of backing should be required if the base for the level is your floor.Once the pallet is level, it is advisable to mark the top edge of the pallet and the placement of the shims if you need to move something later.
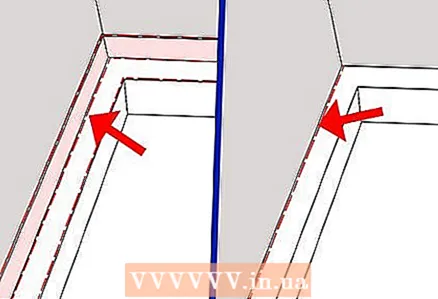
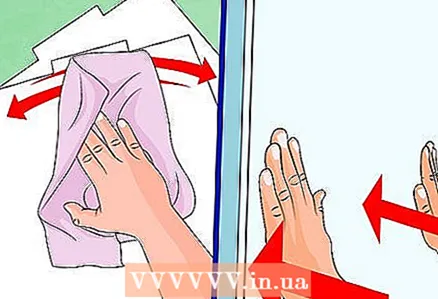
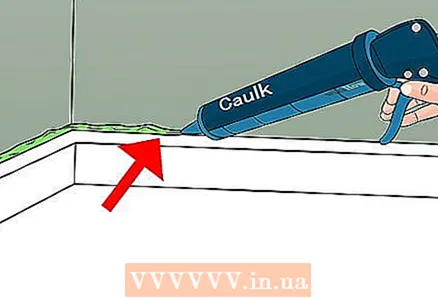 4 Seal the pallet with a layer of sealant. Cover the seam between the pallet and the floor with a sealant with a layer of adhesive tape thick. Also, use a little dock for nails and screws. Wipe the drops of dock from the pallet until it is dry.
 - If you find them after they have dried, scrape them off with your fingernail or putty knife.
Method 4 of 5: Securing the shower stall panels
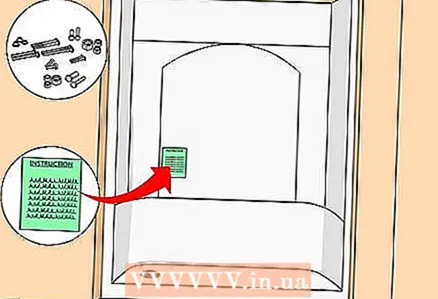
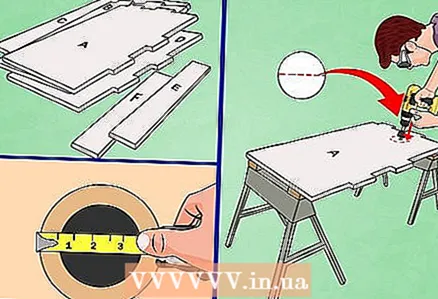 1 Label each of the panels according to the instructions. Each panel must be identified and correctly labeled to make sure you haven't put the wrong panel in the wrong place - a simple mistake if you're working quickly. Identify each of the panels according to the instructions included in the kit, and label each panel with adhesive tape, writing “Panel A” or “Panel 1” on it, depending on the instructions.
 - Determine which panel will be installed in the place where the shower stall control unit is located and set it aside. Measure the location with taps in the wall and use this data to mark and cut holes for the shower control unit
- Cutting holes will be easier if you place the panel on stands. Place a couple of supports under the panel, or use a sheet of plywood to prevent the panel from bending or breaking. Cut holes slowly with a saw.
 2 Try to expose the panels. For some models, the panels must be exposed in a special order to make the cab tighter and more waterproof. It is best to pre-assemble it to make sure everything is in place and to practice assembling before attaching the panels to the wall. Read the instructions carefully to see if this applies to your model.
 - Try joining the panels together to make sure they fit. Some models are made to fit a specific size, while others can be made to fit within an oversized range. The instructions should describe the dimensions that are appropriate for your cab.
 3 Insert the lower parts of the panels into the grooves of the pallet. Most often, pallets are made with grooves along the edges, or slightly offset around the pallet where it comes into contact with the walls. These are sometimes referred to as “exact match” or “variable” panels and the installation process will vary depending on your model.
 - Exact fit panels will dock together. Do this according to your model's instructions.
- Variable matching panels allow you to customize them to fit the length of your wall. These panels can be several centimeters apart and are joined using a vertical cover or a one-piece structure with shelves (for example for soap) that is applied over the gap. When installed and secured, it looks like a one-piece panel.
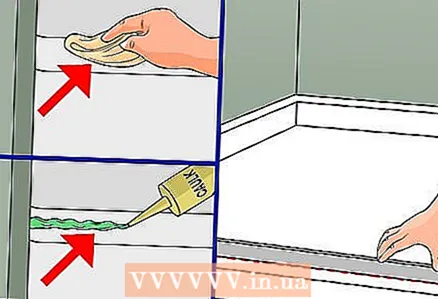
 4 Prepare panels for final installation. Make sure they are clean and dry on the side that will touch the wall. When you are ready to secure the panels, simply repeat the steps you followed for the test installation, but for now you will need to secure them permanently.
 - Some models will require installation with only nails or bolts, while others may require a special adhesive that is safe on plastic or fiberglass. Some may require both. Refer to the instructions included with your booth.
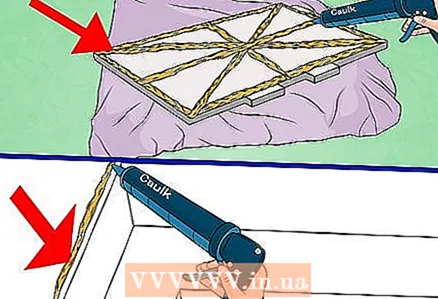 5 Use glue to secure the panels. Carefully place the panel face down on a hard and smooth surface. Squeeze out the bath and shower adhesive all over the surface that will be in contact with the wall.
 - If the panel has a large surface that will be in contact with the wall, or if the entire panel will be against the wall, apply an “X” glue from corner to corner on the back of the panel.
- Next, spread the glue in a “+” shape from top to bottom and right to left, across the “X” you just drew. Also, glue the entire perimeter of the back of the panel about 3 centimeters from the edges to prevent excess adhesive from getting outside when you start gluing the panel.
- Use a little glue where the pallet will come into contact with the panels. Make sure you press out the adhesive in a continuous strip, which will improve the seal.
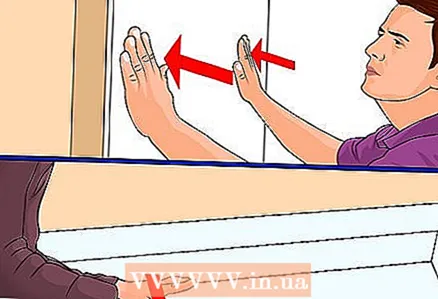
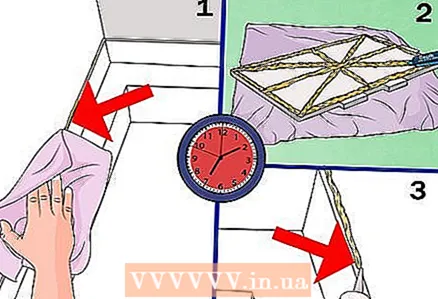 6 Press the panel carefully against the wall. Make sure the bottom of the panel fits well against the pallet. Use a dry towel to smooth the glue evenly from bottom to top.
 - Use glue for the rest of the panels. Repeat the steps above, then attach the panels to the wall following the order of the test build. Make sure you follow the order in the instructions for your model.
- Remove excess adhesive that has come out from the panel during bonding before it dries. Use the correct liquid or water for the cleaning described on the back of the adhesive package. After a few hours (when the glue is dry), seal all crevices and joints for waterproofing.
 7 Use wall bolts if necessary. Some booth models will require the use of nails or bolts along with glue to secure the panels. Holes for nails and bolts should be pre-drilled along the outer edges. Once you've used the glue, you can permanently secure the panels by simply hammering in nails or screwing bolts through the holes.
 - Do not tighten bolts or drive nails completely until all panels are in place. This will allow you to adjust the panels before you fully secure them.
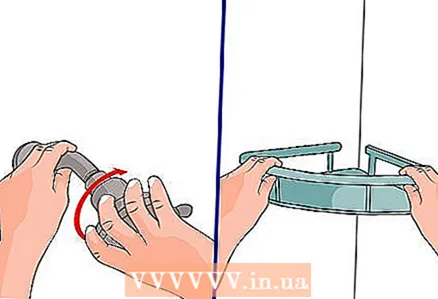 8 Secure the remaining elements of your cockpit. Some models may include a monolithic rack or shelves. You may need glue, depending on the directions in the instructions.
Method 5 of 5: Installing shower doors
 1 Examine the components of the door. There are many door variations and the final steps will depend on the size, style and model of the car you purchased. Doors installed for bathtubs and free-standing shower stalls can be very different. Also, like sliding and swing doors, they can differ significantly.
 - If you are installing bathroom doors, you will need to measure and center the track on the outside edge where you want the doors to be. It should be centered, so measure the width and mark the center point.
- For stand-alone shower cubicles, the track can be inserted or already built into the shower tray if you are using a monolithic shower cubicle. Always refer to the instructions for your model.
 2 Install the bottom track for the doors. Make sure the surface you intend to install the metal track on is dry and clean. Apply a coat of encapsulant along a surface that may be on a pallet or tub, depending on the model you are installing. Apply glue in the center, between the two lines you drew, along the entire surface involved in opening the door.
 - Place the track firmly on the dock layer. Make sure the bottom of the track is in contact with the dock shelter. If not, apply an extra coat to the bottom of the track.
 3 Install wall tracks. Align them with the mounting holes and make sure they fit snugly against the ends of the bottom track. Install the rubber spacers that come with most models over the bolts and secure the wall tracks. The wall tracks will help fix the bottom track correctly. For now, do not fully tighten the bolts.
 - Some models may not be supplied with wall tracks. If they are not there, skip this step and move on to installing the doors.
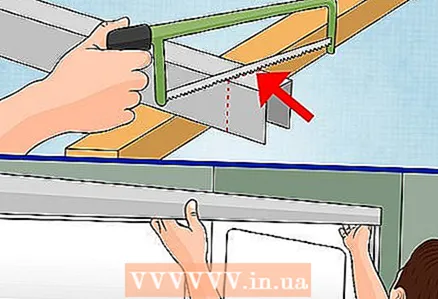 4 Measure and cut the top track if necessary. Make sure the track is tight and correctly aligned between the wall tracks. Most kits can include brackets to help fix the top track.
 - Some models come with different sizes of ruts, meaning they can be larger than you need and you can cut them to the size you want. If so, use a hacksaw and then rinse them thoroughly.
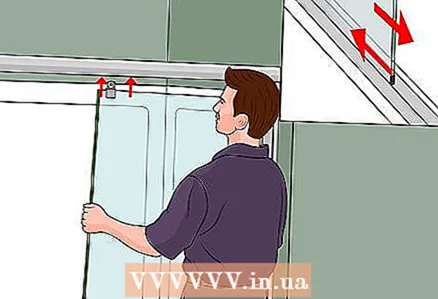 5 First, hang the inner sliding door. If you are installing sliding doors and both doors have towel racks, install with the roller and hanger side inward. Raise the door to the upper track and then insert it into the upper and lower tracks. The door should move easily if installed correctly. If not, try again carefully. The instructions for your model should include a description of the installation with detailed illustrations.
 - For some doors, the casters must be installed before you can begin to put them in place. If so, most will simply slide into place. Read the instructions.
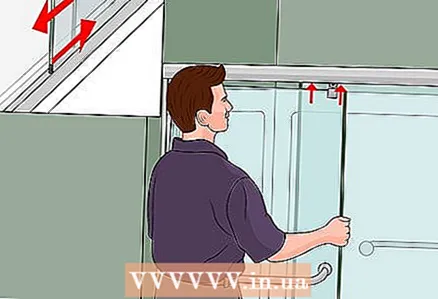 6 Hang the outer door. The towel rack should be facing out. Hang the outer door in the same way as you hung the inner one. Carefully align the rollers and insert into the desired tracks. The outer door should slide freely over the inner door if installed correctly.
 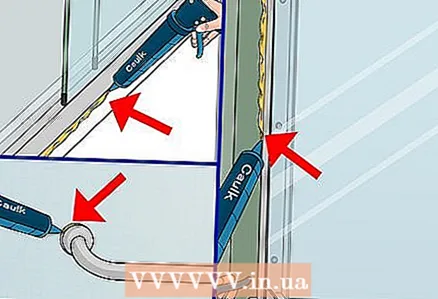 7 Seal seams. Apply a coat of bathroom glue to all ruts. Do this on the inside and outside to form a good water resistance. Allow the glue to dry 24 hours before you run the water.
What do you need
- Pallet
- Bath and shower glue
- Screwdriver
- Towel
- Shower cabin panels
- Roulette
- Hole saw
- Sealer and Sealing Gun
- Shower base plate
- Shower side plates
- Top plate for shower
- Level measuring device
- Shower doors
- Duct tape
Tips
- To take measurements quickly, cut off the part of the cardboard box that housed the shower stall. This section will fit the size of the booth in which you will need to cut the holes. Press the cardboard against the surface with the holes so that they will be imprinted on it. Using a knife, cut holes around the prints large enough to easily fit the flaps. Then, use a piece of cardboard as a template for your booth to mark the holes. Check your measurements to make sure they are accurate.


