Author:
Alice Brown
Date Of Creation:
23 May 2021
Update Date:
1 July 2024

Content
Shower trays serve as the base of the shower stalls and collect water during the shower. The most common are acrylic or fiberglass pallets, for the installation of which you need to know the following basic instructions and use the correct tools. Shower trays from different manufacturers may differ slightly, but the installation principle is always the same. Go to step 1 to find out more.
Steps
Part 1 of 2: Getting Started
 1 Collect the necessary tools and equipment. Installing a shower tray requires common repair tools and a few special tools available at most specialist stores. To complete the task correctly, you will need:
 - Roulette
- Level
- Phillips and flat head screwdriver
- Electric drill
- Drill
- A hammer
- Sealant gun
- Swivel pliers (optional)
- Gon
- Bathroom Silicone Sealant
- New shower tray
- Screws 3.75 or 5 cm
- Washers
- Wooden wedges
- Masking tape
 2 Measure the space where you will be installing the new pallet. Measurements are taken along all walls that the pallet will come into contact with. Write down the measurements and take them with you when you go shopping for the pallet. Based on the measurements, the shop assistant will help you find the correct size.
 - For ease of installation, most modern shower trays are made from acrylic or fiberglass, but remember that some shower trays must be ordered if you need a custom model or size. Find out about this before dismantling your current shower.
- Standard sizes 90 x 90 cm; 90 x 105 cm; 90 x 120 cm usually available in white or almond. These sizes and colors are almost always available. Larger shower trays or shower trays that differ in design and color are likely to have to be ordered. Call the store to inquire about the availability of the color and size you want.
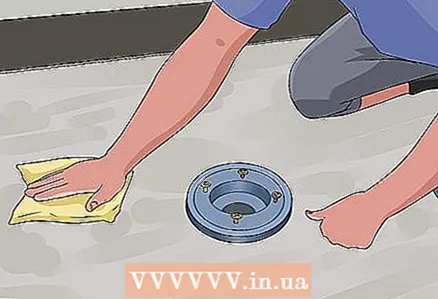
 3 Site preparation for installation. Remove all debris and old glue from the surface. Use a broom or vacuum cleaner to pick up debris. Use a wide spatula to remove old sealant and adhesive.
 - If necessary, carry out all the additional surface preparation work recommended by the shower tray manufacturer: apply a fresh layer of waterproofing to the surface under the future shower tray. Follow the drying time recommendations on the packaging carefully. Do not install the pallet until the waterproofing is dry.
 4 Let the surface dry completely. Before installing the pallet, make sure that there is no standing water and excess moisture on the working surface. Mold and mildew can develop on damp surfaces. In addition, when sealed with a sealant, moisture can affect the adhesion of the sealant and destroy the joint.
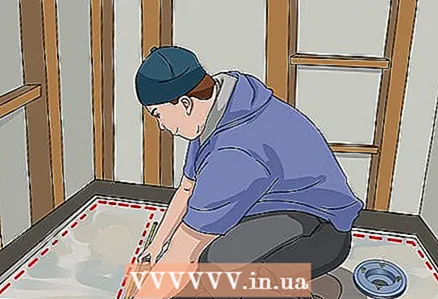
  5 Pre-installation. After surface preparation, the shower tray should be pre-installed in place. It is understood that you will not be using any glue or fasteners for now, as this is just a fit test. The pallet should fit snugly into place, but not enough to bend. If the sump becomes not tight enough, then it can move, which will cause seams to separate and significant water seepage. If the fit is too loose, additional reinforcement is required.
 - Check that the drain hole in the pan is positioned exactly over the drain pipe. Never level them by force to avoid damaging the pallet and pipe. Only a slight (no more than 10-12 mm in each direction) movement of the pipe is allowed to align the drain elements.
- Since the drain elements are manufacturer dependent, the illustrations in the pallet installation guide can be used during pre-installation. After completing the fitting, you can proceed to the next step.
Part 2 of 2: Installing the pallet
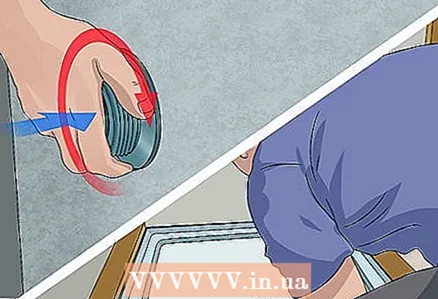 1 Replace the pallet. Replace the pallet if you removed it after pre-installation. Make sure the drain hole is located exactly above the drain pipe. Follow the manufacturer's instructions to connect the drain elements. In some cases, it will be necessary to use a short fitting, which is attached to the bottom of the branch pipe coming out of the pallet and inserted into the drain pipe in the floor through a special collar. Others may require an elongated adapter, already inserted into the floor drain pipe, into which the branch pipe coming out of the sump is inserted through the sleeve and sealed with a sealant and a rubber compression ring. All this information should be indicated in the documentation for the pallet kit.
 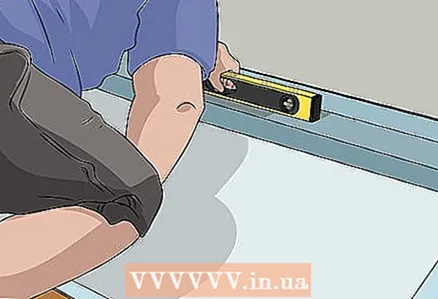 2 Align the pallet. Once the pallet is in place, use a level and wooden wedges to level the pallet. Do not raise the pallet on wedges too high, so that it does not rise or "float" above the rigid base. On a flat surface, only very small wedges may be required.
 - When the pallet is lined up, mark the top of the pallet edge where it contacts the wall uprights, and also mark the location of the wedges if you remove the pallet again.
 3 Secure the pallet to the uprights. Follow the manufacturer's instructions, but in general try not to hammer in nails or drive screws over the side of the pallet unless instructed to do so. You can temporarily secure the pallet to the uprights with a 3.75 or 5 cm screw threaded through the washer, and then insert the screw directly above the pallet rim so the washer overlaps and holds the rim tightly. Do not tighten too much to prevent the shower tray from cracking.
 - After fastening, check the pallet again using a spirit level. Once the pallet is leveled, stable and secured, it's time to waterproof the components.
 4 Seal the drip tray with silicone bath sealant. All holes in the pan (i.e. drilled or factory holes) must be sealed with silicone bath sealant to make a waterproof seal. Also apply sealant around the uprights where they touch the pallet to seal the joints more securely.
 - Apply a thin coat of sealant, no thicker than masking tape, over all mounting holes in the pallet. Use enough sealant to seal the pallet to the uprights with nails or screws. Wipe off any stray drops of sealant from the pallet before it starts to dry.If they are found after drying, they can usually be peeled off with a fingernail or a plastic spatula.
- During operation, do not allow the sealant to get on the side of the sump, as this can affect the tight fit and sealing of the side shower panels. If the sealant does get on the bead, wipe it off before it dries.
- You also need to seal the joint between the pallet and the floor with sealant. The surface must be very clean and dry, otherwise the seam will not be tight enough.
 5 Let the sealant dry and check all seams. Check all drain elements and seal them with sealant if recommended by the manufacturer. When installing compression seals around drain elements, always use a blunt tool to push them into place. Never use a screwdriver or other sharp object to do this, which could damage the seal.
Warnings
- Some in-depth knowledge and skills in plumbing are required to accomplish this task. If you are not sure if you can handle it, or if you do not understand everything, then it would be better to contact an experienced installer or plumber.
What do you need
- Reciprocating saw
- Pry bar
- Plywood 1.3 cm wide (if required)
- Drill with drills
- Shower filter
- Large pliers (if needed)
- Level 1.2 m long
- Galvanized screws
- PVC siphon
- Plumbing primer and cement
- Cuff (compression seal)
- Rubber mallet


