Author:
Joan Hall
Date Of Creation:
1 July 2021
Update Date:
21 June 2024

Content
- Steps
- Part 1 of 2: Choosing a stove and preparing for installation
- Part 2 of 2: Installing a new oven
- Tips
- Warnings
- What do you need
A wood stove is a good way to heat a room without increasing your electricity bill or using kerosene. Wood stoves provide a cozy fire and are an inexpensive source of energy, making them ideal for the budget conscious or environmentally conscious family. For safety purposes, when installing the oven, be sure to keep an eye on the local building and installation requirements. The instructions in this article are summarized and therefore may not be appropriate for your situation. To get started, see Step 1 below!
Steps
Part 1 of 2: Choosing a stove and preparing for installation
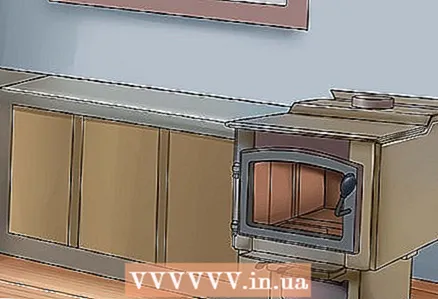 1 Choose a location for the oven. You don't want to decide where to place the stove by rolling around a 500-pound iron hippopotamus on a cart. Decide on a place for your stove before you plan to buy one. Since stoves are heaters, you generally want to place the stove on the ground floor of your home, where you spend most of your time, so that it can keep you warm all day long. To further maximize the efficiency of your wood burning stove, try choosing a location in the room with better insulation so that heat from the stove does not pass through windows and walls.
 - Keep in mind that every wood burning stove needs a chimney. Take this into account when choosing a location for your oven. For example, if you are planning to run a chimney through the roof, you should not select a location for the stove under one of the main support beams on the second floor.
 2 Maintain a distance from the oven when choosing a suitable location. Wood stoves can get very hot during use. The heat generated from the stove can be dangerous to nearby walls and furniture, so wood stoves usually have a certain gap - the minimum safe distance between the stove and nearby floors and walls. Distance from your stove may depend on where you live, whether the floors and walls of your home are flammable, and the type and size of your wood stove. If in doubt about the gap size of your stove, contact the manufacturer.
  3 Choose a certified wood-burning stove. Since you are buying a wood-burning stove, be sure to check that any stove you want to buy must be properly certified to meet all the safety and environmental criteria. In the United States, the Environmental Protection Agency (EPA) certifies wood stoves as meeting certain emission standards. The EPA regularly publishes numerous lists of certified wood-burning stoves, but certified stoves must also be labeled with both a temporary paper label and a permanent metal label.
 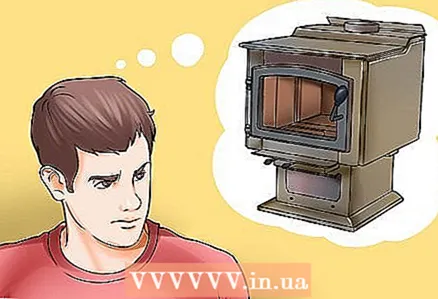 4 Select the oven size you need. In general, the larger the wood burning stove, the more it heats up when it is full of burning wood. Therefore, small rooms can become unpleasant from the heat of a large wood-burning stove. Most wood stove manufacturers quote their maximum heat output per hour in British thermal units (BTU) - the most popular stoves range from 25,000 to 80,000 BTU. A medium-sized home requires around 5,000 to 25,000 BTU - in other words, maximum heat output from a small stove - even in winter. However, the required heating for your home may differ depending on the climate and size of your home, so if you have any questions, check with the manufacturer.
 - Burning a wood-burning stove at maximum power can ruin it for a long time, so you should opt for a larger stove to use it at its maximum power for a long time.
Part 2 of 2: Installing a new oven
 1 Before starting, notify local authorities. Like many construction projects, installing a wood stove may require a permit from your local government in order for you to comply with safety regulations. However, the rules vary from city to city, so before you buy a stove or start changing your home, check with your city's building and planning department or city government to find out what is and isn't legal. If you need a building permit to install a stove, employees in this department should help you get one.
 - You can also call your local fire department, for eligibility, as wood stove installation requires inspection and validation.
- Finally, you can also contact your homeowner's insurance provider, as installing a wood stove can change your responsibility.
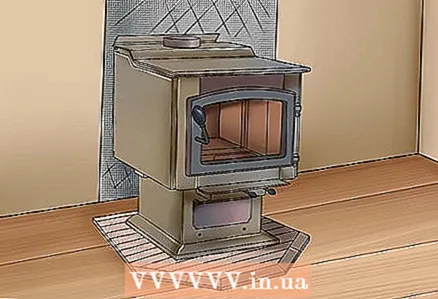
 2 Place a non-flammable covering on the floor where your stove will be located. This covering, made of bricks, ceramic tiles, concrete or any other non-flammable material, must blend into the existing floor covering. A floor covering is essential for the safe functioning of a wood-burning stove to ensure that sparks and embers escaping from the stove only come into contact with this covering and not with the floor, preventing a fire. Floor covering is especially necessary in houses with wooden floors or carpet located near the stove.
 - Certain laws require this floor covering - in the United States and Canada, the floor covering must extend 18 inches (45 cm) from the front of the oven and 8 inches (20 cm) from the other sides.
 3 Add heating protection to prevent the walls from catching fire. Installing heating protection on the walls at the location of the stove will prevent the possibility of fire damage. A heating shield is usually a sheet of metal that can be easily laid over an existing wall surface. Check your local code of law to see if you need any special permits for protection and clearance requirements.
 - Please note that a distance from your stove may be required when installing a heating shield.
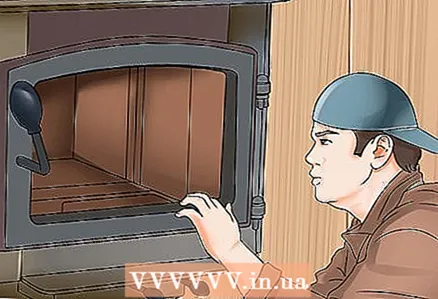
 4 Move the oven carefully to the desired location. Unless you have hired professional furniture transporters to help you place the stove in your chosen location, you will have to move it yourself. Wood stoves are made of metal and can be incredibly heavy, so make sure you take all necessary precautions to protect yourself when moving the stove. A sturdy cart or lifting cart that is suitable for the weight of your oven is a good way to move the oven so that you do not injure yourself.
 - Any adjustments to the location of the oven must be done manually, in which case you will have to enlist the support of a friend or family member, as you should not take the entire weight of the oven on yourself. You can also install the stove by extending the length of the PVC pipe.
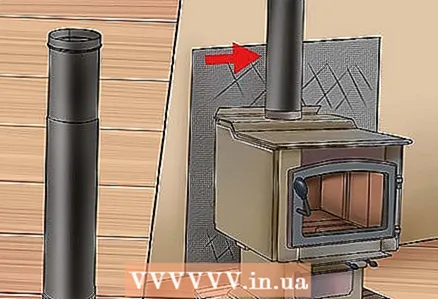 5 Install a chimney and connect it to your stove, if necessary. A well-functioning chimney is essential to getting the most out of your stove. A chimney must safely remove smoke and sediment from your home - a poorly installed chimney may not effectively remove smoke, leaving behind a gloomy and smoky living room. Chimneys may be in the house initially or may be installed along with the stove, but in any case, the chimney must be well insulated and made of non-combustible material. New chimneys installed for wood-burning stoves are often made of special stainless steel pipes.
 - You may need to extend the stove tube to connect to the chimney. This is fine, but remember that the stove tube is relatively thin and poorly insulated, so in no case should the stove tube be used as an insulated chimney.
- As a rule, a taller and straight chimney is better.The longer the distance the smoke travels horizontally (through curved pipe sections, for example), the less efficiently the chimney will remove smoke from the stove.
 6 Consider hiring certified technicians to install and inspect your oven. Properly installed wood stoves can be a huge boon to your home, but if installed incorrectly, they can be a hassle and even a serious hazard. If you have problems installing a wood-burning stove, or are not sure how to proceed safely, enlist the help of a professional. Likewise, if, after installation, you have the slightest doubt about the safety of your oven, schedule an expert inspection. The safety of your home and family costs a lot more than paying for an emergency call.
 - The National Fireplace Installer (NFI) is the body that certifies experts in the field of fireplaces and stoves. If you have any doubts about choosing a professional to install and / or test your new wood burning fireplace, find an NFI certified expert in your area on the NFI website.
Tips
- Install a smoke and carbon monoxide detector (required by law in the UK) to receive alerts if carbon monoxide or smoke is leaking from faulty ventilation in a chimney or chimney. Carbon monoxide cannot be heard by smell.
- Burn dry wood in a stove. The sound when one log knocks on another should be empty. It is best to dry the logs outdoors for 6 months or more.
- Clean ash from the stove regularly. Take ash outside of your home in a non-combustible container.
- Run the chimney through the interior wall to heat most of your home.
- Call a qualified chimney sweep once a year to clean and maintain your chimney. Try to find a qualified chimney sweep through the Chimney Safety Authority of America.
Warnings
- Do not let the coals smolder in the stove.
- You must have a chimney for every wood burning stove.
- Never burn logs that have been painted, treated with chemicals, or made for open fireplaces. Fireplace logs consist of compressed sawdust and wax.
- Be careful not to create more fire than necessary in your oven. When "burned out", the stove adds additional fuel and energy costs. It can also partially damage the oven, resulting in additional maintenance costs.
- Do not keep stove wood, chemicals, or combustible materials in the oven gap.
Never use flammable chemicals such as lighter fluid or kerosene to create a fire in the stove.
What do you need
- Distance from the oven
- Certified wood stove
- Local codes and requirements for the oven
- Flooring
- Wall heating protection
- Certified Professional Installer
- Furnace tube
- Chimney
- ventilation system


