Author:
Eugene Taylor
Date Of Creation:
7 August 2021
Update Date:
22 June 2024

Content
- To step
- Part 1 of 3: Measuring the new neckline
- Part 2 of 3: Removing the collar and cutting the V-neck
- Part 3 of 3: Attaching the collar
- Necessities
A V-neck suits most people very well. They draw the eye towards the face and elongate the body. You can give any crew neck T-shirt a V-neck with a seam ripper, textile scissors, headpins and some basic sewing skills.
To step
Part 1 of 3: Measuring the new neckline
 Gather your materials. To complete your project you will need a crew neck T-shirt, ruler or tape measure (if using a ribbon, you will also need a separate straight section), pins, textile pencil, textile scissors, seam ripper , thread the same color as your shirt and a sewing machine or needle.
  Measure the V. An easy way to do this is to use a V-neck shirt that you like as a guide. Fold the shirt in half vertically and make sure that the shoulders are well together. Lay it flat on the table. Then use a ruler to measure the distance from the point where the V meets the shoulder to the point of the V. Write down this distance.
 - If you don't have a V-neck shirt, you need to estimate how deep the V should be. In this case, it is better to start conservatively, because you can always make it even deeper.
- It is good to put on the shirt when determining how deep the V should be. While wearing the shirt, look in the mirror and mark the location where the tip of the V should be with a pin.
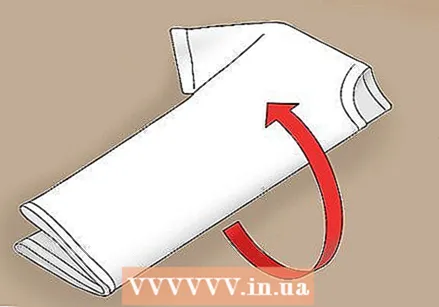 Fold the crew neck shirt in half vertically. The front of the collar should be on the outside of the fold. Make sure the neckline, shoulders and arms are perfectly aligned. Place the shirt on a table and smooth it so that it doesn't have wrinkles.
  Trace the V. Place a ruler in a diagonal line from the point where the shoulder seam meets the collar to the center of the chest. Using the measured distance from the previous step, mark the tip of the V with textile pencil. Then draw a line between that point and the point where the shoulder seam and collar meet.
 - Turn the shirt over and repeat this step on the other side.
Part 2 of 3: Removing the collar and cutting the V-neck
 Remove the stitches. Unfold the shirt, turn it inside out and place it on the table. Make sure the front is facing you. Then use a seam ripper to remove the stitches securing the front of the collar to the shirt.
 - If you don't have a seam ripper, you can use sharp scissors to carefully cut away the stitches.
- Stop at the shoulder seams. Unless you don't plan on reattaching the collar to the new neckline, leave the collar on the back of the shirt.
 Smooth the crew neck shirt on the table. Make sure the collar is folded back, out of the way from where you will be cutting. This ensures the most beautiful, straightest cut and helps you to avoid mistakes.
  Cut out the V-neck. Starting on one side of the V, use sharp scissors and cut along the marked line. Stop when you reach the bottom. Repeat this process on the other side. Make sure you only cut in the front of the shirt.
 - If you didn't plan on adding the collar again, your new shirt is now ready.
Part 3 of 3: Attaching the collar
 Cut the front of the detached collar in the middle. You must first determine where the middle is. To do this, lay the T-shirt flat on the table with the front facing you. Then measure the width of the collar and use your textile pencil to mark a point in the center. This is where you will cut.
  Pull each side of the cut collar along the edges of the V-neck. Most crew neck T-shirts have ribbed collars and should stretch a few inches.
  Pin the raw side of the collar to the shirt. Pull one side at a time along the length of the V and pin the collar as you go. Place a pin about every 1 inch to make sure the collar stretches and stays in place before you sew it on. Do the same on the other side.
 - The raw edge of the collar should be attached to the raw edge of the shirt, with the edge of the collar facing the outside of the shirt.
 Sew from the top of the collar towards the bottom of the V. Sew about 0.6 cm from the edge of both layers. When you sew on the second side of the collar, stop shortly before you reach the point of the V and sew that last piece to the back of the first side sewn. Finish by pressing the new seam with an iron.
 - Make sure the thread in your sewing machine matches the color of your shirt.
- If you don't have a sewing machine, you can also hand fasten the collar to the edges of the V.
Necessities
- Flat surface
- Textile pencil
- Seam ripper
- Ruler / straight edge
- Textile scissors
- Headpins
- Sewing machine
- Wire
- Needle
- Iron
- Ironing board


