Author:
Marcus Baldwin
Date Of Creation:
14 June 2021
Update Date:
1 July 2024

Content
1 Choose the right location. Ferns require a shady location and diffused (rather than direct) sunlight. Place your plant near the north window; there is too much direct sunlight on the east and west windows. You can place the fern next to a south-facing window if you don't have a north window. Keep the plant a short distance from the window so that it receives more ambient light. 2 Maintain a high humidity level near the fern. The high humidity level is ideal for ferns. There are two ways you can create a higher humidity level for your fern: a double fern pot or a room humidifier. To make a double fern pot, use a second pot that is slightly larger than the pot in which your fern grows. Fill a larger pot with moss soaked in water, then place the fern pot in it. Cover the soil and edge of the moss-soaked fern pot and moisten it every few days to keep the moss moist.
 - If you are using a humidifier, place it near the fern for better growth.
- You can moisten the fern with a hand sprayer with lukewarm water, but only once every few days, otherwise it can cause mottling.
 3 Maintain a constant temperature. Most indoor ferns are of tropical origin, although not all require tropical weather. Make sure the temperature in your home (or at least the room where the fern sits) is about 70 degrees Fahrenheit. Ferns can handle temperatures up to 60 degrees, but they won't do well in cold temperatures. If unsure, increase the temperature.
 - Consider placing a fern in your bathroom; temperature and humidity are often higher there.
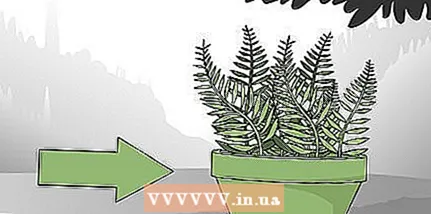
4 Water your fern regularly. Ferns love moist atmospheres and moist soil. Make sure your fern's potting mix is always moist (but not wet). This is accomplished by watering a small amount of water every day, rather than occasionally watering it heavily. 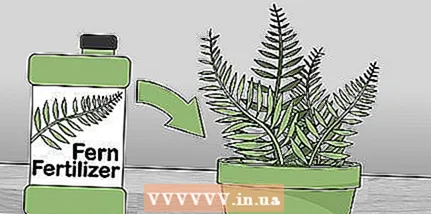 5 Fertilize your ferns once a month. Visit your local garden center and buy house fern fertilizer; ask the seller for help if needed. Spray this fertilizer on the fern monthly to give the plant the nutrients that the potting mix is lacking. You should wait at least six months after planting the fern before fertilizing it. 6 Remove dead or diseased fern parts. House ferns can have some diseases, but they are resistant to most diseases. If your plant looks sick, cut off the damaged areas. If your fern has started to wither as a result of oversight, do the same, cutting off the damaged or dead area with scissors. If the entire plant looks sick, it is best to remove it before it infects other indoor plants. 7 Transplant the fern a year or more after planting. After a certain amount of time, any fern will outgrow the pot in which it was originally planted. The transplant time depends on the health of your fern, but it may need to be transplanted into a larger pot as early as 6 months after planting.
 Method 2 of 2: Keeping Ferns Outdoors
 1 Plant your ferns where they are ideal. If you already have ferns growing and doing well in your garden, then you probably won't transplant them. Ferns love shady and damp places and do well under the canopy of other large plants or trees. Plant (or transplant) ferns in northern areas out of direct sunlight. When exposed to direct sunlight, their leaves will burn.
 - 2 Keep the soil moist. If it does not rain regularly in your area, you should water the ferns daily so that the soil is moist all the time. Place a dense layer of pine needles or leaf mulch about 2 to 3 inches thick around the ferns. This will help trap moisture and keep evaporation high so that the air around the ferns is slightly more humid.
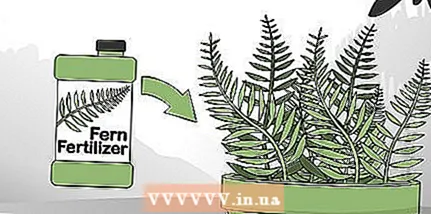 3 Fertilize your ferns once a month. Six months after planting, you can start fertilizing the ferns to enhance growth. Choose an organic fertilizer that is applied by spraying and fertilize the fern following the directions on the package. Alternatively, you can add a layer of compost and mulch to the soil to create a better growing environment for the fern.
 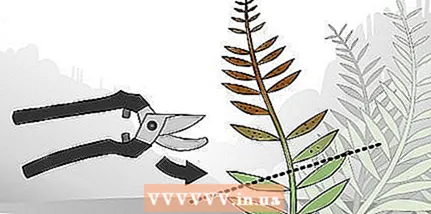 4 Cut off damaged stems. Outdoor ferns have no natural enemies other than slugs and one or two rare diseases. If you do notice that your fern has damaged or diseased stems, use garden shears to trim them. This will preserve the integrity of the entire plant and prevent other plants from becoming infected in the event of illness.
 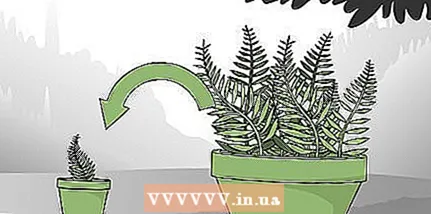 5 Replant ferns as needed. They can grow quite large and will need to be divided and transplanted. To subdivide a large fern, carefully dig up the plant with roots. Divide it into pieces carefully; as a rule, the fern grows in groups of shoots, each of which has its own root system. This makes division easier. Plant each plot separately and water well.
Tips
- A healthy fern can be divided every 2-3 years.
Warnings
- Keep house ferns away from air conditioners or other air-drying appliances.
- In ferns, scale insects, felt mites and ticks can start. Ferns are not recommended to be treated with pesticides. Shaking or picking up with your hands will be the best way to remove pests.
- Direct or constant sunlight can cause drying and / or browning of fern leaves.
What do you need
- Fern
- Potted or dirt soil
- Watering can
- Pot (for planting indoors)
- Fertilizer for plants
- Thermometer
- Moss, mulch and / or gravel
- Shovel


