Author:
Eric Farmer
Date Of Creation:
12 March 2021
Update Date:
1 July 2024

Content
- Steps
- Method 1 of 6: Balloon Drum
- Method 2 of 6: Rattle
- Method 3 of 6: Two-note flute
- Method 4 of 6: Bottled Xylophone
- Method 5 of 6: Rain stick
- Method 6 of 6: Straw Oboe
- Tips
- What do you need
You can create wonderful music without buying expensive instruments. For thousands of years, people have been making tools from natural materials and household items using their two hands. Next, you will read how to make a simple drum, rattle, flute, xylophone, rain stick and oboe from a straw.
Steps
Method 1 of 6: Balloon Drum
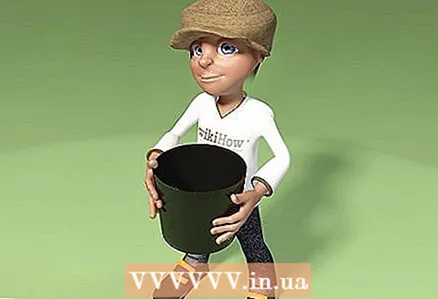 1 Find a drum base. You can use an old saucepan, bowl, vase, or bucket; choose a deep, sturdy container for the base. Do not use containers made of glass or other fragile materials.
 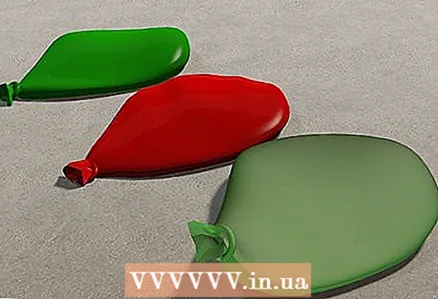 2 Take a package of balloons. It is likely that during the process of making the drum, several of them will burst, so it is better to buy in reserve. Choose large, sturdy balls. Try different ball sizes to find the perfect match for the drum base.
 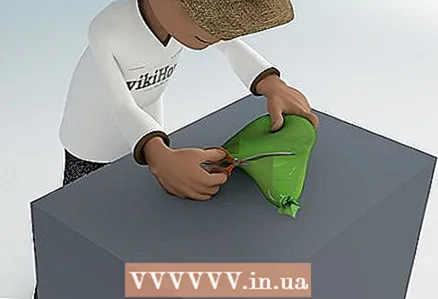 3 Cut off the end of the ball. Take scissors and cut off the end of the ball where it starts to taper.
  4 Slide the ball onto the base. While holding the ball on top of the base with one hand, pull the ball on the other side with the other. The ball will cover the opening of the pot, vase, or bucket that you use as the base.
 - You may need the help of a friend to hold the ball to prevent it from slipping out.
- If the base ball is too large or too small, try different ball sizes.
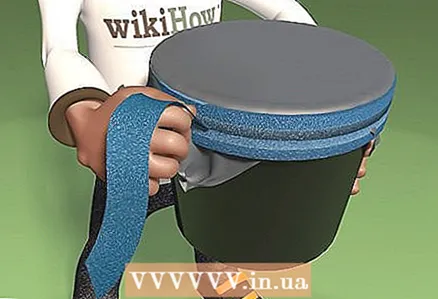 5 Secure it with tape. To secure the ball, wrap the edge of the base with heavy-duty tape or tape.
 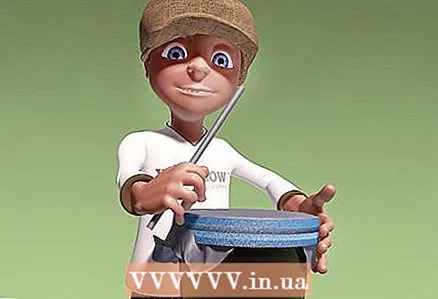 6 Play with sticks on the balloon drum. Use chopsticks, pencils, or other long, thin objects to play the drum.
Method 2 of 6: Rattle
 1 Choose a container for the rattle. To do this, you can use a coffee can, a glass jug with a lid, or cardboard cylinders. Wooden containers will work too. Each vessel will have its own unique sound.
 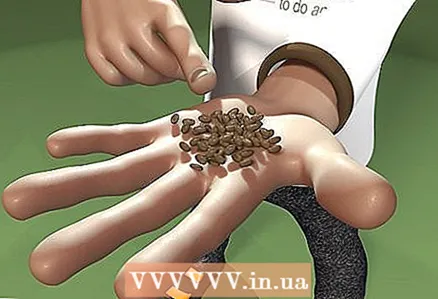 2 Choose filling for the rattle. Small trinkets in any quantity will sound interesting when you shake them. Collect a handful of some or all of the suggested items:
 - beads - plastic, glass or wood;
- dried beans or rice;
- coins;
- seeds.
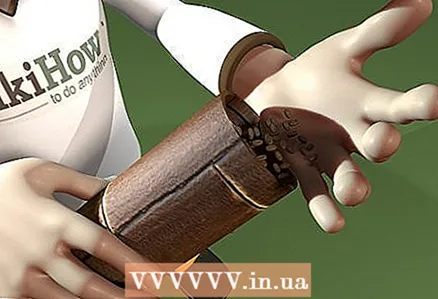 3 Place the selected materials in a container.
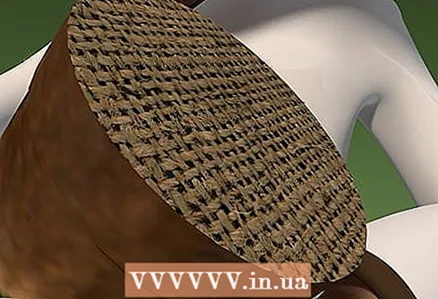 4 Close the container tightly with the lid.
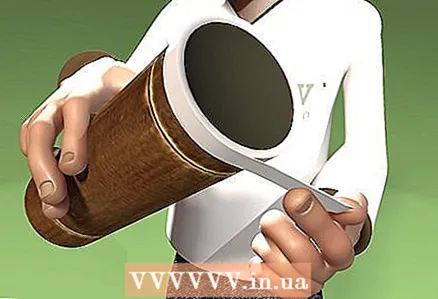 5 Wrap the container with duct tape. Wrap several layers of tape and make sure the entire vessel is wrapped.
 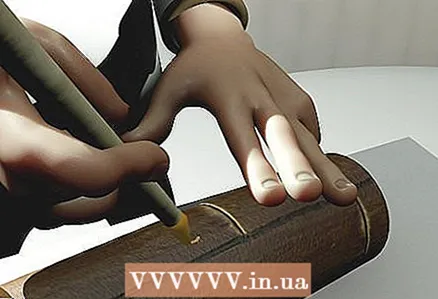 6 Decorate the rattle. You can paint the rattle or use different decorative materials for decoration.
  7 Shake it up. Use the rattle as a percussion instrument alone or in a group.
Method 3 of 6: Two-note flute
 1 Take a glass jug or bottle. A bottle of wine or olive oil, a large glass jug, or any other glass jar with a thin neck will work well.
 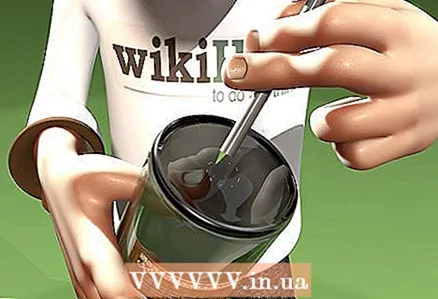 2 Drill a finger-sized hole in the bottom of the bottle. Use a glass cutter to cut a small hole in the bottom of the bottle or jug.
  3 Blow through the hole already located at the top of the jug. The position of the lips should be such that you blow horizontally, just above the opening. Keep blowing until you get a clear note. This may take a while, so be patient and keep practicing.
 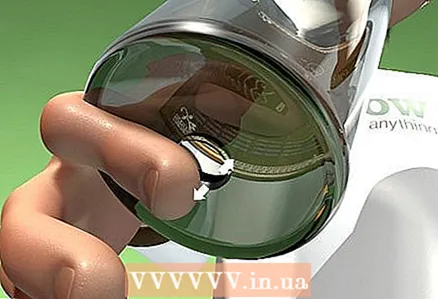 4 Cover with your finger and open the hole on the bottom. Do this as you blow, experimenting with the different sounds produced.
 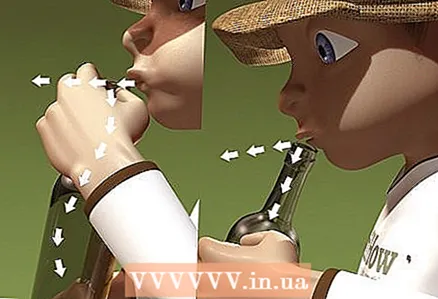 5 Try tilting your head up and down to get high and low notes.
Method 4 of 6: Bottled Xylophone
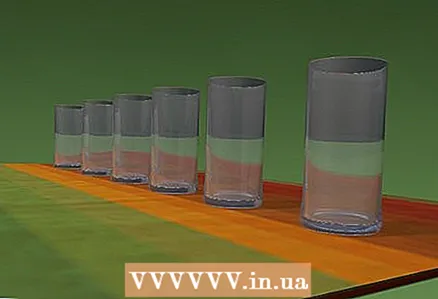 1 Take 5 bottles of 0.6 liters. Choose round bottles with a flat bottom and a wide mouth. Number them from 1 to 5.
 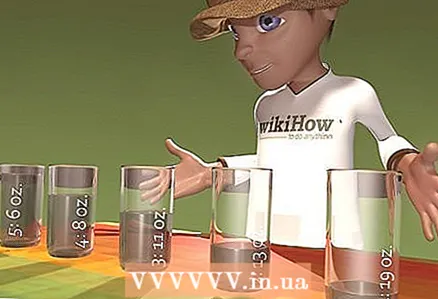 2 Fill bottles with different amounts of water. Pour the following amount of water into the bottles:
 - Bottle 1: 0.57 l. This will give you the note F.
- Bottle 2: 0.39 l. This will give you the G note.
- Bottle 3: 0.33 l. This will give you the note of A.
- Bottle 4: 0.24 l. This will give you the note C.
- Bottle 5: 0.18 l. This will give you the note D.
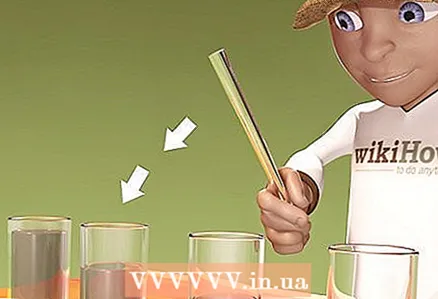 3 Play on the bottles with a metal spoon. Tap the sides of the bottles with a spoon to play notes.
Method 5 of 6: Rain stick
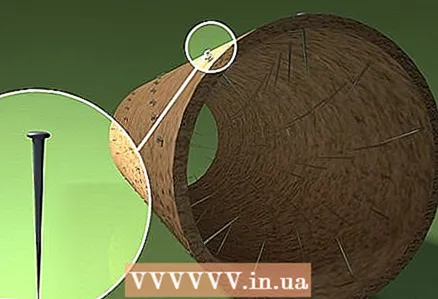 1 Drive small nails into the paper towel cylinder. They should be on the sides in arbitrary places throughout the cylinder. For the best effect, at least 15 nails must be hammered in.
  2 Seal the bottom of the cylinder. Tape a piece of cardboard or other sturdy cover to the bottom of the cylinder.
 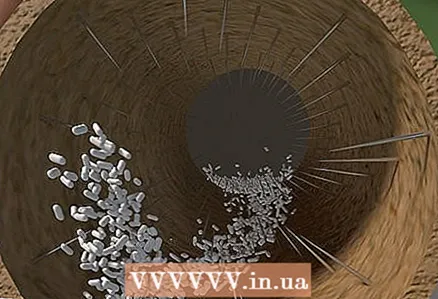 3 Add rain. Put rice, sand, dried beans, corn kernels and other small things inside that will make the sound of rain.
 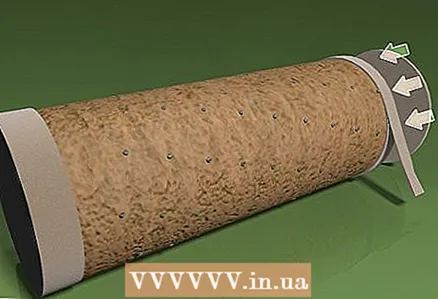 4 Close the cover. Add a second lid to the top of the rain stick and glue it over.
 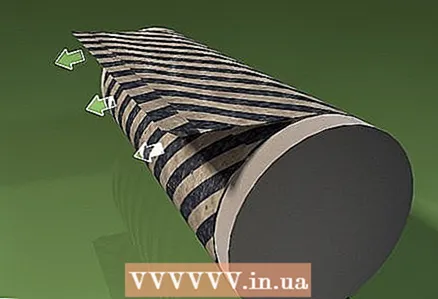 5 Cover the rain stick with wrapping paper. You can also paint it or decorate it with stickers.
  6 Play on a rain stick. Swing it from side to side, and you will hear the sound of falling rain.
Method 6 of 6: Straw Oboe
- 1 Take a cocktail straw. These straws can be found in any restaurant or even in your home.
- Short or curled straws will not work.
- 2 Squeeze one end of the straw with your teeth to flatten it. This will be the mouthpiece. Experiment until you get the sound out.
- If the straw is easy to blow and no sound comes out (as if it weren't squeezed), try flattening the end even more or holding the edges with your lips.
- If it is very difficult to blow into the straw, the end may be too flat. Blow on the opposite end to reveal it slightly.
- 3 Cut the holes with a pair of compasses and scissors.
- Decide where you want to make the hole and what size. Note that you will need to cover it with your finger.
- Poke two holes in the straw with the sharp end of a compass or something similar. These punctures should be located where your hole will be: one puncture marks its beginning, the other marks the end (that is, the distance between them is the diameter of the hole).
- When piercing the holes, try to make them as wide as possible, but be careful not to pierce the straw on the other side, otherwise air will escape through this through puncture.
- Take scissors and stick their points into the punctures made with a compass. If the punctures are too small for this, reinsert the compass and twist slightly to widen them.
- Make an incision with scissors to connect the punctures.
- Now that you have more room for the scissors, insert one blade into the cut and carefully cut out the circle.
- 4 Cut as many holes as you like.
- Don't make too many holes; there should not be more of them than the fingers with which you will play. It is recommended to do six.
- If the holes are too high, they can interfere with the vibration of the tongue.
- 5 Blow on the tongue as if playing a real oboe.
- Each straw has its own sound. Some sound like a clarinet!
Tips
- Another way to make drums. Take a bucket and paint it. Cover it with transparent paint (varnish) on top to make it shine. Do the same with a few more buckets until you have a whole set of drums. Place them together in a circle, upside down. Sit in the middle of the circle and drum!
What do you need
Drum
- A vessel, such as a pot
- Balloon
- Duct tape
- Sticks
Beanbag
- Jar with lid
- Dried rice beans, beads and the like
- Insulating tape
- Paint or stickers
The flute
- Water jug or wine bottle
- Glass cutter
Xylophone'
- 5 bottles of 0.6 l with a flat bottom
- Beaker
- Water
- A spoon
Rain stick
- Paper Towel Cylinder
- Cardboard
- Scissors
- ribbon
- Nails
- A hammer
- Wrapping
Oboe made of straw
- Straw
- A compass or other sharp object
- Scissors


