Author:
Eric Farmer
Date Of Creation:
3 March 2021
Update Date:
1 July 2024

Content
- Steps
- Method 1 of 3: Removing the Center Canal
- Method 2 of 3: How to Use Special Programs
- Method 3 of 3: Reverse speaker phase
- What do you need
Want to make karaoke songs? You can learn to isolate the vocal channel from songs while leaving the music behind.While this can be difficult to do without ruining the clarity of the track itself, you can try various tips and tricks to get the best sound quality.
Steps
Method 1 of 3: Removing the Center Canal
 1 Start with high quality audio tracks. If you load poor quality files into your audio editor, trying to separate them will not sound good. It's worth starting with WAV or FLAC files. As a result, the sound will be much clearer than from an over-compressed MP3 file.
  2 Find vocals in the mix. All stereo tracks have two separate channels on which the instrumental and vocals are placed. Bass, guitar, and other channels tend to be biased to one side or the other, while vocals are usually located in the "center channel". This is done to make it sound "centered". To separate it, you need to split this central channel and subject one of them to inversion.
 - How do you define vocals? Just listen with quality headphones. If vocals seem to be coming out of both channels at the same time, then they are mixed in the center. If not, then they are on the side from which you hear the vocal sound.
- Music of certain styles and specific recordings will have different ratios between channels. If the vocals are off-center rather than "centered", it will be much easier to remove them.
- Songs with a lot of effects can be tricky to separate and reverse. There may be a small echo from the vocals in them, which is difficult to get rid of.
 3 Import audio into editing software of your choice. You can perform this simple operation in any audio editor that allows you to invert tracks for a single channel. Although the exact position of the instrument differs slightly in all programs, the basic process is the same for the following programs:
 - Audacity
- Pro Tools
- Ableton
- Reason
 4 Divide channels into separate tracks. Most programs can split a high quality audio file recorded in stereo into two tracks. You will see a black arrow next to the track name that you can click on, then select Split Stereo Track. You should have separate channels that you can work with individually.
 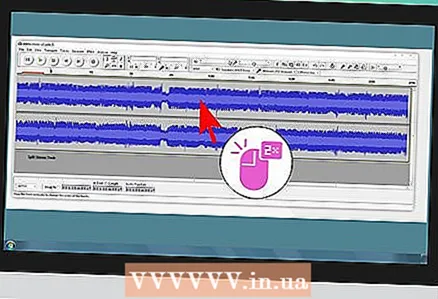 5 Select one of the channels to invert. Since vocals are included in both tracks, select either one. Double click to select the entire track if you want to remove vocals from the entire length of the song.
 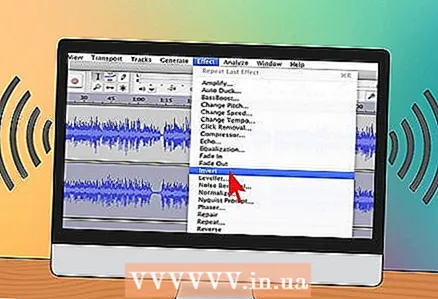 6 Invert the channel. After selecting a track, use the Effect and Invert functions to invert it. The song may sound a little strange after playing it. After inverting, the track should sound like it's coming from the sides and not from the center.
 - You can still hear some vocals, but don't worry. You will get the desired result when you do mono.
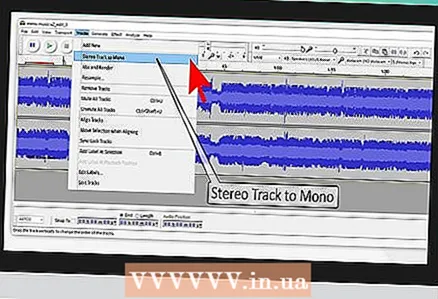 7 Convert the file back to mono. Combine two stereo channels into one. You should now have one combined track with reduced amplitude. This means that the vocals are processed and the instrumentation can be used. The faint voice of the performer can still be heard in the background.
Method 2 of 3: How to Use Special Programs
 1 Select a program to suppress vocals. Voice suppression packages are available on the Internet at a variety of prices. Some of these programs are free to download, but most are available only after purchase. Each package contains installation instructions. There are several different packages at different price points:
 - Vocal Remover Pro
- IPE MyVoice Karaoke
- Roland R-MIX
- E-Media MyVoice
- WaveArts Dialog
 2 Install the audio equalizer package. These software packages are not free, they need to be purchased. Installation instructions are provided with the package. Make sure this audio program is compatible with your operating system and the sound files you are using. Some audio equalizers include:
 - Profound Sound CSharp
- Equalizer APO
- Graphic Equalizer Pro
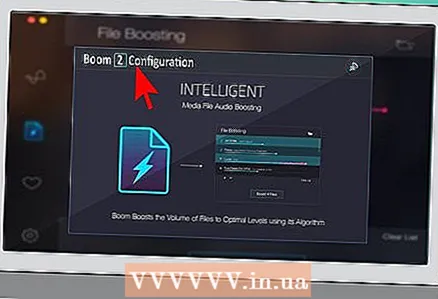
- Boom 2
 3 Open the song file and follow the instructions. Each software package works differently, but the instructions included in the kit will help you understand the process. It is quite easy, especially with those programs that are specially designed for recording karaoke songs. The program will automatically delete the audio track.
 - When using the equalizer, you usually just need to open the audio equalizer program and play the music file you want to edit. Audio Equalizer will automatically remove audio tracks.
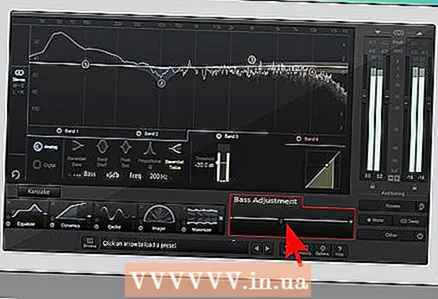
 4 Adjust audio equalizer to preserve bass. In order not to lose bass, it is important to make a few adjustments. Set signal attenuation to +5 dB at 200 Hz and below both left and right channels. This will preserve the bass.
Method 3 of 3: Reverse speaker phase
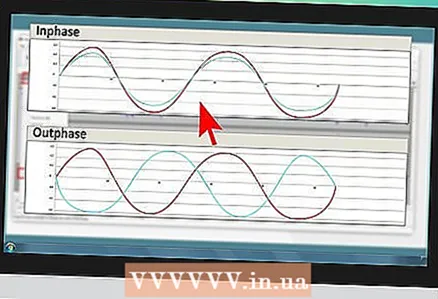 1 Understand the concept of channel phase. When two sound waves move up and down together, they are said to be "in phase." When one wave is moving up, and at the same time another wave is moving down, then these waves are said to be out of phase. Opposite waves cancel each other out, resulting in a flat line of sound. Phase flipping to one speaker will cancel the coincidence of signal waves in the other speaker.
 - The effectiveness of this method is rather controversial. In theory it might work, but using this method you cannot save a song file without vocals.
 2 Find the wires leading to the back of one of the speakers. Each speaker usually has two wires, one positive and the other negative. Typically, they come in the following colors: red and white, black and red, or black and white. Sometimes they are both black. Swap the two wires going to one speaker.
 - If the wire is black, then change it with red, and red, respectively, with black.
- On many modern stereo systems and headphones, you cannot swap wires on the same speaker. Sometimes the wires are assembled into a single tubular connector. The only way to change the assembled wires is to dock the ends or re-solder the connector.
 3 Use a digital phase processor. There are special digital technologies using chips called a digital signal processor that allows you to flip a wave inside a stereo or Hi-Fi. Typically this is a "karaoke" button that flips one side of the phase of the stereo image.
 - If it is in your stereo or program, then just click on it and the vocals will be very weak or completely disappear.
 4 Adjust the levels to ensure that vocals are lost. Background vocals are often mixed more to the left or right, so it's difficult to remove them. You will have to sing along with it, pretending to be your own background choir, if you are trying to make a karaoke song.
 - Changing the phases in some places really affects the bass waves. So the bass can disappear along with the vocals. Karaoke DSP systems will correct this by switching the phase to the vocal frequencies only. Try adjusting the levels on your stereo to get the sound you want.
- Sophisticated vocal removal systems or programs will let you decide which out-of-phase frequencies to switch.
What do you need
- Audio playback device
- Commercially available vocal remover packages
- Audio recorder
- Audio equalizer


