
Content
- Steps
- Method 1 of 6: Egg Carton Caterpillar
- Method 2 of 6: Pom Pom Caterpillar
- Method 3 of 6: A Tennis Ball or Styrofoam Caterpillar
- Method 4 of 6: Buttoned caterpillar
- Method 5 of 6: The Ring Caterpillar
- Method 6 of 6: Sandwich Caterpillar
- What do you need
Handmade toy caterpillars are quite popular, especially among children. Caterpillar shapes can be created from a wide variety of materials, so these crafts are ideal for getting creative and using a variety of unnecessary items.
Steps
Method 1 of 6: Egg Carton Caterpillar
This method is perhaps the most common for creating a toy caterpillar.
 1 Get a clean, unwrinkled cardboard egg tray. Five whole cells will be enough. Therefore, if you have a tray for 10 or 20 eggs, cut five cells out of it so that they form a straight line.
  2 Turn the cut 5 cells upside down. Paint them with acrylic paint. Choose the color of the paint to your taste; you can just use green paint, or you can paint the caterpillar in all the colors of the rainbow. Then place the cardboard on one side and let it dry completely.
  3 Cut two small slits from one end of the cardboard. You will insert the antennae of the caterpillar into them.
 - To do this, you can use regular scissors, a cardboard knife, or a sharp nail.
 4 Pass the yellow wire through the cut-out slots. Bend its protruding ends upward to resemble the antennae of a caterpillar. Trim the ends, if necessary, so that they are the same length. Glue the wire to the inside of the cardboard mold.
 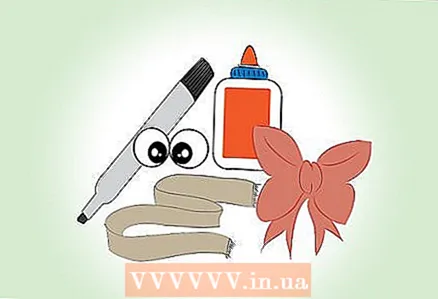 5 Decorate the caterpillar. Glue the toy eyes. Draw a smiling mouth with a felt-tip pen or black waterproof marker. You can also cut the mouth out of felt and glue it on. Decorate the craft in other ways:
 - The body can be painted with polka dots.
- Draw big pink cheeks.
- Tie a beautiful bow on one of the antennae.
- Wrap a scarf or tie around your neck.
 6 Ready.
Method 2 of 6: Pom Pom Caterpillar
This method is easy to implement and produces excellent results.
 1 Make or purchase pom poms. If you want to make them yourself, use the article How to make a pompom.
 - When choosing or creating pom-poms, consider whether you want your caterpillar to be one or two colors, or multi-colored, and choose (make) pom-poms in the appropriate colors.
 2 Glue the pom-poms that form the torso at the same height.
 3 Glue the pom-pom that matches the head of the caterpillar slightly above the rest of the pom-poms.
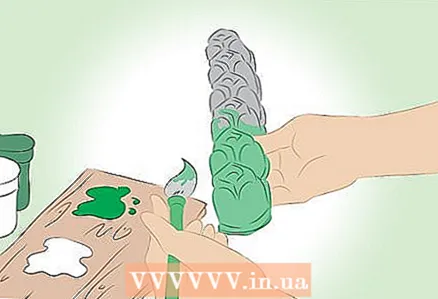 4 Wait for the craft to dry completely.
 5 Attach the legs. Take some wires or plastic sticks and fold each of them into an "M". Glue them on the bottom of the pom-poms with the bottom ends of the "M" pointing down to form the legs of the caterpillar. In this way, glue all the wires (sticks) to the pom-poms, except for the front pom-pom that forms the head.
 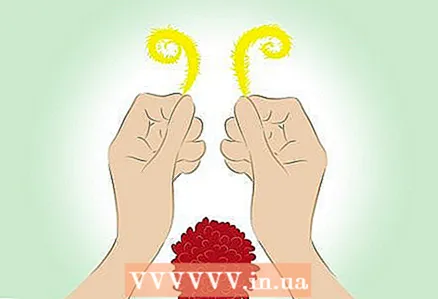 6 Attach the antennae. Cut two pieces of suitable length from the wire (plastic tube) and twist the ends slightly. Glue a piece on each side of the head pompom.
  7 Decorate your head. Glue on toy eyes and a smiling felt mouth.
  8 Made. Dry the pom-pom caterpillar and it is now suitable for playing or showing off to guests.
Method 3 of 6: A Tennis Ball or Styrofoam Caterpillar
This method will require adult help, especially when making holes in the balls.
 1 Place the first tennis or foam ball at the very end of the sock.
 2 Place the rest of the balls in the sock one by one. At the same time, leave small gaps between the balls. Thanks to them, the caterpillar will bend freely.
 - If you wish, you can drag the sock with rubber rings between adjacent balls. This is not necessary, but it will give the craft a bOincreased elasticity.
 3 Leave about 5 cm (2 inches) of the toe free on the side of the hole. If there is more left, trim off the excess.
  4 Prepare the last balloon. It will close the toe and serve as the head of the caterpillar. Use a pencil or scissors to poke a small hole in this ball. While pressing the pencil (tip of the scissors) firmly into the ball, be careful not to hurt yourself.
  5 Add the last bead to the sock. In this case, the previously made hole should be directed to the exit of the sock. Push the remaining free top edge of the sock into the hole in the ball. This will fix the sock with the balls inside. First grease the edges of the hole with glue.
 - Use a pencil to push the sock into the hole.
 6 Decorate your head. You can do the following:
 - Glue the toy eyes.
- Twist the antennae out of wire or plastic tubing. Make small holes in the head ball and insert the antennae into them, gluing them firmly.
- Cut the smiling mouth out of felt and glue it below the eyes.
 7 Attach the legs. This is not necessary, but it will give the caterpillar some originality.
 - Measure the length long enough for the legs to protrude from the balls. It should also be reached in order to bend the edges of the legs down.
- Cut the wires (plastic tubes) to the required length, one for each ball, excluding the head.
- Glue the center of the leg to the bottom of the ball. After that, fold the protruding ends downward, thereby forming the legs out of them.
- Repeat for each balloon except the head one.
- Spare no glue. Then dry the craft well.
 8 Decorate the caterpillar if desired. After the steps listed above, it is already decorated enough, but you can also add a bow, paint the body with polka dots, glue sequins, and so on.
  9 Ready. Now you can play the craft and show it to your friends.
Method 4 of 6: Buttoned caterpillar
This method is suitable for those who love to embroider and would like to decorate children's clothes.
 1 Choose the right item for kids' clothing. It should be such that it was easy to sew on buttons.
  2 Choose the buttons for your caterpillar. They can be of the same color or multi-colored.
  3 Locate the track on your clothing. Sew the first button on one end. Just sew it to your clothes.
  4 Sew on the second button next to the first, just above. Continue sewing on the buttons, alternating slightly higher and lower along the marked line.
  5 Complete the row with a button slightly "higher". This will be the head of the caterpillar. From this button, sew up the stitches representing the antennae of the caterpillar.
  6 Made. Despite the fact that this method is simple, it allows you to decorate children's clothes in an original way. It's also a great way to teach your child a taste for embroidery!
Method 5 of 6: The Ring Caterpillar
This method is easy to perform and suitable for young children.
 1 Cut strips out of heavy paper or cardboard. The width of the stripes depends on how wide you are going to make the caterpillar; the wider the stripes, the more resilient and elastic the body of the caterpillar will be.Cut strips to the same size, both in width and length.
 - Use heavyweight paper or thin cardboard rather than standard paper. The latter breaks easily, and the craft from it will not last long.
 2 Decorate the cut strips. You can add borders, spots, twisting lines, glue paper thorns, glitter, paint on the paper, and so on. Leave only the strip intended for the head of the caterpillar unadorned.
  3 Make a ring out of the strip. Glue the ends of the strip with glue, tape, or staple them together.
  4 Fold the ends of the next strip around the first ring, starting to make the chain. Also connect the ends of the second strip with glue, tape, or a stapler.
  5 Continue until you have the length you want. The last ring intended for the head must be unpainted.
  6 Decorate your head. Draw eyes and a smile. You can cut them out of felt and glue them if you like.
  7 Add tendrils. Cut a couple of short pieces of flexible straw just below where it bends. Attach them to your head with tape or glue. Bend the straw at the flexible joint so that the tendrils protrude forward.
  8 Ready. Now you can play the caterpillar and show it to your friends.
Method 6 of 6: Sandwich Caterpillar
If you want to make an edible caterpillar for a party, the sandwich method is one of the easiest.
 1 Determine the estimated track length. This determines the size of the dish on which you place your artwork.
  2 Make small sandwiches. Each of them should be in the shape of a circle. You can cut your bread into circles using a hand-made ring dough stamp. For the filling, use foods that are easy to cut and, when joined together, will keep the round shape of the sandwiches (use, for example, butter or peanut butter, Nutella, and the like to hold the filling together).
  3 Arrange the round sandwiches in a wavy line on the platter. To resemble the body of a caterpillar, overlap the edges of each other.
  4 Add the head. It is very easy to make the head:
 - Pick a cherry tomato of the right size, cut it in half and place it out of the halves of the eyes.
- Paint your mouth with food coloring, icing, mustard, or something similar.
- Stick in two toothpicks as tendrils.
 5 Add decorations such as lettuce and other herbs like herbs. The dish is ready to be shown to guests and eaten.
What do you need
Method 1:
- Egg carton
- Scissors
- Acrylic paint
- Paint brush
- Soft wires or plastic tubes
- Glue (for crafts)
- Toy eyes
- Decorative elements
Method 2:
- Pompons (quantity depends on desired track length)
- Glue
- Scissors
- Soft wires or plastic tubes
- Toy eyes
- Felt
- Other decoration items
Method 3:
- Long colored sock to the knee
- 6-8 tennis or styrofoam balls about 7.5 cm (3 inches) in diameter
- Scissors
- Glue (for crafts)
- Pencil
- Toy eyes
- Soft wires or plastic tubes (for antennae and legs)
- Felt
Method 4:
- Buttons (at your discretion, preferably multi-colored)
- Thread (for embroidery or double cottons to match the garment)
- Embroidery threads (for antennae)
- Sewing scissors
Method 5:
- Strips of cardboard or heavy paper
- Scissors
- Yardstick
- Colored pencils, markers and the like
- Sequins
- Stickers
- Glue
- Stapler and / or tape
- Toy eyes (optional)
- Antennae straw
Method 6:
- Sandwich bread and filling products
- Cherry tomato
- Food coloring, mustard or similar
- Pastry bag
- 2 toothpicks
- Large dish or plate


