Author:
Sara Rhodes
Date Of Creation:
15 February 2021
Update Date:
1 July 2024

Content
In this article, you will learn how to create an index page in Microsoft Word to find important terms that were discussed in the document and on the pages on which they were present.
Steps
Part 1 of 2: Creating Terms
 1 Open your document in Microsoft Word. In MS Word, an index can be inserted into any document, regardless of its length, style or content.
  2 Click on the Links tab. It is located on the MS Word toolbar at the top of the window, next to other tabs such as Home, Insert, and View. The Links toolbar appears at the top of the window.
  3 Click the Mark item button. This button looks like a blank page with a green plus and a red line inside. It is located on the Links toolbar, between the Insert Title and Mark Link buttons, closer to the upper-right edge of the window. This will display the Define Index Entry dialog box, where you can select important terms and phrases as index entries.
  4 Specify a word or group of words to be used as index entries. Double click on the word with the left mouse button or select the word using the keyboard.
  5 Click on the "Define Index Entry" dialog box. The highlighted term appears in the "main:" text box.
 - In addition to the main index element, you can enter an additional index and a cross-reference. The optional index entry and cross-reference will be indicated in the appropriate fields in the dialog box.
- The user can also insert a third-order index. To do this, insert a colon (:) in the "additional:" field, and then enter the text that will be used as a third-order index.
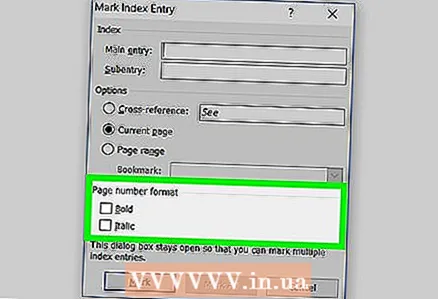 6 Format the page numbers in the index. If you want page numbers to appear in bold or italics, check the appropriate boxes under the Page Number Format heading.
  7 Format the text of the index entry. Select the text in the "main" or "additional" field, right-click on it and select the "Font" option. After that, a new dialog box will appear on the screen, in which you can change the font, size, color and effects of the text, as well as select additional options such as size, spacing and offset.
 - If you want to learn more about changing the font in Word, find articles online about the different types of fonts and styles you can use in your Word document.
 8 Click on Mark to mark the highlighted term and add it to the index with the corresponding page number.
 9 Click on Mark All to search the entire document for the index entry and mark each case mentioned.
 10 Select another word or group of words that you want to mark. Highlight another term in your document and click the Define Index Entry dialog box.The new term appears in the main field. Additional indexes, cross-references, page numbers, and font settings for the new index can be changed as needed in the Index Entry Definition window.
Part 2 of 2: Inserting an Index Page
 1 Scroll down and click on the area at the very bottom of the last page.
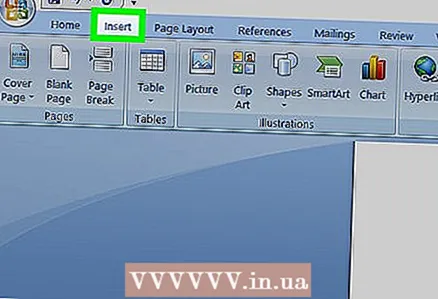 2 Click the Insert tab in the toolbar at the top of the window.
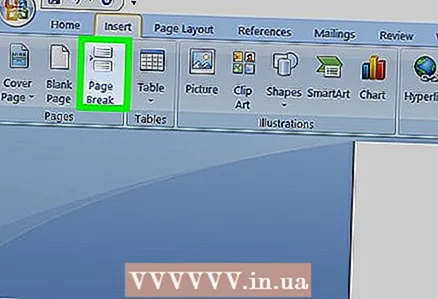 3 Click the Page Break button on the toolbar. This button looks like the bottom half of one page is above the top half of another page. This button will create a new page and end the previous one.
  4 Click the Links tab on the MS Word toolbar at the top.
 5 Click the Index next to the Flag Item button on the Links toolbar. The Index dialog box appears.
  6 Select the type of pointer (indented or not indented). A "indented" pointer is more reader-friendly, whereas a "no-indented" pointer takes up less space on the page.
 - As you change the index, you will see a variety of styles and formats in the Sample Printed Document window.
 7 Choose an index style from the Formats box. Choose a style from predefined formats to customize your index.
 - Users can create their own style. To do this, select the "From template" format, and then click on the "Change ..." button. After that, you can change the font, spacing and style of all major and minor indicators, thereby creating your own format.
- Before deciding on your choice of format, review it in the "Sample Printed Document" window.
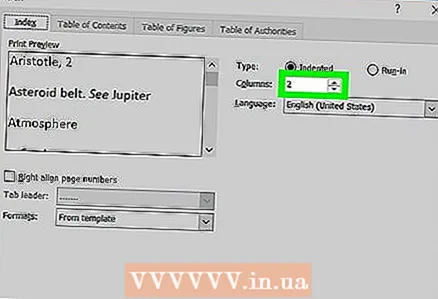 8 Change the number of columns. Increase the number of columns in the Columns box to take up less space, or set the number of columns to Auto.
  9 Click on OK. This will create an index page with all tagged indexes and corresponding page numbers. Use this index to find pages that mention important terms and concepts.
Warnings
- Marking index entries will automatically enable the Show All Formatting Characters option. It can be turned off at any time by clicking on the paragraph icon on the "Home" tab.


