Author:
Carl Weaver
Date Of Creation:
25 February 2021
Update Date:
2 July 2024

Content
- Steps
- Method 1 of 4: Collecting Materials
- Method 2 of 4: Building the system
- Method 3 of 4: Faucet and Bypass Valve
- Method 4 of 4: Build
- Tips
- Warnings
Did you know that on average, each roof collects about 600 gallons of water for every millimeter of sediment? So that this good does not go to waste, you can build your own rainwater collection system, so that you can then use it in your garden or other purposes. Read on to learn the technique!
Steps
Method 1 of 4: Collecting Materials
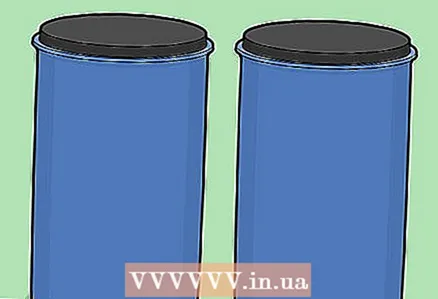 1 Purchase several water tanks. They can be bought at a hardware store, but it is much easier to buy a used barrel from someone else's hands. Just make sure the barrel is clean and wash it thoroughly with soap and water. You can also make a water tank out of a plastic trash can. Count on a volume of 30-55 liters.
 - If you decide to use a used drum, make sure that it has not been used to transport oil, pesticides or other toxic substances. It is very difficult to clean the drum from traces of these substances, so it is not safe to use them.
- If you are going to collect more water, buy two or three barrels. You can combine them into one system to have several gallons of water at your disposal.
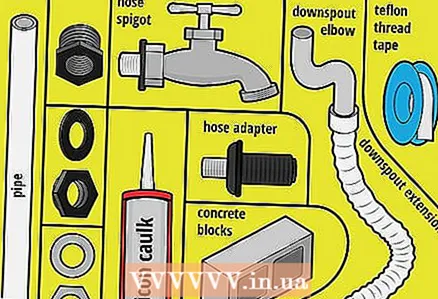 2 Purchase additional equipment to transform barrels into water storage. You can buy these supplies at any hardware store. Check to see if you already have some of these items.
 - 1 standard 1-in. Water tap with ¾-in. Pipe threads
- 1 zip tie ¾ "x ¾"
- 1 grommet ¾ "x ¾"
- 1 pipe thread ¾ "with adapter for 1" hose
- 1 ¾ Inch Spanner
- 4 metal O-rings
- 1 roll of Teflon thread sealing tape
- 1 silicon seal
- 1 waste pipe “S” to direct the drain to the tank
- 1 aluminum mosquito net to keep bugs, leaves and other debris out of the water
- 4-6 concrete blocks
Method 2 of 4: Building the system
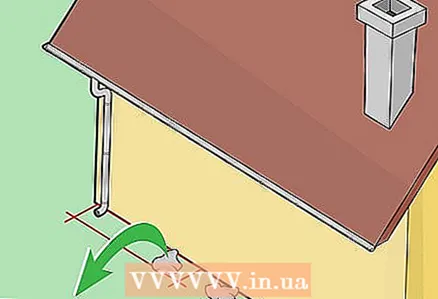 1 Measure out the area under the downpipe. A downpipe is a metal or plastic pipe that leads from the roof to the ground. If you want to channel water from the roof into your containers, the platform needs to be prepared. Take a shovel and compact the ground under the roof where your water tanks will be.
 - If your gutters are directed to a concrete walkway or an elevated patio, flatten the surface on the lower level and line it with wood paneling to place the barrels there.
- If you have more than one gutter in your home, install your tanks as close as possible to your garden or where you will be using your stored water.
 2 Apply a layer of fine gravel. This will help keep water from stagnating around your containers and flooding the base of your home. Dig a 10-12 cm rectangular depression, cover it with a thin layer of gravel and place the barrels.
 - Skip this step if your gutter faces a concrete walkway or patio.
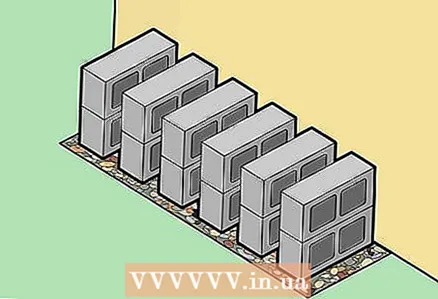 3 Place concrete blocks on top of the gravel, then place the catchment tanks on top of them. The completed platform should be wide and long enough to keep all of your tanks level and prevent them from toppling over.
Method 3 of 4: Faucet and Bypass Valve
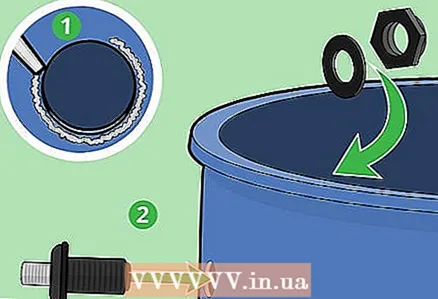
 1 Punch a hole for a drain in the side of your tank. The hole should be high enough to fit a bucket or pitcher to collect water. For the drain hose to fit accurately, the hole size should be about 2 cm.
 - This is the standard size for a drain pipe, but if your pipe is of a different diameter, make sure the hole in the tank matches it exactly.
 2 Seal the hole with a silicon gasket, inside and out.
 3 Connect the water tap. Connect it to the screed. Use Teflon tape to bond them tightly and avoid leaks. Place the O-ring on the threaded end and thread through the hole from the outside. Slip on another O-ring from the inside. Connect the grommet to hold the tap firmly in place.
 - Follow the instructions for connecting the water taps - they may vary depending on the type and model.
 4 Install the float valve. Punch a second hole a few centimeters from the top of the tank. The hole should be about the same size as the first one. Install the O-ring inside and out. Place an insulating gasket on the hose connector and thread it through the hole from the outside. Place another gasket on the male threads, apply Teflon tape, and tighten the nut lock to secure the structure.
 - If you have a second tank, you can use it as a spare container if the first tank overflows. Punch a third hole in the first tank and then make the same hole in the second tank. Connect the hose connections to the openings in both tanks following the instructions above.
- If you are connecting a third tank to the system, you will need to make a hole in the second tank to connect it to the third. The second valve should be flush with the valve on the first tank.
Method 4 of 4: Build
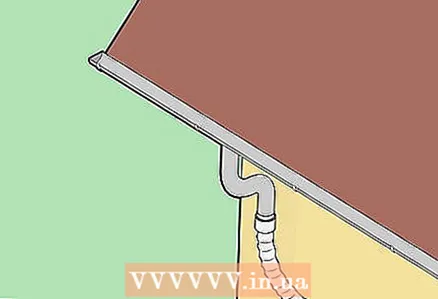 1 Connect the bottom of the downpipe. Place the tank under the drain so that the pipe can be easily connected. Make a mark on the drain pipe 2 cm below the tank level. Connect a hose to the tank to drain the water directly inside. Saw the downpipe at the mark. Place the pipe elbow into the hole in the tank and fasten firmly.
 - Make sure the downpipe extends deep enough into the tank so that water does not spill out.
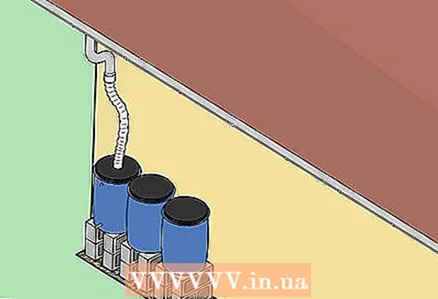 2 Connect the tank to the pipe elbow. If the tank has a lid, make a hole to fit the downpipe into the tank. Cover the hole around the edges with a metal shield.
 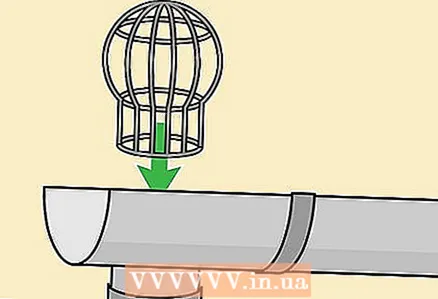 3 Place the filter on top of the downpipe. This will prevent leaves and other debris from entering the system.
 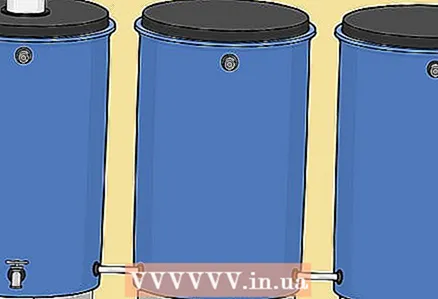 4 Connect additional tanks. You can connect them using hoses and valves.
Tips
- You can place a screen or special "louvers" on top of the downpipe to repel leaves and other debris and allow water to flow through.
- Make sure that the downpipes are not clogged. Especially beware of maple seeds - they can clog even the best pipes.
- Plastic pipe connections are the most durable.
- You can find free used tanks on specialized exchange sites, car washes, farms, or hardware stores.
- This water is not potable, but it is the same water used to naturally irrigate your lawn. If you want to use water in food, boil it to kill all bacteria, viruses, and parasites. After cooling to room temperature, pour water into a filter container (some brands: Brita, Culligan, and Pur). This will filter out metals and chemicals to make the water food-safe. You can also use a still to purify the water and make it drinkable.
Warnings
- Water collected from roof gutters will also contain chemicals in the roof covering.
- Many parts of the world experience "acid rain". Rainwater contains sulfur compounds that are released from sulfuric acids and burnt coal. The concentration of hydrogen ions in the rain rises after the first 5 minutes, and the molarity of acidic water is quite low.
- Check if the collection and reuse of water is permitted in your area.
- Never use water in your drink without pre-cleaning it (according to the instructions above). However, water can be used for watering flowers, washing and washing.


