Author:
Alice Brown
Date Of Creation:
24 May 2021
Update Date:
23 June 2024
Content
- Steps
- Part 1 of 3: Planning
- Part 2 of 3: Getting Started
- Part 3 of 3: Installing roof tiles
- Warnings
- What do you need
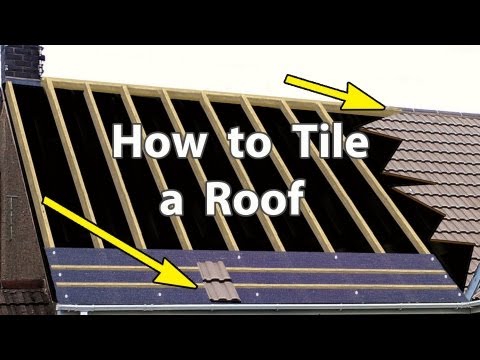
Installation of roofing tiles is a rather complicated and time-consuming process. Such a project requires comprehensive planning and preparation even before the actual work begins. Regardless of whether you are replacing damaged tiles or installing new ones, it is very important to use the correct installation technology.This article will help you to properly install roofing tiles.
Steps
Part 1 of 3: Planning
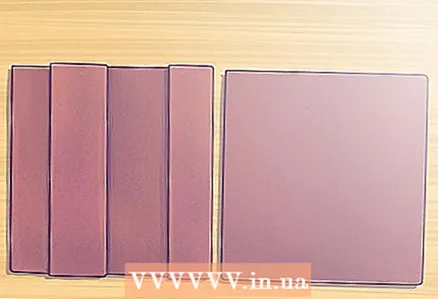 1 Decide on the type of shingles. There are many different types of shingles to choose from to suit your climate. It is equally important to decide whether you will use clay or concrete tiles (both types have different climatic performances). There are significant differences between the two, so take your choice seriously.
 - Clay or ceramic tiles are considered one of the most durable roofing materials, surpassing even concrete tiles in terms of service life. If concrete shingles can last about 30-50 years under normal conditions, then a clay roof under similar conditions does not require replacement even up to 100 years.
- For this reason, ceramic tiles are more expensive (although both options are not cheap). The difference in price is clearly seen in the following example: the cost of covering the most standard house with a roof area of 140 square meters with concrete tiles. meters will be from 6,000 to 15,000 dollars, while clay tiles for a similar roof will cost 10,500-45,000 dollars.
- Finally, concrete tiles fade faster than ceramic tiles. The roof is built for more than one decade, so it is better to take care of its appearance in advance.
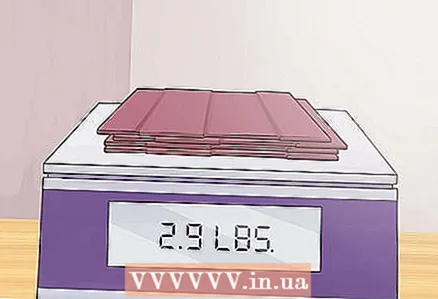 2 Consider weight. In simple terms, ordinary bituminous roofing tiles (the most common roofing material in the United States) exert a pressure of no more than 13.5 kg per square meter. meter. Concrete tiles, which are lighter than clay tiles, exert a pressure of 45 kg per square meter. meter. If such shingles are installed on a roof that are not designed for the given weight, they may simply collapse. In this case, it is required to inspect the roof and, if necessary, increase the strength of the structure.
  3 List the required tools and materials. Some of them can be found in any household (for example, a ladder), while others have a fairly narrow scope. For example:
 - Roofing nails are nails that have an outer plastic cap to cover the nail holes and prevent leakage.
- Lining or waterproofing. It is a waterproof layer between the shingles and the cladding truss. There are various options available on the market, but since our roof must last 30-100 years, it is better to invest in a material that is strong enough.
- External embossing or sealant. There are a large number of embossings or sealants for outdoor use, but again, it is recommended to use a particularly durable and high-quality product. A roof like this will last your whole life, provided that all materials match.
 4 Make an estimate of materials. The first important starting point will be roof measurements. You can use this calculator to determine the size of the roof (do not use the Tile Calculator as it is for calculating floor tiles).
 - Without accurate information about the selected type of material, it is impossible to calculate the required amount of tiles. For a roof area of 10 sq. meters, 75 to 400 shingles may be required (see page 5 of this manual for more information).
 5 Work execution time. If you are going to change the shingles on a long-built house, then it is necessary to take into account the weather factor and the time of such work. In addition to the obvious things, such as the fact that you will not change the shingles in winter, it is also advisable to choose days without precipitation. Keep an eye on long-term weather forecasts (remembering that they also change). Also, take care of a sufficient number of working hands so as not to stretch this task for a long time. This work is not for one person, which should also be taken into account in your plans.
  6 Purchase the necessary tools and materials. When purchasing materials, ask the questions you are interested in to consultants of building stores.They can tell you which materials are in greatest demand and which customers have complained about.
Part 2 of 3: Getting Started
 1 Removing the old roof covering. This is a rather laborious job that requires special tools. Prepare to spend a considerable amount of time.
 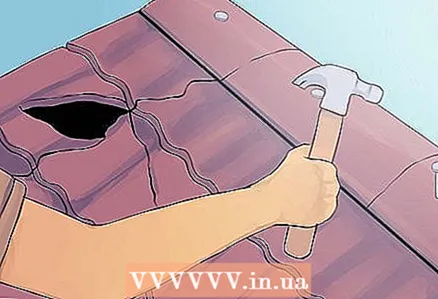 2 Roof repair and structural reinforcement. It is better to reinforce the roof before removing the cover. Even then, the sheathing (the layer of wood or other material covering the gaps between the truss openings and the outer layers of the roof) may be damaged or weakened.
 - Don't forget about the weight of the roof. The usual and inexpensive shingle roof, which covers many houses, is lightweight; if you decide to change such a roof to shingles, then the difference in weight will be significant. For an average house with a roof area of 140 sq. meters, the total weight of the lining and tiles will be about 8 tons. It's heavier than two large SUVs parked on the roof of your house.
 3 Installation of waterproofing.
- Place the first roll of liner on one side of the roof perpendicular to the bottom edge (cornice). When rolling out the lining, make sure that the bottom edge of the material matches the edge of the eaves, but is above a metal or synthetic edging that may cover the edges of the eaves.
- Secure the lining. Unwind the lengths of 3 meters at a time and secure them with nails at a distance of 60 cm from each other. The nails should be no closer than 5 cm from the edge of the roof.
- When you reach the edge of the roof, cut the lining straight along the edge. Secure the edge with nails.
- Return to the edge of the roof where you started. Roll out the overlap so that the new layer partially covers the one already laid. Lines may be drawn on the lining to indicate the exact size of the overlap. Guided by the top line on the already laid segment, as before you adhered to the edge of the cornice.
 4 Avoid obstacles. Elements protruding from the roof, such as chimneys, also need to be repaired. Around the chimneys, metal linings should be used, which must be sealed with embossing or other sealant intended for outdoor use. Around such obstacles, the lining is cut in place, after which an additional layer of material (for example, the remaining pieces of the lining material) is laid and fixed at the points of convergence of the lining and lining.
Part 3 of 3: Installing roof tiles
 1 Installing battens. If the roof has a steep slope, then battens may be required to secure the shingles. Battens are thin strips of material (usually wood, but sometimes metal or plastic 25 mm thick and 50 mm wide) that are laid horizontally along the length of the roof. Often, shingles have a tongue or ridge that engages them with the battens (as you can see, this is another factor to consider when choosing a shingle). In addition, there are special brackets for attaching tiles to battens (see page 4 of this document)
 - Determine the required distance between battens using two shingles. The minimum overlap for non-meshing shingles (sheet piling saves you the need for such calculations) is 75 mm, and the overhang above the eaves should be slightly less. These factors must be taken into account when determining the location of the battens (see page 8 of this document).
- Having determined the distance between the first two battens, measure the distance and place the battens all over the roof, remembering to double-check the measurements.
 2 Laying tiles. Start on one side and work your way up the length of the roof.
 - If you have not installed battens, then the shingles can be nailed directly to the sheathing.
- If you have installed battens, then nail the shingles to them. You can also fix the tiles to the battens using staples.
- When using tightly hooked sheet pile shingles, it may not be necessary to nail the entire shingles to the sheathing or battens; read the installation instructions carefully.
 3 Trim shingles to size. On the way, you will come across obstacles such as a chimney, which must be avoided by trimming the tiles. In addition, you will almost certainly have to trim the last shingles in each row.
 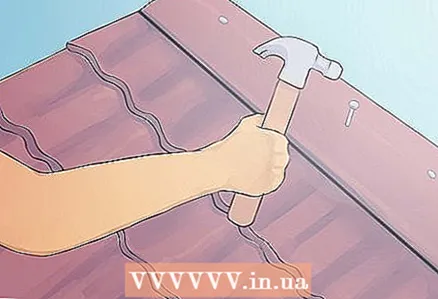 4 Installation of ridge tiles. After the completion of the main platform (wide roof surface), it will be necessary to cover the skates with special ridge tiles. They are rounded and, depending on the design, are stacked end-to-end or overlapping. This is the last step in the shingles installation process. Congratulations on your successful installation!
Warnings
- Roofing tiles contain crystalline silica, which can cause cancer. Inhalation of silica dust may occur when trimming or sanding tiles. To prevent this from happening, wear appropriate personal protective equipment while working.
- Use a ladder or scaffolding that is rated for your weight. Failure to do so may result in injury or even death. Do not use ladders or scaffolding that you are unsure of.
- If you find significant damage to the roof or are in doubt about any part of the work, seek the assistance of an experienced roofer.
What do you need
- Ladder or scaffolding
- Durable gloves and eye protection
- Staples
- Shingles
- Nails
- Roofing board (optional)
- A hammer
- Pry bar
- Metal scissors (nippers)


")