Author:
Gregory Harris
Date Of Creation:
15 August 2021
Update Date:
1 July 2024
Content
The creation of partitions or partitions is necessary so that the information stored on the hard disk is stored separately, on different partitions. An operating system, for example, is best installed on a separate disk, a separate partition. Then the computer will work better and faster.
Steps
 1 Open the Start Menu. Type Computer Management. Open the program.
 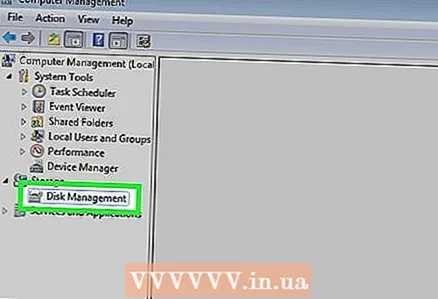 2 Go to the Disk Management tab. It's in the left pane. All disks and partitions are displayed here.
 - In our example, there is 1 disk with two partitions.
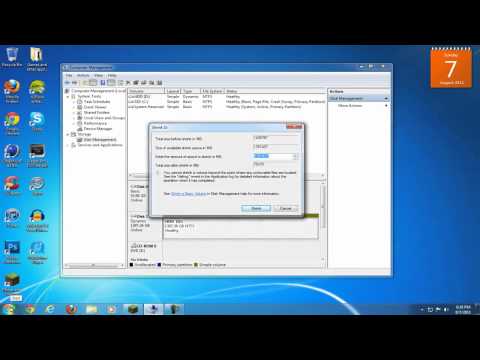
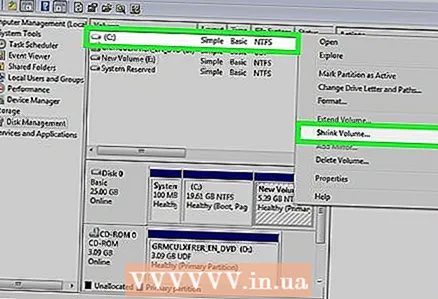 3 Free up some space for the new partition. Right-click on a section. Click on Shrink volume.
- In the example, we are shrinking the section (C :).
- Note: You may have a section called System reserve (System Reserved). You don't need to touch it at all.
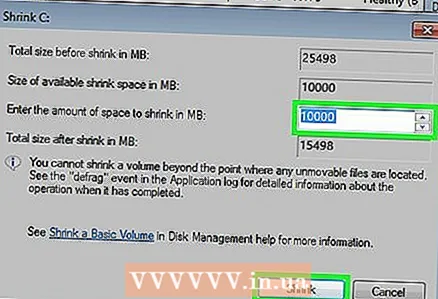 4 Click the Shrink volume option. Enter the desired size of the new partition in megabytes (1000 MB = 1GB). Click on Shrink.
 - In our example, we are shrinking the partition to 10,000 MB or 10 GB.
- Note: The partition cannot be shrunk by more MB than specified in the field Compressed Space (MB).
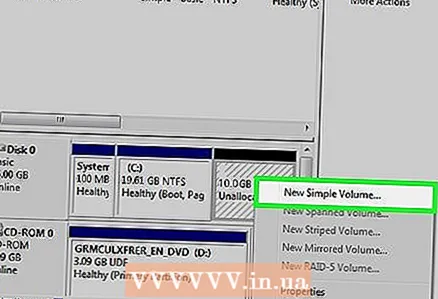 5 Create a new section. Now the new partition will appear in the Computer Management window, in the Disk Management tab. Click on space Not allocated right-click it and select Create Simple Volume.
 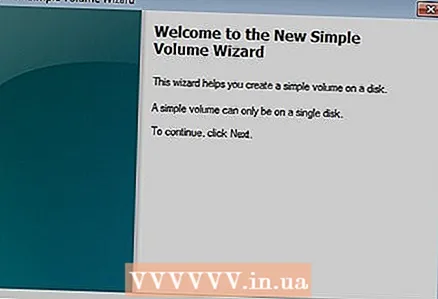 6 The Create Simple Volume Wizard will open. Click Next.
  7 Enter the size of the new volume. Click Next.
 - In our example, we create a new partition as large as possible using the maximum available free space.
- Note: The new volume cannot be larger than the maximum amount of available free space.
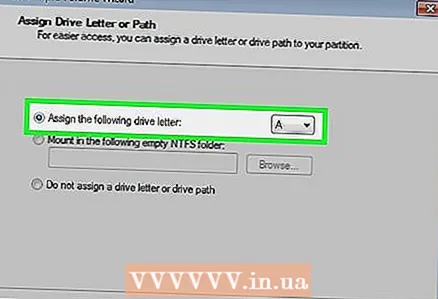 8 Select a new name or letter for the new volume. Select a name and click Next.
 - In our example, we selected the letter (E :).
- The letter is the name of the section that must be specified when specifying the path to the file.
 9 Set up a new partition.
- Click Format Partition after selecting the desired file system settings, etc.
- As File system choose NTFS
- IN Cluster size put the option Default
- IN Volume label write a name for the new section.
- Check the box next to Quick format
- Push Further
 10 We create a new volume. Push Ready.
 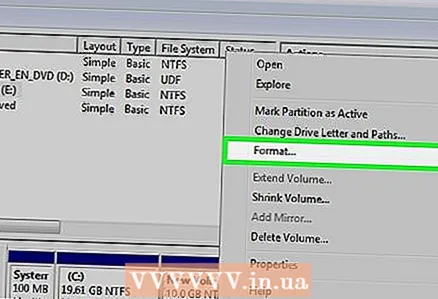 11 We are waiting for the formatting to complete.
- A new window will appear where you can select the option to format the new partition. Click on Format.
- A new window will appear. Click on Start.
- A warning window will appear. Click on OK.
- A new window will appear where you can select the option to format the new partition. Click on Format.
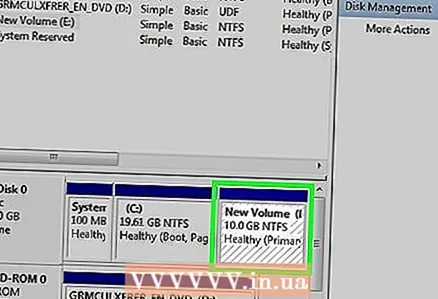 12 Check out the new section. If everything works well, a new partition will appear in the Disk Management tab.
Warnings
- Before creating a new size, copy all the data you need from the disk so that it does not disappear or get damaged.


