Author:
Eric Farmer
Date Of Creation:
10 March 2021
Update Date:
1 July 2024
Content
This article will show you how to create simple macros for Excel spreadsheets.
Steps
Part 1 of 3: Enabling Macros
 1 Open Excel. The process for enabling macros in Excel 2010, 2013, and 2016 is identical. There is a slight difference in Excel for Mac, which will be detailed below.
 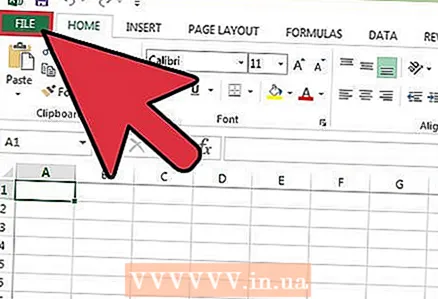 2 Click the File tab.
- In Excel for Mac, click the Excel menu.
 3 Click on Options.
- In Excel for Mac, choose the Options menu.
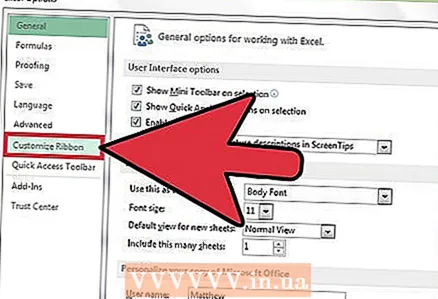 4 Select the Customize Ribbon section.
- In Excel for Mac, select the Ribbon & Toolbar under the Content Tools category.
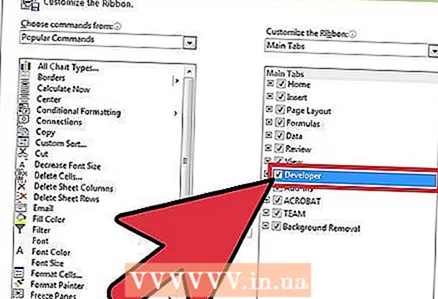 5 Check Developer in the right column.
- In Excel for Mac, find Developer in the Tab or Group Title list.
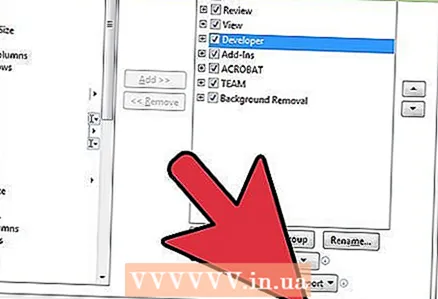 6 Click OK. The Developer tab will appear at the end of the list of tabs.
Part 2 of 3: Recording a Macro
 1 Remember the sequence of macros. During the recording of the macro, any of your pressings and actions will be recorded, so one mistake can ruin everything. Walk through the commands you are going to write down a couple of times so you can repeat them without hesitation or confusion.
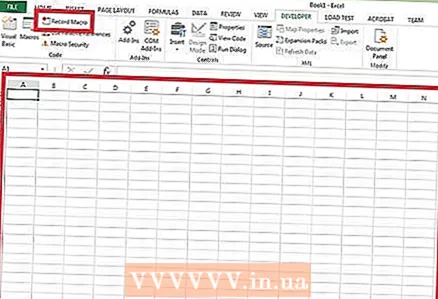
  2 Go to the "Developer" tab.
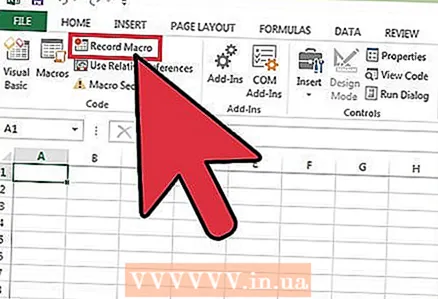 3 Click on Record Macro in the Code section of the ribbon. Or press Alt+T+M+Rto run a new macro (Windows only).
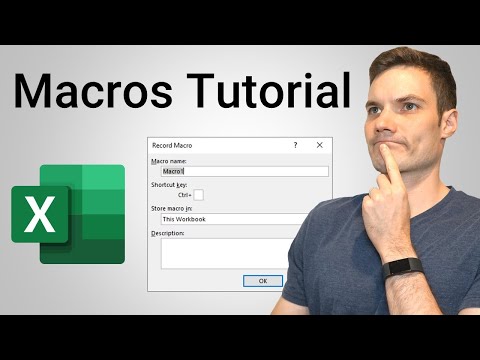
 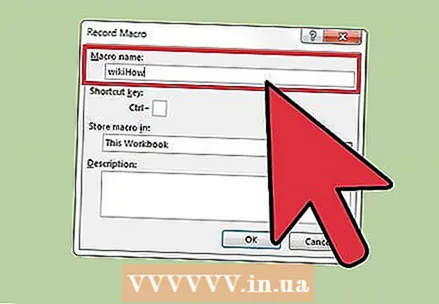 4 Give the macro a name. Make sure you can easily identify it, especially if you are going to create multiple macros.
 - Add a description of what the macro should do.
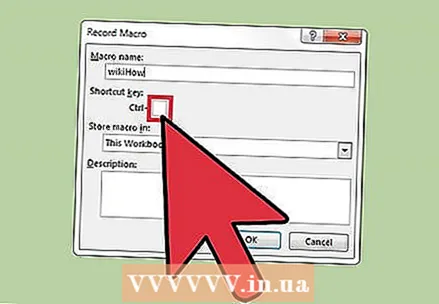 5 Click on the Shortcut keys box. To quickly run a macro, assign a keyboard shortcut to it. You can skip this step.
  6 Click on ⇧ Shift+key. This will assign the keyboard shortcut Ctrl+⇧ Shift+key to run the macro.
 - On a Mac, the combination will look like this: ⌥ Opt+⌘ Command+key.
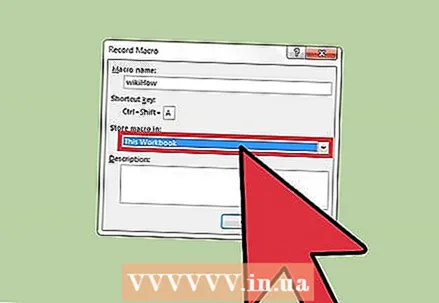 7 Click on the Save to menu.
 8 Choose where to save the macro. If you plan to use the macro only for the current table, leave this book value. If you want the macro to be available for the entire spreadsheet you are working on, select Personal Macro Book.
 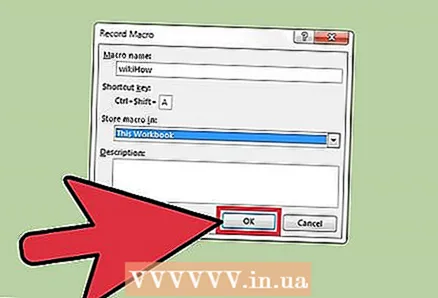 9 Click OK to start recording the macro.
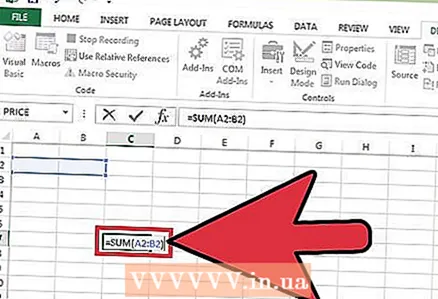 10 Execute the commands you want to record. Almost all your actions will be recorded and added to the macro. For example, if you sum cells A2 and B2 in cell C7, running the macro will sum A2 and B2 and display the results in C7.
 - Macros can be very complex and can even open other Office programs. When you record a macro, almost anything you do in Excel is captured in the macro.
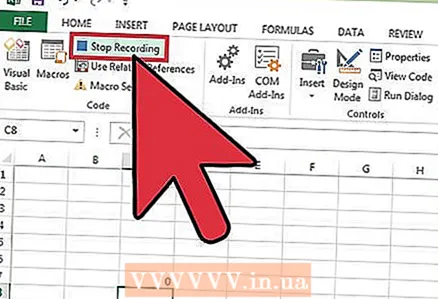 11 When you're done with the macro, click Stop Recording. This will stop recording the macro and save it.
 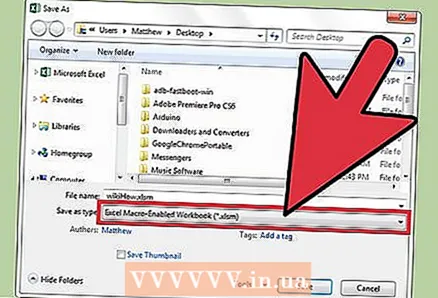 12 Save the file in a macro-enabled format. To save macros, you need to save the workbook in Excel format with macro support:
 - open the "File" menu and select "Save";
- under the "File name" field, click on "File type";
- select Excel Macro-Enabled Workbook.
Part 3 of 3: Running a Macro
 1 Open the macro-enabled workbook file. If you closed the file before running the macro, you will be prompted to enable it.
 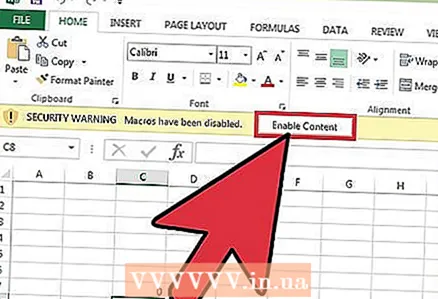 2 Click the Enable Content button. It will appear in the security notification bar at the top of the Excel spreadsheet every time you open a macro-enabled workbook. Since you created this file yourself, you have no reason not to trust it, but beware of opening macro-enabled files from any other source.
  3 Press the key combination to run the macro. If you need to quickly run your macro, repeat the keyboard shortcut you created for it.
 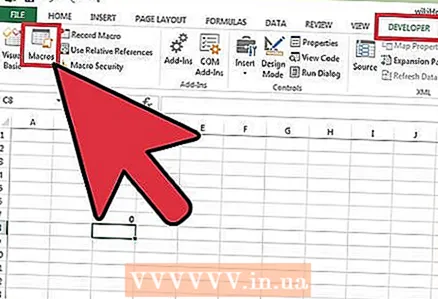 4 Click on the Macros button on the Developer tab. All macros available in the current spreadsheet are located here.
 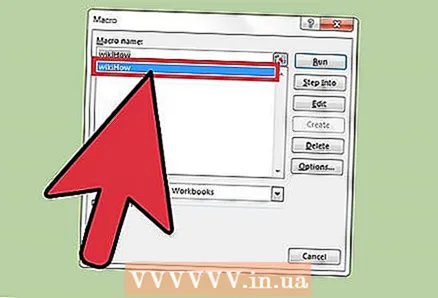 5 Click on the macro you want to run.
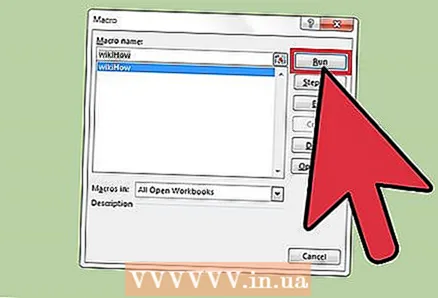 6 Click on the Run button. The macro will execute in the currently selected cell.
 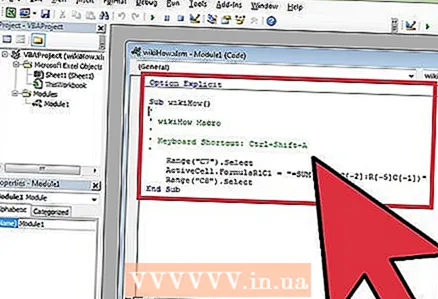 7 Review the macro code. If you want to learn more about how the macro code works, open the code of any macro you create and experiment with it:
 - click on the "Macros" button on the "Developer" tab;
- select the macro you want to view;
- click the "Change" button;
- view the macro code in the Visual Basic Code Editor window.


