Author:
Carl Weaver
Date Of Creation:
24 February 2021
Update Date:
1 July 2024
Content
- Steps
- Method 1 of 2: Setting up a shelter
- Method 2 of 2: How to adapt the shelter to different conditions
- Tips
- What do you need
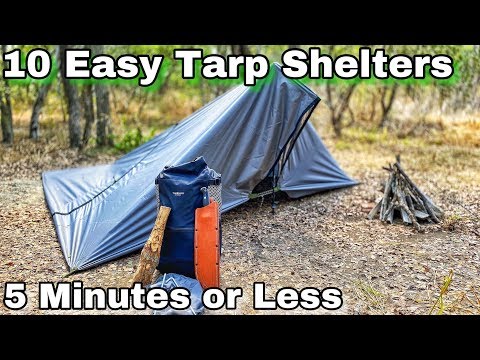
Tarpaulin shelters can be cheaper, lighter, and easier to set up than traditional tents, making them ideal for many campers.Once you have learned the basic skills needed to set up a tarp shelter, you can have fun coming up with different shelter modifications to suit your situation. And of course, after a long day's hike, there is nothing more enjoyable than resting and relaxing in a safe, sturdy hiding place!
Steps
Method 1 of 2: Setting up a shelter
 1 Choose a suitable campsite. Ideally, you want a flat, smooth, large enough space to accommodate all your friends. There should be two trees nearby, standing 3-9.1 m apart, depending on the length of your cord or rope.
 - When setting up camp, consider weather conditions and safety concerns before choosing a hiding place. If it can rain, you should, if possible, avoid places where water can accumulate. If strong winds are expected, look for an area that is protected from the gust of wind. Never camp near dead, unstable trees, in a floodplain, or under a large lone tree that may be struck by lightning.

- If you are in an area where there are not enough suitable trees, you can create your canopy using poles or poles while waiting for the base frame to be created.

- When setting up camp, consider weather conditions and safety concerns before choosing a hiding place. If it can rain, you should, if possible, avoid places where water can accumulate. If strong winds are expected, look for an area that is protected from the gust of wind. Never camp near dead, unstable trees, in a floodplain, or under a large lone tree that may be struck by lightning.
 2 Make a frame for the shelter.
- First, tie one end of the rope around one of the trees using a harness knot. It should be about shoulder height or slightly higher.

- Tie the other end of the rope around the other tree at the same height using the truck trailer attachment to make the line as tight as possible. The tighter you make the frame, the more stable the tarpaulin shelter will be.

- First, tie one end of the rope around one of the trees using a harness knot. It should be about shoulder height or slightly higher.
 3 Attach the tarp to the frame. Most tarpaulins have bushings or loops that you can use to tie them together. Small pieces of parachute cord, sometimes known as a P-cord or parachute cord, are ideal for this. Length should be 25-50 "(60-125 cm) or more.
 - Place the tarp in the center of the frame.

- Use the harness knot to tie one end of the P-cable to the grommet or loop on the edge of the tarp just above the frame.

- Use the other end of the P-cord to attach the tarp to the frame using a knot called a simple bayonet. This will allow you to place the tarp where you want on the frame line and is useful if you want to install multiple tarp pieces on the same frame.

- Tie both sides of the tarp to the base and make sure it is securely fastened.

- Place the tarp in the center of the frame.
 4 Attach loops to the corners and edges of the tarp for anchoring to the ground. As in the previous step, tie one end of a piece of P-string to each location on the corners of the tarp you want to secure, as well as three locations along the outer edges.
 - Use a "simple bayonet" to tie the other end of the P-cord to the same, making a loop in the cord. You can then slide the device up or down the cord, or squeeze the loop.

- Use a "simple bayonet" to tie the other end of the P-cord to the same, making a loop in the cord. You can then slide the device up or down the cord, or squeeze the loop.
 5 Attach the tarp to the ground by driving a stake through each P-cord into the ground, making sure the rope is tight.
- The corners of the tarp should be placed at approximately 45 degrees.

- Try to keep the tarp stretched evenly without creases or wrinkles.

- It may be helpful to reinforce each corner and tighten them so that the tarp remains in the center of the frame.

- You can also tighten or loosen the lines to the stakes by moving the device up or down to adjust the P-cord loop. This works well if you need to slightly adjust the position of the awning.

- If you don't have tent stakes, you can secure the loop with a large rock or fallen branch, or tie the P-cord to surrounding trees, rocks, etc. (not necessarily on the ground).

- The corners of the tarp should be placed at approximately 45 degrees.
 6 Place a second tarp on the ground underneath the first and your home is ready!
Method 2 of 2: How to adapt the shelter to different conditions
 1 Adjust your shelter to suit the weather. The main advantage of the tarpaulin canopy is that you can easily change the design according to the environmental conditions.
 - For warm weather: Use a taller frame and insert the stakes further away from the tarp so that they are higher from the ground. This encourages airflow into the shelter, making it much more comfortable in hot weather. If you have a square piece of tarp, you can place it diagonally above the frame. If you are using a rectangular tarp, you can place it along the line of the frame to make it more open.

- In windy weather: Be sure to position the cover so that one side of the tarp is in the path of the wind, preventing it from entering the cover. Set the frame slightly lower and drive the leeward stakes close to the surface to protect you as much as possible. It wouldn't hurt to double the cable line, too, when you batten down hatches.

- In rainy weather: Use a frame and stakes on all sides of the tarp, as close to the ground as possible.

- For warm weather: Use a taller frame and insert the stakes further away from the tarp so that they are higher from the ground. This encourages airflow into the shelter, making it much more comfortable in hot weather. If you have a square piece of tarp, you can place it diagonally above the frame. If you are using a rectangular tarp, you can place it along the line of the frame to make it more open.
 2 Experiment with tarp bindings by placing the rope base off the center of the tarp. This will create a distinct style of cover that can, for example, provide much more shade on a hot day.
  3 Explore the natural environment around your camp, you may be able to create an unusual, interesting and more comfortable hideout.
 4 Use two poles or sticks to build your shelter without using a rope base. When there are no suitable trees around, place sticks around the edges of your hiding place and make sure to set them up and secure them well.
 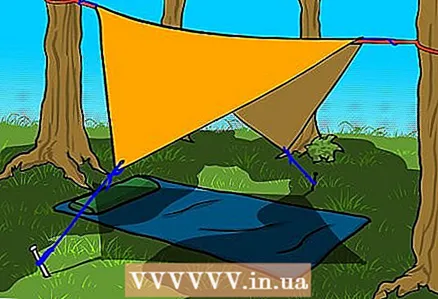 5 All is ready.
Tips
- If the tarp does not have a loop to tie the P-cord, or if the loop is broken, do not punch a hole in the tarp, this could damage the tarp. Instead, find a small rock and wrap a piece of tarp around it so there is a slight bulge where you want to attach the ropes around the edges. Tie a P-cord around the edge.
- Wind, rain and other factors can weaken the base ropes and thus compromise the stability of your tarpaulin, so be prepared to make adjustments as needed.
What do you need
- Thick, durable tarpaulin
- Base fabric (optional but recommended)
- Strong rope or cord - 20 '(6m) or more - for the base
- Parachute cord (P-cord / paracord / 550 cord) or similar - up to 20 pieces 2'-3 '(1M) or more
- Tent stakes or wood branches
- Ski poles or similar poles (optional) - instead of trees


