
Content
- Steps
- Part 1 of 4: Assembling and Setting Up the Tent
- Part 2 of 4: Tent Disassembly and Packing
- Part 3 of 4: Preparing well for the hike
- Part 4 of 4: Choosing a Suitable Camping Site
- Tips
- Warnings
Camping hikes with tents are a great summer pastime. Staying in a tent for several days allows a person to relax well and reconnect with nature. Despite the fact that the hikes themselves are quite interesting, setting up a tent can sometimes be a rather laborious task, especially when you are just starting to master the basics of such tourism. It may seem difficult at first, but most modern tents are simple and easy to set up. Despite the fact that the process of setting up a tent itself is not at all complicated, setting up a tent camp, it is necessary to keep in mind a lot of additional nuances for outdoor recreation to be successful. Proper preparation for the hike and choosing the right place to pitch your tent is just as important as knowing how to assemble it.
Steps
Part 1 of 4: Assembling and Setting Up the Tent
 1 Unpack your tent. After choosing a suitable location for your campground, you can start unpacking your tent. It is best to unpack all the tent components at once. You will quickly assemble the tent if you do not have to consistently unpack the parts that you need in the process of work. Put all the details in one place so you don't lose anything. The specific set of tent elements will depend on the type of tent. Below are the different tent options.
 - A-shaped tents are the most common type of single person tents. They are the easiest to assemble, but often require an additional weather awning over them to protect against rain and wind.
- Tunnel tents differ from A-shaped tents in that they have a frame of a pair of long arcs running parallel to each other and across the width of the tent itself. This design increases the inside of the tent and provides more space at the top of the tent. However, tunnel tents are not as stable in strong winds.
- Domed frame tents are usually the largest and are designed to accommodate larger tourist groups. Despite the large size, it is quite easy to set up such tents.
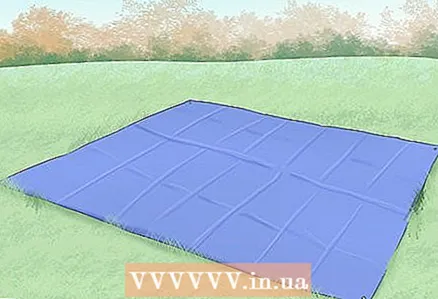 2 Spread out your tent mat on the ground. Regardless of how clean your tent site is, there may be branches and other debris on it that can pierce the bottom of the tent and cause you discomfort.The mat should be large enough to cover most of the area the tent will be on. The extra softness of the mat will provide you with a more comfortable stay.
  3 Insert the bobbins into the drawstrings and pockets of the tent. Having unpacked all the tent parts, you can start assembling the frame. First, stretch the tent itself on the ground (or an outer awning, depending on which part of the tent is mounted on the frame). This will keep you from getting confused about which wireframe to insert where. This stage of work usually takes the most time, but everything is simple enough.
 - In the case of a tunnel tent, make sure you insert the boom bars parallel to each other.
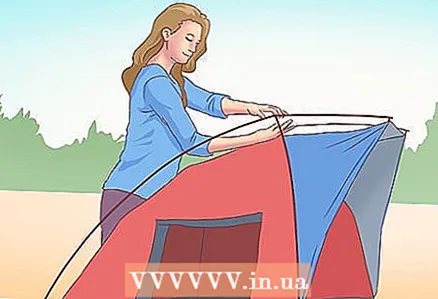
 4 Raise the tent on the frame. If the tent poles are split, make sure they do not open anywhere. They will keep your tent on them. Help the tent to get into the correct shape by lifting the center of the tent and straightening the canvas on the arcs. After these steps, the frame arches usually support the shape of the tent by themselves. Otherwise, adjust and secure the frame as required by the structure of the tent.
 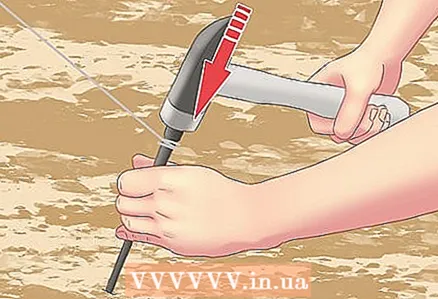 5 Use pegs and guy ropes to secure the tent to the ground. Use a hammer or a suitable stone to hammer the pegs into the ground around the tent. Stretchers attached to the pegs stabilize the tent canvas and prevent it from moving. If for some reason you did not have any mounting pegs with you, you can use strong sticks instead, driving them into the ground in the same way and fastening the stretch marks to them. SPECIALIST'S ADVICE
Halle payne
Songwriter and singer Halle Payne began writing songs at the age of 8. She has composed hundreds of songs for guitar and piano, some of which are recorded and available on her Soundcloud or YouTube channel. She was recently a member of a 15-member group in Stockholm, Sweden called Skål Sisters. Halle payne
Songwriter and performer“I usually use a stone for this purpose. However, be careful - don't get caught by them! If the soil is soft, it may be enough to press down on the pegs with your hand or foot.
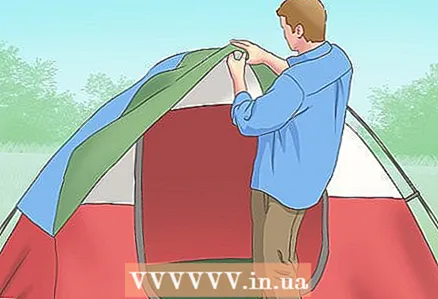
 6 Place a weather awning over the tent. It is important to remember that the tent itself (its inner part) usually does not have moisture protection. The weather awning is responsible for this. The weather awning is the second additional layer of the tent. Usually it is fastened to the top of the tent with snaps and fastened to the braces with some gap from the canvas of the tent. Even if you are sure that it will not rain, it is still better to install a weather awning. This way you will be prepared for a sudden rain without losing the individual tent elements. Keep in mind that in some cases it is the upper tent of the tent that is equipped with a frame, and the tent itself is attached to the tent from the inside (therefore, the order of work with these elements depends on the tent model).
  7 Move all your belongings to the tent. After setting up the tent, you can start arranging its interior space. Since there is usually not much space inside, it is necessary to decide which things are safe to leave in the open, and which ones are better to bring inside. Obviously mats and sleeping bags should be placed inside. Sealed containers with things and food can be left outside.
 - If there is a risk of encountering bears where you set up your tent, it is highly discouraged to bring food into the tent. If a bear appears, no one wants him to break in in search of food, the smell of which he smelled.
Halle payne
Songwriter and singer Halle Payne began writing songs at the age of 8. She has composed hundreds of songs for guitar and piano, some of which are recorded and available on her Soundcloud or YouTube channel. She was recently a member of a 15-member group in Stockholm, Sweden called Skål Sisters. Halle payne
Songwriter and performerTo prevent things from getting wet, put them in the tent. “If the rain and wind cover is securely installed and secured on both sides, your gear is safe in the event of rain. I was taught this: when you leave the camp, make sure that your tent will survive any storm. "
Part 2 of 4: Tent Disassembly and Packing
 1 While living in a tent, keep it clean. Taking care of cleanliness is important even when you live in a tent. This will make it easier to clean up after yourself, and it will be more pleasant to live clean. Be sure to take off your shoes when you climb into the tent. Make sure that the inside is always tidy and properly dispose of food debris.
 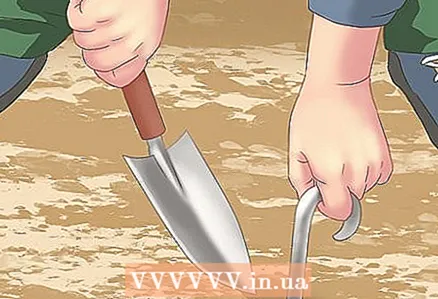 2 Pull the pegs out of the ground. Usually the pegs are pulled out quite easily, and this must be done before the main disassembly of the tent. If you are having trouble manually pulling out a peg, try digging in a little to get it out of the ground.
 - Also, among the first, you should remove the frameless tent parts (depending on the design, this can be either a weather awning or an inner tent).
 3 Remove the wireframe arcs. After removing the mounting pegs, remove the framing pockets from the fixing pockets. Do this with all their ends (the number of which will depend on the number of arches in a particular tent), and only then proceed to extracting arches from your curtains. This will prevent the tent from tipping over due to uneven disassembly.
 - Pull out the bows slowly. Even the best quality tents can be damaged if not careful.
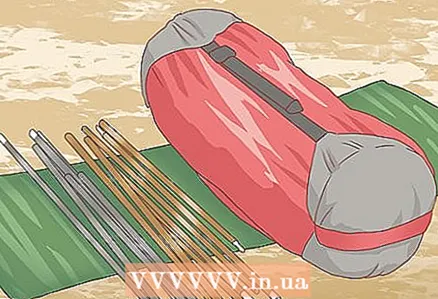 4 Fold all tent elements into one place. When removing the pegs and folding the awning with the frame arches, try to put them in one place. It is generally accepted to store a tent with all its elements in one place (a separate bag), but it is especially important not to forget about this when you turn off your camp. You cannot leave the parking lot without taking all the necessary parts with you.
 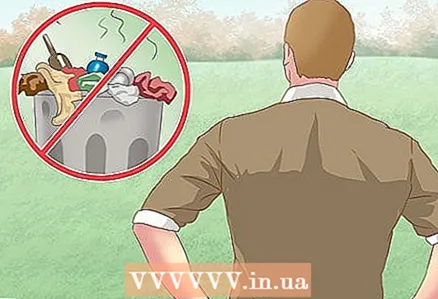 5 Take a look around the parking lot to make sure you haven't forgotten anything. When the camp is already assembled, at the last minute you need to take another look around the camp and make sure that you have not accidentally left anything behind or forgotten. Including, you should not leave trash behind. After you, the parking lot should look the same or even better than it did before you arrived.
 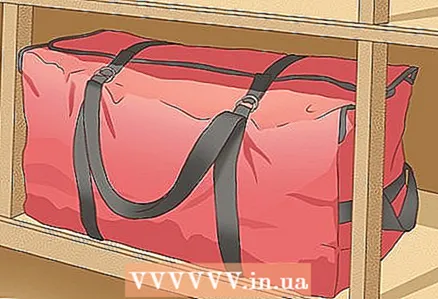 6 Store your tent in a dry place. After returning home, you need to store the tent in a dry place. If during storage the tent becomes covered with moisture and mold, then its canvas will rot over time and it will become unsuitable for further use.
Part 3 of 4: Preparing well for the hike
 1 Purchase a tent that fits your exact needs. There are many different types and sizes of tents on sale. Some are designed for just one or two people, while others are spacious enough to even accommodate tables and chairs inside. If you are purchasing a tent for individual use, it is better to opt for a small model. Larger tents are more difficult to carry and usually take longer to assemble and disassemble.
 - The tent packaging usually indicates the recommended maximum number of people to be accommodated inside. Use this parameter to roughly estimate the size of the tent (in case of emergency, often one additional person can fit in the tent).
- Do not try to save money and get a tent of the model that is on sale at a discount. While you will save initially, it will likely wear out quickly and will not provide you with as good weather protection as other higher quality models.Remember that the tent will serve as your home on all your hikes, so it is wise to spend a little more on it and get a model that has at least the important basic characteristics.
 2 Conduct a practice tent assembly. Basically, the actual camping trip should be as hassle-free as possible. However, it may take some time for you to understand how to handle your new tent when you set it up. Taking this into account, it will be useful even before the hike to practice assembling the tent somewhere in your private yard or even in the spacious hall of your apartment. This way you will be able to deal with all the complexities of the installation process, and in the field you will no longer have to worry about the time of assembling the tent and doubt whether you will have a roof over your head at night.
 - You should also consider the possibility that sometimes certain parts are missing in the tents. If this is the manufacturer's fault, you will have the opportunity to exchange your tent even before the hike.
 3 Don't forget to pack and bring your first aid kit. Aside from the obvious things like food and clothing, it’s just as important to bring a first aid kit with you on the hike. This includes bandages, gauze wipes, over-the-counter pain relievers and antiseptic ointments. Although it is unlikely that serious injury is likely to occur, it is not uncommon for people to get minor scrapes and bruises in nature, so you should have everything you need to quickly heal wounds so that they do not negatively affect your hiking experience.
  4 Make sure you bring your supplies with you before leaving. In order not to regret later that you forgot something at home, it is better to check everything in advance. It is especially frustrating to find out at the parking lot that you are missing important details from the tent. Even if you are in a rush, take a few minutes to check that you have all the basic items.
 - It will be helpful to make a preliminary list of what you and your fellow hikers will need.
Part 4 of 4: Choosing a Suitable Camping Site
 1 Stay away from obvious threats. When choosing a potential camping site for your hike, it is important to look around and check for any hazards nearby. It is likely that you will be staying somewhere in the woods. If so, it will be helpful to know the details of the area in advance and become familiar with the potential hazards.
 - Broken trees hanging over the tent can be deadly if they fall. It's best to stay away from anything that doesn't inspire confidence and could potentially fall.
- Wasp hives can be another source of danger in the wild. If you notice a hive, try to get away from it too.
- The presence of a large amount of animal excrement suggests that you are on a busy animal trail. Although many wild animals will try not to get close to you, some predators (especially bears) may purposefully survey your camp.
 2 If there is a chance of rain, do not pitch your tent in low-lying areas. It is generally not recommended to arrange hikes in rainy weather, and even in good weather, just in case, it is better not to pitch a tent in low-lying places. If it rains, the water will drain to the lowlands and your camp could be flooded.
 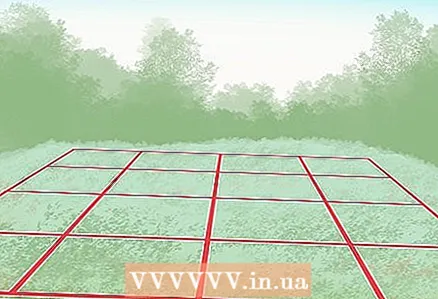 3 Choose a level area to pitch your tent. A level area is required to properly pitch your tent. Since you will sleep practically on the ground, the location chosen for the tent should be as level as possible. When looking for a suitable location, keep in mind the size of your tent and the location of your tent entrance. Having a steep slope in front of a tent is a great recipe for injury.
  4 Clear the area of debris. Having found a relatively level place, near which there are no obvious sources of danger, it is necessary to clear the area from debris, which creates irregularities and can damage the tent. With the obvious danger of glass under the bottom of the tent, you should also not underestimate the stones on which you simply will not be able to fall asleep if they are directly below you.
  5 Make sure your chosen anchorage site is not in the middle of a wildlife concentration. If you decide to stay in the forest, you must be prepared for possible encounters with wild animals. Despite the fact that most of them will bypass your camp by the side, bears carry the most important danger and a meeting with them can end in tears. The presence of a large amount of animal excrement can be a sign that you are on an animal trail. While you can never guess what you are going to encounter, it is wise to study information about the area you are going to, including whether or not bears are found there.
 - If there is a risk of encountering a bear, it is best to store food outside the tent. Thus, the bear will not need to break into the tent in search of food, the smell of which he smelled.
Tips
- The more often you pitch your tent, the easier it will be. In most cases, it is difficult only the very first time.
- It is best to pitch a tent for several people at once. This is especially important when setting up large tents.
Warnings
- Make sure you are allowed to pitch a tent in the area before setting up your camp.


