Author:
Joan Hall
Date Of Creation:
27 July 2021
Update Date:
1 July 2024

Content
- Steps
- Method 1 of 3: Create an Urban Emergency Evacuation Kit
- Method 2 of 3: storing your bag
- Method 3 of 3: Create a Plan
- Tips
- Warnings
- What do you need
Natural and man-made disasters can cause the evacuation of all office workers. In large cities, disasters can also affect public transport, forcing you to look for an alternative route to get home or get away from the disaster. In an emergency, you may be alone and act on your own.Put together a city emergency evacuation kit and keep it at work in case of an emergency so you are ready and safe.
Steps
Method 1 of 3: Create an Urban Emergency Evacuation Kit
 1 Find the right bag for you. Use a large, canvas, waterproof, multi-compartment backpack with padded shoulder straps. The hip belt will help distribute the weight and the backpack will be easier to carry over long distances. Since you don't use it every day, you can get an inexpensive backpack at a discount store, military surplus store, dollar store (all for one dollar), or even your local thrift store. Think functionality rather than fashion and style.
 - Attach a luggage tag with your name and contact information to your backpack. If possible, add some form of identification to the inside of your bag, such as your old work ID number. You can leave it behind a carry-on bag.
 2 Pack enough water and food. Water is hard to carry, but you need to have enough water. You will also need high-calorie snacks. Put at least one sealed bottle of water in your bag and add more if you can handle that weight. Make sure the container is sturdy, reusable and easy to open and close.
 - Pack Raisin Oat Bars, S.O.S. bars, or protein bars, which are high in calories and carbohydrates and can be stored for a long time. Food is needed not only for energy, it is also important for morale. Dried fruits are also an excellent option.
- Peanut butter (unless you're allergic to peanuts) comes in convenient tubes and is a great source of protein and doesn't need to be refrigerated or cooked.
 3 Pack reflective tape. Blackouts stopped many cities, forcing people to walk for miles. Cellular communication may not work everywhere or not at all. Subways may not work and vehicles get stuck in traffic jams due to inoperative traffic lights. Think ahead! Make a plan! Visit a fabric or sports store, or search online for reflective tape. Buy 1-3 meters to attach to your bag or other belongings as needed. It is usually sold in rolls with a width of about 3 cm or more.
 - Attach reflective tape to the outside of your backpack. Use fabric glue if you won't be sewing.
- Attach reflective tape to the back of the backpack and the front of the shoulder straps.
- Don't save tape. This will help you to be noticed by drivers and emergency workers.
 4 Pack a compact raincoat or cape. Choose a raincoat or cape made of a bright fabric, such as yellow, to make it easier to spot. This will protect you during long walks, provide cover, and if the raincoat is fitted with reflective tape, it will help you be seen by drivers and other people. You should attach reflective tape to it, as wearing a raincoat on top, you can use it to cover the tape on your backpack.
 - Pack your folded poncho into your backpack. If it doesn’t fold into itself (like many), then you can put it in a small purse so that it doesn’t get in your way.
- You can also tighten it with thick hair ties. They also come in handy for pulling up long hair during emergencies. (If hair gets in your eyes, it will obstruct your vision, in addition to irritation.)
 5 Pack a thermal blanket. You can buy mylar strips (called thermal blankets) at hardware stores or camping stores. They are large, lightweight, waterproof and extremely thin.They come in tight wraps the size of an elastic band and should remain in their packaging until you need to use them, as they are difficult to fold back after you open them. Since Mylar (polyester film) reflects heat, it can be used to retain body heat during extreme cold or to reflect it in hot conditions.
  6 Pack your whistle. It will make more noise with little effort than screaming while trapped. The higher the tone of the whistle, the better, as opposed to the voice.
  7 Pack a pair of athletic shoes. In an extreme situation, you may have to run or walk long distances in unpredictable conditions. It will be inconvenient for you to do this in heels or in work shoes made of hard leather. Your safety may depend on the speed and efficiency of your driving. Sports shoes are a must in a grab-and-run work kit. Do not take a new pair, it can rub, take a worn, but not quite worn out, if possible. Even a worn pair is better than boots or heels.
 - Most athletic shoes have reflective stripes, but you can add them. You should still have some tape left over from your backpack and raincoat.
 8 Pack your socks. Pack a pair of cotton athletic socks that will fit your athletic shoe in thickness. Avoid cropped socks, they will not protect your heels when walking long distances. Slip them into your shoes to save space and store them with your shoes.
 - Women who wear skirts and dresses can benefit from packing knee-high sports socks - knee-highs to protect their legs as much as possible.
 9 Pack a small first aid kit. For the set, use a zippered bag with a capacity of 1 to 4 liters. Make a mark on your bag. You can even stick a piece of reflective tape on it to make it easier to find if you've dropped it or looking in the dark. Include the following elements:
 - Plasters: several pieces of different sizes. Pack mostly 2.5cm ones as they work well for blisters. Foam patches, rather than cloth patches, offer better protection against blisters and can be used in other first aid treatments.
- First aid antibiotic ointment.
- Benadryl, or another antihistamine: Emergencies are not the best time for allergic reactions.
- Syringe with a dose of antidote, if prescribed by your doctor for severe allergies. They usually write several recipes for different things, so keep a few available.
- Prescribed medicines for the next day or two in a labeled container. If your treatment changes, then you will need to update your kit. Be very specific when labeling medicine bottles, indicate what doses are there and what they help from. Do not forget to use an inhaler if you are asthmatic. Maybe you will be in a place where air quality is in question.
- Pain reliever such as aspirin. Look for small bottles in travel stores or samplers.
- Elastic bandage, it is good for stretching the ligaments or can be used to immobilize a limb.
- Latex or vinyl gloves (if you are allergic to latex) are required. Injured people may be near you or someone may need your first aid.
- Antibacterial hand gel to disinfect the skin.
- Rag or Hand Towel: May be used to wash your face to dry your sweaty forehead or to signal.
- Find a travel-sized saline solution or probe (or lens wetting solution) and include in your medicine cabinet. The contact lens wearer or anyone else may need to flush out dust or polluted air from their eyes. It can also be used to wet a wound.
- Gauze or other first aid items.You can use an additional plastic bag with a capacity of 1 to 4 liters so that all of them are conveniently stored and do not accidentally get wet.
 10 Pack a small flashlight. Find at least a small to medium sized hand or head torch and make sure it has new batteries. Maglite type flashlights are very durable, but much heavier than aluminum ones. Larger flashlights can be used as defensive weapons if needed. Decide if you can support the weight and if there is enough space in your backpack. You can load full size batteries (D type) if there is room and you can handle the weight. You will not receive a massive power outage or evacuation warning.
 - Look for a small or medium flashlight that runs on AA or C batteries. It depends on how much space you have, your needs and how much weight you can handle. Lightweight plastic flashlights are good. No need to buy expensive, but make sure it works.
- There are many new LED pocket flashlights in the markets, which are less expensive (check discounts), more durable (they don't have an electric bulb to burn out or break) and give more light to the battery pack.
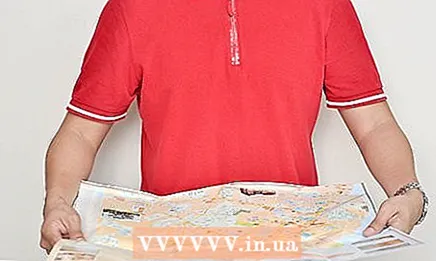 11 Take a map of your city. Streets and public transport routes (metro stops) should be displayed there. You may have to detour, disembark early from the train or take an alternative route - and find yourself in unfamiliar territory. Always have a map to find the best route to your destination. If you get lost, it will add salt to the wound. Routes change frequently, so you may find yourself walking in unfamiliar places. Keep your map with you and mark the different paths to get out.
  12 Pack the list of emergency contact numbers. Your cellular connection may not work or your phone may run out of power. Keep the phone numbers of friends or family around work, between work and home, and those who might pick you up and offer refuge. Hide the list of numbers in your kit. The telephone network can be intermittent and difficult to get connected, so don't expect to call the help desk right away. Your memory can also be overextended by stressful situations, so write down what you need to do.
  13 Pack a face mask. You can purchase one from your local hardware store or paint shop, and include it in your kit. They cost a penny. If you need one, then you really need it. During a fire or earthquake, you can suffocate from smog and wood chips. A regular mask can help very well.
 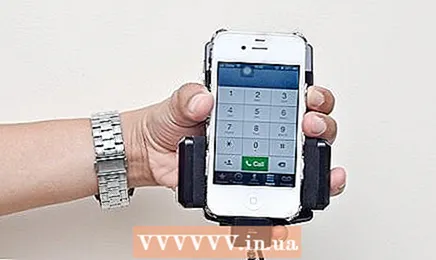 14 Pack a portable charger for your phone. Solar and wind chargers are available. Others often use small batteries and convert energy into a small charge for your phone. Look for them on travel websites, cell phone stores, or airport kiosks.
  15 Pack some cash - but not too much. Save money for public phones, food, or any other item you might need. Don't store too much, just a few hundred rubles and a change. You can hide them under the sturdy cardboard at the bottom of your backpack. You can use cash for transportation or to buy water or food. Remember to stock up on a few coins if you need to use a public phone and be able to find it.
  16 Pack a small pack of paper and wet wipes. This can be of double benefit when using a restroom that is not fully equipped. Think about the different things with which you may collide on the way home. Cities differ from each other, and so does their infrastructure.
 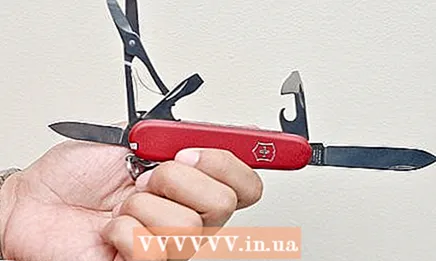 17 Grab a multifunctional pocket tool or a Swiss army knife. Multipurpose tools are available at most sporting goods stores and camping stores.As shown here, there are pliers here that can come in very handy. There are too many ways to use each tool to start listing each one.
  18 Pack a small radio. Most local radio stations switch to emergency broadcasts during emergencies. Look for a small, battery-powered FM transistor radio for your bag. It can be found at a discount store or electronics store at rock bottom prices. All local radio stations will start emergency radio broadcasts if an emergency occurs in your area. Make sure it has new batteries and turn it off before putting it in your bag.
  19 Tie a spare house key to the bottom of the bag, under the cardboard bottom. If you leave your house key, do not add anything to make it identifiable. It's even better to hang a combination lock box on your door (if allowed) with a spare key in it. In a hardware store, it costs about 1,000 rubles, and it will also come in handy at any time to you or your family members if they accidentally lock themselves in the house or you need to ask a neighbor to come into your house when you are away, so you will not risk losing a spare key somewhere.
 - An added benefit is that if you do not store a spare key in your emergency kit, you can attach your address to your baggage / ID card. A spare key can help depending on your situation (or in the magnetic wheel bay - it really works!).
Method 2 of 3: storing your bag
 1 Resist the urge to crawl into your bag for water, snacks, or tape. Keep the kit intact and only open it to check the expiration date of medications, check or replace batteries and expired food.
 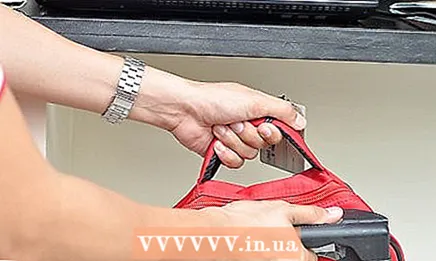 2 Pack your bag and keep it in a drawer, under a desk, or in an office closet nearby, or somewhere else, so that you can grab it in a hurry. When in doubt, grab her. Everything you need can easily fit into your backpack. If you live in a cold climate, you can take extra items or change the contents depending on the time of year.
 - Take her in case of fire drills and other alarms... Keep it handy when news of an emergency in your city reaches you.
- You may not realize that you are being evacuated until you are detached from your kit.
- In large cities, in areas prone to earthquakes or hurricanes, and in large office buildings it makes sense to be a little paranoid.
 3 Update your kit regularly. Place a reminder on your phone or computer to check your bag every few months. You may want to check it twice a year (perhaps when you replace the batteries in your smoke detector, or set the clock forward or backward for daylight saving time), use your loved ones' birthdays as reminders, or put a memo on your desk calendar. Check at least once a year on the memo.
 - Check perishable items (batteries, food, first aid items) for expiration dates, leaks, or if someone "borrowed" something from the bag. Make sure all cards and phone numbers are up to date. Check the integrity of the gloves, everything is missing, the functionality of the electronics and anything that can go wrong that you would not want to face in an emergency.
- Send an email to your home computer with a list of items to stock up on, or just print it out. You can forget about these things when you leave your office.
Method 3 of 3: Create a Plan
 1 Determine where and how far from home you work. Do not rely on normal transport conditions.Ask yourself what you would do if you had to get home without a car or public transport during an emergency. What would you wear if you had to walk home, and how long would it take?
  2 Make an emergency plan for the family. Talk with your family about what you can do in an emergency if they cannot reach you. Discuss those options and scenarios that might be practical. Knowing about your actions can enable them to help, even if you may not be able to reach them during emergencies.
 - If your family hears about an emergency, they can pick up your children, meet you at an agreed place, or be prepared for them to be ready to get involved in the situation by the time you call, send a message, or they receive a message from a third party. ... Make a family action plan.
 3 Create a system of mutual assistance with the employee. Coordinate with your colleague and exchange ideas to create the perfect personalized grab-and-run bag based on the situation, urban area and workplace.
 - If you are working with someone who lives close to you, carefully discuss a plan for using a peer-to-peer system to get home together.
- Get them to pack the bag so that of each had their own supplies of the necessary.
- Agree with management to turn kit creation into a community activity or emergency planning training. Get permission for everyone to bring their own things, pack them as a team, and go shopping for missing items.
Tips
- Store batteries in store packaging, not in devices where they will drain slowly. Stock up on scissors or a multifunctional or Swiss army knife to open the pack of batteries, or store them in a labeled plastic bag.
- Consider adding a pair of safety goggles to your kit. This can be especially useful to prevent foreign bodies, dust, blood, or other irritants from entering your eyes. You can buy them at drug stores, safety equipment stores, hardware stores, or medical equipment stores. You can also find them in online stores. They are not expensive and can often be found in the regular glasses section.
- If your backpack is large enough, then you have room to hide your purse or wallet inside. Don't baffle yourself with briefcases and laptops, fold only what you need to survive on the streets for hours. During a power outage in New York, many tried to travel with books, files and irrelevant items. They had to drop it or ask strangers to hold it and negotiate it with little success.
- Laptops, expensive jewelry and furs can make you the victim of a robbery. Think about what you can leave at work and travel with the least amount of things that catch your eye.
- Lip balm and sunscreen come in handy too.
- If you are working in an area prone to flooding or areas with drainage problems, it is best for you to have suitable waterproof shoes with you.
- If you are packaging multiple battery-powered devices, try to match those that use the same type of battery. Then you can pack an add-on kit that works for both and you can change devices.
- Place a piece of duct tape or plaster on the flashlight and battery switches. You don't want to accidentally hit the bag under the table and turn on the device. And when you need to turn it on, you will have dead batteries.
- If you live in hot climates where the heat and temperature can be dangerous, you should consider packing a light shirt, shorts, hat, and plenty of water.
- Turn the batteries over or use another method to prevent the flashlight or radio from turning on when not in use. You do not need to touch your bag and turn on the device, wasting its charge and not knowing it.
- Think of it as a staff rallying exercise. Do this instead of having an ice cream party and socializing.
- Buy a subway or public transit pass and hide it in your bag. If you get to a working station, you can skip the checkout counter or not worry about finding cash to pay.
- If you live in a very cold climate, you can add a pair of sweatpants, hats, thermal underwear, or other warm clothing. Something super warm will be more needed than something trendy or work. You can pack a larger package.
- With Blackberry, iPhone, and smartphones, you are accessible and mobile and can safely leave the office without transporting laptops.
- A mechanical pencil, notebook and a pack of matches or a lighter must be included.
- You shouldn't buy everything at once. You may be able to borrow something from your home medicine cabinet or toolbox to start with. Instead of buying full-size items, you need to visit the travel department of your local pharmacy or store to buy things. The packaging will be small and easy to pack.
- Store your bag in your closet or under your desk. Do not keep it in an underground car park as you may not have time or access to it. If you can, stock up on an additional kit that is more suitable for your car.
- Leaders, if there is additional funds in the budget, then provide your team with things that expand their sets. Keep kits updated and reward your team with discount store gift cards, flashlights, first aid kits, or even just provide snacks while they stack their kits together.
- Work with coworkers to find out if anyone has additional items at home that they can donate to create a shared kit on the day the kit is assembled. Someone in the office might have kids and lots of used backpacks, an extra cape, or even a few extra batteries or bandages. Count this too.
- Think about the climate and add something to the kit that will allow you to travel comfortably in areas with harsh and possibly dangerous temperatures.
Warnings
- Always be sure to include latex or vinyl gloves in your kit. Bloodborne bacteria are real, and not everyone is warned or aware of infections or health problems. You may encounter injuries or help someone with your first aid kit. Remember to wear gloves. They can come in handy if you have to help yourself and you have dirty hands. This will reduce the risk of infection and make the first aid process cleaner.
- Audible / personal alarms work very well to scare off a potential intruder.
- You may want to add a baton, stun gun, or other weapon to your bag. Be careful, as keeping such items in the workplace may be against company policy.
- Inverted batteries can damage some LED flashlights. Use a different method to avoid accidentally turning on the LED lights.
What do you need
- Sports shoes with cushioning soles
- Thick short or long sports socks
- Battery powered flashlight - LED flashlight lasts longer and uses smaller batteries
- Small radio with batteries
- Map of your city
- Backpack
- Water
- Easily Stored Foods High in Calories and Carbohydrates
- First aid kit
- Cash and change
- Identification form (hidden in the bag)
- Spare house key (hidden in the bag)
- Cape or raincoat
- Friends and family phone numbers
- Spare batteries
- Pain relievers and antihistamines
- Anti-dust mask
- Scotch tape or other reflective fabric to keep yourself and your belongings safe (optional, but desirable)
- Work gloves - useful for moving heavy, sharp or sharp objects and keeping hands warm
- Sunscreen
- Thin, warm knitted beanie
- Whistle
- Utility tool (Leatherman) or pocket knife
- Emergency Blanket / Thermal Blanket / Survival Blanket (Approximately 120x180 cm of mylar strips. When packed, it becomes 8x10 cm and weighs several tens of grams.)
- Flammable agents (matches)
- Brass knuckles and ammunition - for self-defense (from dogs and rats)


