Author:
Gregory Harris
Date Of Creation:
7 August 2021
Update Date:
1 July 2024

Content
- Steps
- Method 1 of 2: Assess the static charge of various materials
- Method 2 of 2: Using a DIY Electroscope
Static electricity appears when there is an inequality of positive and negative charges on the surface of objects. It is easy to spot - for example, when you touch a metal doorknob between it and your hand, a spark can slip through. However, measuring static electricity is a much more complex process. Learn how to measure static electricity, and you can determine the electrical charge on the surface of various objects.
Steps
Method 1 of 2: Assess the static charge of various materials
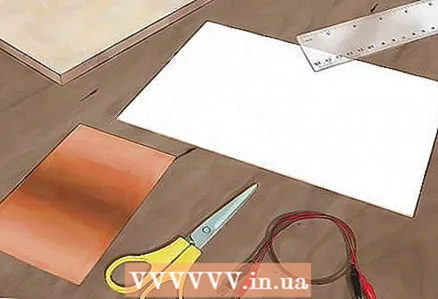 1 Get everything you need ready. For this experiment, you will need: a small copper plate, a ground wire, electric wires with crocodile clips, white paper, scissors, a ruler, a balloon, hair, a cotton T-shirt, a polyester T-shirt, carpet and ceramic tiles. This method allows you to determine the relative amount of static charge.
 - A small copper strip can be purchased fairly cheaply from a hardware store or ordered online.
- Grounding wires and crocodile clips are available at a hardware or electrical store.
 2 Connect the copper strip to earth ground with a wire. Attach one wire clamp to the ground and the other to the copper plate. It doesn't matter where you connect the wire, just attach it to the ground wire.
 - When an object touches the copper plate, accumulated static charge drains from it.
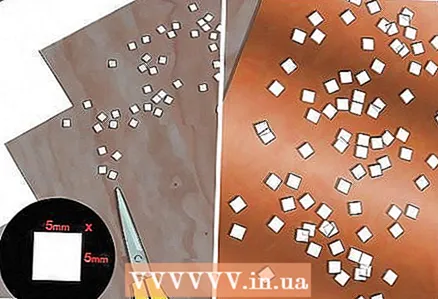 3 Cut a sheet of paper into 100 square pieces 5mm x 5mm. Use a ruler to divide the sheet into 5mm squares and cut them out. Try to keep the dimensions as accurate as possible.It is easier to do this with a paper cutter.
 - Static charge may remain on pieces of paper. To get rid of it, place paper squares on a copper plate.
- After you have removed any potential static, empty the pieces of paper onto a flat surface and proceed to the next step in the experiment.
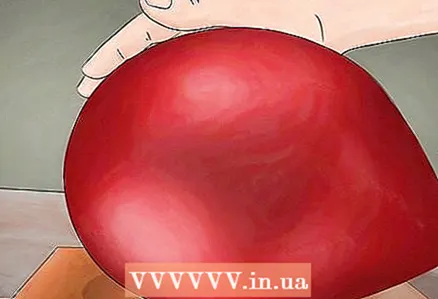 4 Inflate the balloon. Inflate the balloon to a medium to large size. The size of the ball is not important as long as the same ball is used for all materials. If the balloon bursts during the experiment, you will have to inflate a new balloon and start over to keep the experimental conditions unchanged.
 - Discharge the ball by rolling it over a copper plate.
 5 Sweep the ball over the surface of the test material five times. First, select the material on which you want to measure the static charge. Hair, carpet, cotton T-shirt, polyester T-shirt, carpet, or ceramic tiles work well for this.
 - Move the ball over the material in the same direction.
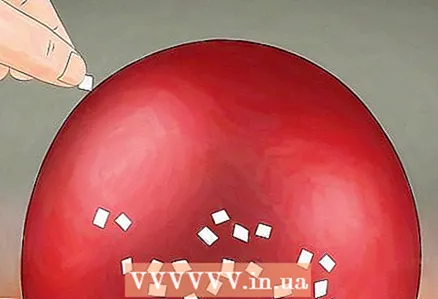
 6 Place the balloon on top of the pieces of paper. After rubbing against the test material, the ball will be charged with a certain amount of static electricity (this amount will be different for different materials). When you put the ball on the pieces of paper, they will stick to it, and their number will depend on the amount of static charge on the ball.
 - Do not roll the ball over the paper. Just place it on top of the pieces of paper and see how many of them stick to the ball.
 7 Count the number of pieces of paper adhering to the ball. Collect the pieces of paper from the balloon and count them. After rubbing against different materials, a different number of pieces of paper will stick to the ball. Repeat the experiment with different materials and see how they differ.
 - Unload the paper and balloon before each new experiment.
 8 Compare results for different materials. Look at the data and compare how many pieces of paper adhered to the ball after rubbing it against different materials. The more scraps of paper adhere to the ball, the higher its static charge.
 - Review the results and determine after rubbing against which materials the most paper adhered to the ball. A large amount of static electricity collects on the hair, and after rubbing with it, the ball is likely to stick with the most pieces of paper.
- Although this method does not provide an accurate estimate of the static charge, it can be used to judge the relative static electricity that is contained in various materials.
Method 2 of 2: Using a DIY Electroscope
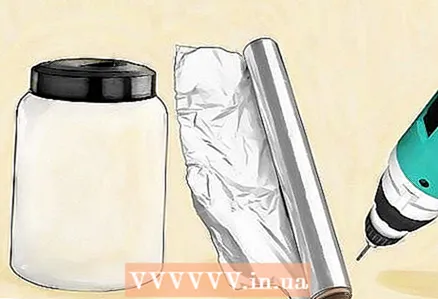 1 Get everything you need ready. An electroscope is a device that detects static electricity using thin metal plates that separate when static is present. The simplest electroscope can be made from several household items. This requires a glass jar with a plastic lid, aluminum foil, and a drill.
 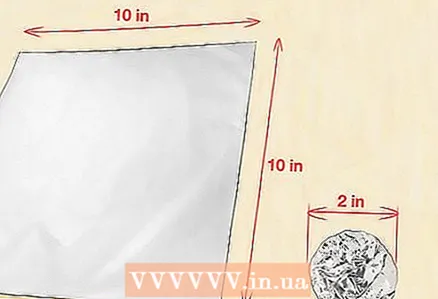 2 Make a foil ball. Cut a square of about 25 cm x 25 cm from the foil. The exact dimensions are not important. Crumple up the cut-out piece of foil to form a ball. Try to keep the ball as correct as possible.
 - You should get a ball with a diameter of about 5 centimeters. And in this case, the exact dimensions are not important - the main thing is that the ball is not too large or small.
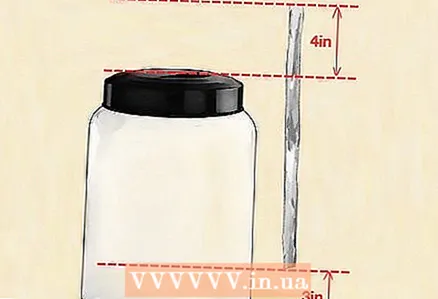 3 Twist the aluminum foil rod. Cut another sheet out of the foil and twist it into a rod. The rod should be slightly shorter than the glass jar. This aluminum rod should be 7–8 centimeters above the bottom of the can and protrude about 10 centimeters above the top of the can.
 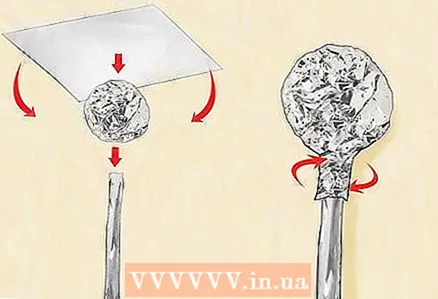 4 Attach the ball to the rod. Take another sheet of foil for this. Place the ball at the end of the rod, slide a sheet of foil over them and twist it. Wrap the foil around the ball and rod tightly to hold them together.
 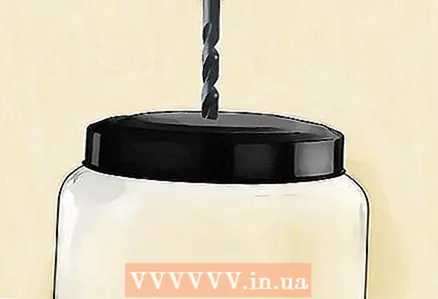 5 Drill a hole in the plastic jar lid. Drill a hole in the middle of the cover. The hole must be large enough to accommodate the aluminum rod. If you don't have a drill handy, you can punch a hole with a hammer and nail.
 - Be careful when handling the hammer and nail. Children should use them under adult supervision.
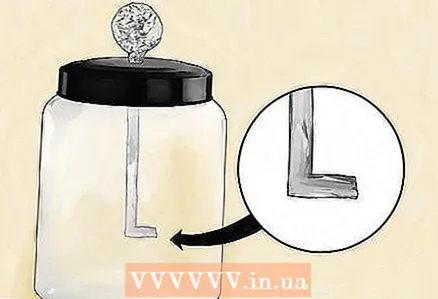 6 Attach a rod with a ball to the lid. Thread the rod through the hole in the cap so that the ball protrudes from the cap. Use duct tape to secure the rod to the top and bottom of the lid. Bend the rod 90 ° (at a right angle) 12-13 mm from the bottom of the lid.
 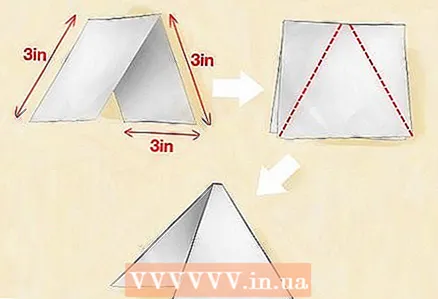 7 Cut a triangle out of folded foil. Cut a strip of about 15 cm x 7.5 cm from the foil.Fold the strip in half along the short edge to create a 7.5 cm x 7.5 cm square.Cut a triangle from the folded strip so that there is little left at the top of the strip. uncut foil. As a result, you will have two triangles with closed vertices. A narrow strip of foil will connect the vertices of the triangles.
 - If you cut the foil so that it splits into two triangles, cut a new strip of foil and try again.
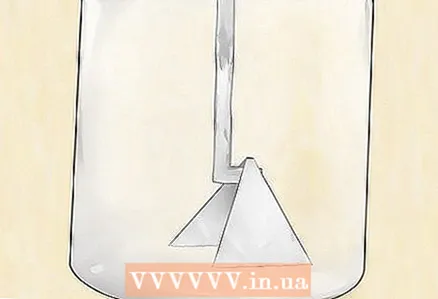 8 Hang the foil triangles from the folded end of the rod. Secure the triangles so that they hang down and almost touch each other. Screw the lid onto the jar. Hold the jar upright and be careful not to let the triangles slide off the stem.
 - If the triangles do fall off the rod, simply unscrew the lid and hang them in place.
 9 Check the device in action. Rub the ball on your hair and bring it up to the sphere above the electroscope cover. The triangles must deviate from each other. When the device comes into contact with static electricity, the triangles are charged with opposite charges and repelled from each other. In the absence of static electricity, the triangles will remain hanging side by side.
 - Try holding the ball of the electroscope near various objects in the house and see how strongly they are charged.


