Author:
Ellen Moore
Date Of Creation:
17 January 2021
Update Date:
1 July 2024
Content
- Steps
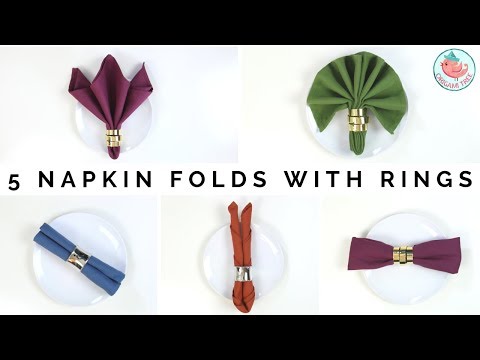
- Method 1 of 4: Lightweight, fluffed up napkin
- Method 2 of 4: Napkin Fan
- Method 3 of 4: Double Straw
- Method 4 of 4: Double Candle
Why use regular napkins folded four times when you can liven up your table? There are dozens of ways to fold paper and tissue napkins, and many more with a decorative napkin ring. Each napkin ring has different difficulty levels, so don't hold back when experimenting!
Steps
Method 1 of 4: Lightweight, fluffed up napkin
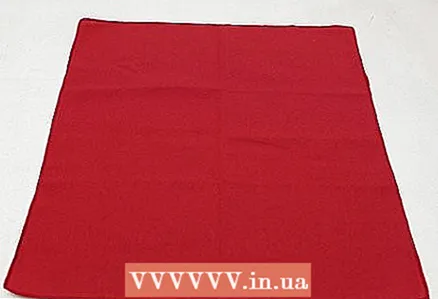 1 First, flatten the napkin. This napkin folding method is very quick, simple and easy to repeat, so it is good for beginners. So, flatten the napkin on the table or work surface.Smooth out any visible folds and folds.
 - Note that this method works best for large, square cloth napkins. For best results, use plain tissues without wrinkles or fringes.
 2 Lift up the napkin, keeping it in the center. Pinch the middle of the napkin between your thumb and forefinger. Raise it so that it does not touch the table or work surface. The napkin should fall in soft folds.
  3 Smooth out any creases. If necessary, straighten the folds of the napkin with your free hand so that it hangs freely. Or you can shake it with the hand that holds it.
 - When you're done, the napkin should hang down loosely, like a curtain.
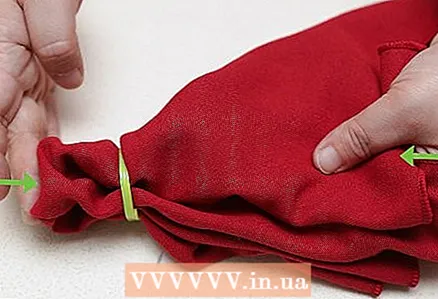
 4 Thread the edge of the napkin you are holding through the ring. Hold the middle with your free hand to keep it in place. After that, pull the ring through the folded end of the napkin.
 - If possible, pull the ring up until it is firmly held by the volume of the napkin. But since not all napkins are so voluminous, including yours, stretch the ring 3-5 cm up and put the napkin.
 5 Whisk the ends. Next, just fluff up the untipped edge of the napkin to add a nice visual dimension; this is the most suitable and easiest way for large cloth napkins. As a final touch, you can also straighten the assembled bottom of the napkin a little. Congratulations! All is ready. Arrange the napkins as you like.
 - There are many ways to arrange napkins beautifully on the table, for example, you can put napkins on plates to draw attention to them, or put them in a napkin holder in the center of the table so that guests can grab them when needed. You decide!
Method 2 of 4: Napkin Fan
 1 Fold the napkin in half. This method is not much more difficult than the first one, but it looks very elegant, so this is a great option if you want to impress your friends. First, flatten the napkin and fold it in half. Smooth the crease and unfold the napkin.
 - For this method, it is very important to use a hard, square-shaped cloth. On such napkins, the folds will hold better, so the final "fan" will turn out to be more accurate. Also, if you are using a rectangular napkin, the proportions of the fan will change.
 2 Napkin accordion. Fold parallel to the existing crease, changing the right side each time. Try to make 4-6 folds on each side of the center fold - the exact number doesn't matter. Smooth the folds as you go. When you're done, you should have a long, thin strip of accordion.
 - Note that the first fold should be the fold of the resulting accordion. The width of the folds must be carefully adjusted so that the folds are the same size. Over time, you will get better and better.
 3 Fold the accordion in half. Next, find the middle of the accordion strip and fold it in half so that the ends match. As a result, on one side there will be a rounded and very thick fold (most likely, it will not be able to bend it even more), and on the other, there will be two fans.
  4 Slip the ring over the rounded fold. Now, you need to try to put the napkin in the ring. Stretch the ring to the middle, and then pull the accordion that is above it to the sides. Spread out the napkin nicely. Congratulations! All is ready!
 - Again, you can emphasize the napkin by placing it in the center of the plate. You can also try inserting a napkin into a glass or champagne glass for a more unusual and colorful setting.
Method 3 of 4: Double Straw
 1 Fold the napkin in half. This option is very simple and easy, but at the same time quite formal and suitable for a wedding or holiday party if there is little time left to prepare. First, fold the bottom edge of the napkin to the top to form a rectangle.To make it clear, the bottom edge of the napkin will be folded, but at the same time the top will be open.
 - The best shape for a napkin remains a square, but its material is not as important for this method as for the previous ones, since the napkin will not hold its own weight. Therefore, this method can be used even for paper napkins.
 2 Roll up half of the napkin. Next, on one side, start rolling the napkin tightly inward until you reach the middle. Use a napkin ring or plate to secure the tube while you bend the other side.
  3 Roll the other half of the napkin up to the middle. Repeat the previous step for the other half of the napkin. Both tubes should touch exactly in the middle of the napkin and be the same size, if this is not the case, you can correct them a little to make it look symmetrical.
  4 Stretch out the ring. Just put the ring on the resulting tubes and pull it to the middle of the napkin. That's all! Napkins can be handed out to guests or laid out on the table. There is a ribbon on hand - use it - a napkin folded this way looks even better if you tie it with a bow!
 - Do not forget to arrange the napkins with the tubes up, otherwise, they will look like a regular roll or bundle.
Method 4 of 4: Double Candle
 1 Fold the napkin diagonally. This amazing method requires no more effort than the previous ones, but the result is simply breathtaking. First, flatten the napkin on a table or other work surface, then fold it diagonally to form a triangle.
 - For this method, as for the first two, a hard square-shaped cloth napkin is more suitable. You will notice that for this method, the material should be even more rigid, because in it the napkin will hold on its own weight.
 2 Start rolling the napkin at the base of the triangle. Take the long, wide section of the napkin and roll it all the way down. Twist as tightly as possible. The tighter you twist it, the easier it will be to maintain its final shape, therefore the tighter the better.
 - When you're done, your napkin should look like a narrow, thin tube. The edges of the napkin should follow the diagonal lines on the surface of the tube.
 3 Fold the napkin in half. Try to make sure that the napkin does not unwind, and bend it exactly in the middle. The ends of the napkin should match perfectly. Hold the base of the napkin to prevent it from unrolling.
  4 Place the ring over the folded edge of the napkin. Next, take the folded end of the napkin and thread the ring (it should fit well if the ring is too large or too small this can be problematic). The two curled ends of the napkin should stand upright, resembling tapers. Congratulations! All is ready!
 - The main secret to arranging such napkins is to align the folded end, insert it into the ring and place it vertically. The ring should resemble the rim of a candlestick, emphasizing the similarity of the napkin to the candle. Note that this arrangement can be easily overturned inadvertently.

 quickly")

