Author:
Alice Brown
Date Of Creation:
24 May 2021
Update Date:
1 July 2024
Content
1 Pay attention to the recycling sign. Different types of plastic also require different types of adhesives. The easiest way to find out what kind of plastic is in front of you is to look at the recycling mark on the plastic product itself, its label or packaging. The sign is a triangle of three arrows; inside or outside the triangle is a number or a letter, or both.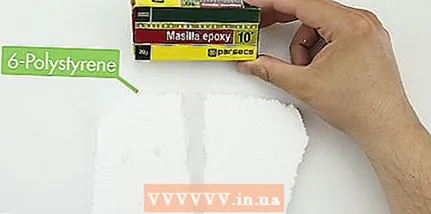 2 How to choose an adhesive for plastic marked with the number 6. If the recycling sign shows a number 6 or PSthen polystyrene is in front of you. It is better to glue it with plastic cement or special glue for plastic, for example, epoxy glue for plastic "Loctite" or Super glue for plastic. ... Cyanoacrylate glue (also called "second glue" or "cyano") or epoxy glue will also work.
  3 How to choose adhesive for plastic marked with numbers 2, 4 or 5. If the plastic product contains numbers or letters 2, 4, 5, HDPE, LDPE, PP, or UMHW, in front of you is polyethylene or polypropylene. Such plastic is very difficult to glue, and you need to look with a special designation on the label, for example, "Loctite" glue for plastic or Scotch Weld DP 8010.
  4 We choose glue for the plastic marked with 7 or 9. Plastic marked 7 or type ABSmarked 9, indicates the various plastic resins that make up the product, and additional letters may be indicated on the product, indicating the subtypes of plastic. Epoxy or cyanoacrylate is the best choice for this type of plastic.
  5 How else can you determine the type of plastic. If there are no signs of recycling on the product, then you can determine the type of plastic without them. This can be done as follows:
 - Lego blocks are made of ABS plastic and are best glued with epoxy cement. Cement thinner will also work, but may change the shape of the product to be bonded.
- Artificial glass, cheap toys, CD cases, and other fragile items are usually made of polystyrene and can be used with a variety of adhesives. For best results, use polycement or plastic adhesive.
- To glue items made from denser, harder plastics, such as bottles, buckets, crates, and food containers, you must use an adhesive designed for polyethylene or polypropylene items. These items are nearly impossible to glue with regular plastic glue, so make sure the glue says it is suitable for polyethylene or polypropylene items.
 6 Look for more information on how to glue a plastic product to a different material. You need more information if you want to glue plastic to wood, metal, glass or any other type of plastic.If you cannot find the information you are looking for on the Internet or ask an experienced craftsman, head to a specialist store and take a look at the range of adhesives available. On the packaging of the glue it is always indicated for which materials it is suitable for gluing.
 - Visit the site to what for more information on which glue is best for a particular material. This information is most relevant for common types of plastics, especially polystyrene.
- If you're still not sure which glue is best to use, test by applying glue to the same type of plastic you want to glue, or try glue on a small area of the glue.
Method 2 of 3: glue the plastic
 1 Remove dust from the surface of the plastic product. Wash the plastic item with soap and water, wipe with a special cleaner or isopropyl alcohol. ... Dry thoroughly.
 - To avoid contaminating the surface of the plastic after cleaning, be careful not to touch it with your bare hands.
- 2 Sand the surface to be bonded. Sand down with 120-200 grit sandpaper for a rougher surface and better adhesion. Steel wool or sandpaper is also suitable for this purpose, the main thing is not to sand the plastic for too long.
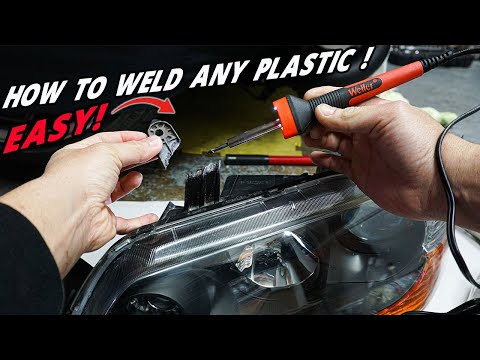
- 3 Mix the two components together as needed. Epoxy adhesives have two components that must be mixed to form an adhesive. Follow the directions on the packaging, as there are a large number of epoxy adhesives and each requires a specific ratio of adhesive components. Some can be used for several hours after mixing, while others must be applied immediately to the bonding surface.
- Read How to Choose a Glue to find out which glue is best to use. You can skip this step if you are not using a two-part adhesive.
- 4 Apply glue to both bonding surfaces. Using a brush, apply a thin layer of glue to the surfaces to be glued together. When applying the adhesive to very thin surfaces, a needle can be used.
- If you are using a cementitious solvent (not polycement or plastic cement), first you need to pinch both parts together, then use the applicator to apply a thin layer of solvent to the interface between the parts that forms when they touch. If you are using solvent to glue plastic pipes, read How to glue plastic pipes.
- 5 Squeeze the surfaces gently. Press the surfaces together so that they fall into place and to get rid of air bubbles. Do not press too hard so that the glue does not flow out of the joint. If the glue does drip, wipe it off, but not if you are using acrylic cement, which must be left in a small amount so that it evaporates.
- 6 Fix the parts to be glued. Use a clamp, duct tape, vise, or rubber bands to firmly hold the parts to be glued together. On the packaging of the glue, it is indicated how long the parts to be glued must withstand. Depending on the glue, this time can range from a few minutes to 24 hours.
- Some plastic adhesives continue to work even days or weeks after application. Try not to put pressure on the glued object and keep it away from high temperatures for at least 24 hours, even if the glue seems to set very well.
Method 3 of 3: Glue the plastic pipe
 1 Determine what type your plastic pipe belongs to. There are three types of plastic pipes, each requiring a specific adhesive. You can identify the type of pipe by the recycling sign, which is a triangle of three arrows with numbers or letters indicating the type of plastic.Learn how to determine the type of plastic before choosing an adhesive in these and other ways.
 - PVC pipes are most commonly used in residential plumbing, although they are not desirable for distribution lines with high temperatures. Usually such pipes are white or gray if they are intended for industrial use. Recycling mark on such pipes 6 or Pvc.
- CPVC pipes are the same as PVC pipes, but they can withstand higher temperatures. Recycling mark on such pipes 6 or Pvcbut they are colored cream or brown.
- ABS pipes are the most flexible pipes, usually painted black. Such pipes cannot be used in rooms where drinking water is distributed through pipes, and their use is prohibited in certain regions. Recycling mark on such pipes 9, ABS, or 7 (other).
- XLPE pipes are the newest type of pipes, they are available in different colors. Such pipes are not recyclable. They cannot be glued with glue, they can only be joined with mechanical tools.
 2 Choose a glue. The adhesive used for gluing plastic pipes is called cement solvent. Select the cementitious solvent according to the type of plastic.
 - The cement solvent for ABS is designed for pipes made of this material, just like the solvent for PVC is for PVC pipes.
- Transitional cementitious solvent is designed for bonding PVC pipes to ABS pipes. It is easily identified by its green color.
- If you cannot find a specific adhesive for a particular type of plastic, you can use a universal cementitious solvent that will work with any combination of PVC, ABS, and CPVC. However, this solvent is still not suitable for XLPE pipes, which can only be connected mechanically.
- Read carefully the label of the cement thinner, which indicates which pipe size it is suitable for.
- To glue a plastic pipe to a metal pipe, you need special glue, or you can mechanically join them. It is best to consult a professional plumber or shop assistant on this matter.
 3 Protect yourself from breathing solvent vapors. Primer and cement thinner release toxic substances during use. You need to work either in a well-ventilated area (with large windows, doors) or wear a respirator that will protect your respiratory system.
 - 4 Grind the pipe to a smooth state if it was previously cut. Use 80-grit sandpaper to sand the inside and outside of the pipe at the cut. You need to get rid of the smallest irregularities and "burrs" from sawing, on which debris can subsequently accumulate, which, in turn, can cause blockages in the pipes.
- Roll up the sandpaper so that it conforms to the shape of a pipe, this will make it easier for it to work.
- If you do not have sandpaper, use a file, or remove the protruding bumps with a knife.
- 5 If you are gluing a curved piece of pipe, first mark where the pieces will be glued. When you apply the cement thinner, you don't have much time to put the pieces back in place, so try the pipe pieces together before applying the glue. Attach the pieces to one another and use a marker to mark where they meet.
- 6 Before applying the adhesive, the pipe surface must be primed. Of the three pipe types, only PVC pipes are required to be pre-primed, however for best results a primer should also be applied to CPVC pipes. Apply a primer to the inside and outside of the pipe at the joint and let it dry for 10 seconds.
- 7 Apply the cement thinner with quick and vigorous strokes. Protect your hands with gloves, apply a thin layer of solvent to the inside and outside of the pipes to be bonded with a brush or cotton pad. The layer must be very thin, otherwise the excess glue will dry out and subsequently lead to blockages in the pipe.
- 8 Immediately after applying the adhesive, connect the pipes, turn them and press them down. Immediately after applying the solvent, attach the pipes to one another, while stepping back from the mark made by a quarter of a turn, then turn the pipes so that the marks coincide. If you have not previously made notes, simply connect the parts to be glued and turn them a quarter turn. Leave in this position for about 15 seconds for the glue to set.
- 9 Adjust the length of the pipe by attaching another piece. When the solvent dries, the pipe may shorten slightly. If you end up with a pipe that is too short, make a cut and glue another piece of pipe to it. If the pipe is too long, saw off the entire section of the pipe and join the two ends together.
Tips
- Silicone material is useless for plastic, except for cosmetic purposes, the connection of pipes with a substance with silicone will not be strong enough.
- If acrylic adhesive gets on a surface that you are not going to glue, do not wipe it off, but let it evaporate.
Warnings
- Use glue only in a well-ventilated area or wear a respirator.
What do you need
- 2 plastic parts
- sandpaper
- glue (read How to choose glue)
- small brush
- clamp, vise, duct tape or elastic
For gluing a plastic pipe:
- two pieces of plastic pipe
- sandpaper
- primer for PVC or CPVC (refer to instructions for more details)
- cement solvent (refer to instructions for more details)


