Author:
Janice Evans
Date Of Creation:
1 July 2021
Update Date:
23 June 2024
Content
- Steps
- Method 1 of 2: Using a Screen and Squeegee
- Method 2 of 2: using a hoop
- Tips
- Warnings
- What do you need
- With Screen and Squeegee
- Using the hoop
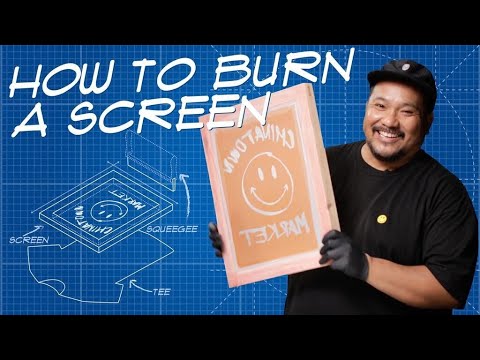
Screen printing (sometimes called silk screen printing) is an amazing artistic technique especially useful for printing on materials. The process is simple, versatile, and relatively inexpensive, so everyone should try it! This article will help you get started.
Steps
Method 1 of 2: Using a Screen and Squeegee
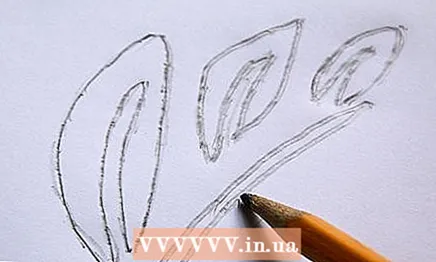 1 Create your print. Think of something interesting and draw it on a piece of paper. Don't worry about how to color or shade the drawing - you will cut it out anyway and use the rest as a stencil.
 - Keep the drawing simple for the first time. Geometric shapes and irregular circles are the easiest and never boring option. If you're a beginner, place them far enough apart - you don't want the paper to rip when you cut out the templates.
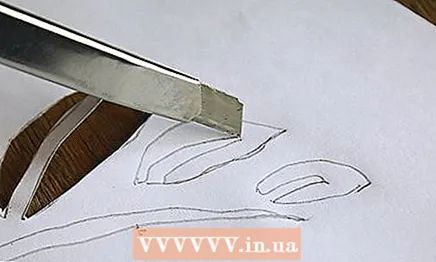 2 Use a carving knife to cut off all the colored pieces of your design. Leave the rest of the blank sheet intact. You have now made a stencil. Unfortunately, if it breaks, you will most likely have to start over. Be careful and precise.
 - Make sure your stencil fits your shirt properly. If not, you will have to resize or adjust in some other way.
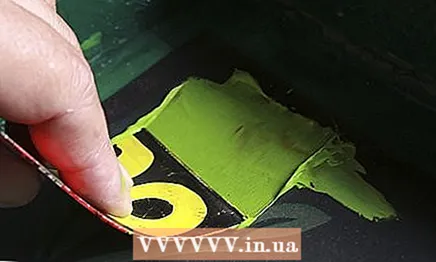
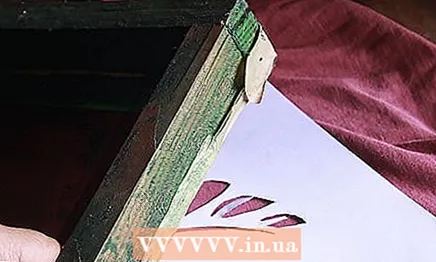 3 Place the stencil on top of the material (paper or T-shirt) and the printing plate on top of the stencil. Position the stencil so that the grid of the plate is exactly on top (they should touch) and the handles are facing up. If there are gaps between the edges of the stencil and the mold, tape it to the bottom. You don't want paint to get where it shouldn't.
 - If using tape, be sure not to glue the stencil to the mesh. Otherwise, the stencil can be skewed when you slide the squeegee over its surface.
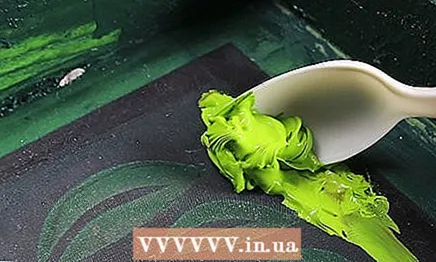 4 Apply some paint. Make a line at the top of the stencil (the part farther away from you). At this point, you don't need paint on the entire stencil surface. Try to apply as much paint as you think will cover the entire stencil.
 - It's a bit tricky to use more than one color in this method. If you do decide to give it a try, know that at one point or another the colors will mix. If that suits you, then go ahead!
 5 Use a squeegee to spread the paint over the grid. Try to do this in one downward motion - or with as few strokes as possible. This will ensure that the drawing looks as smooth and professionally done as possible.
 - Always, always, always do vertical strokes.If you do both horizontal and vertical strokes, the paint will collect in a lump, dry poorly and do not fit well on the canvas.
- Once you reach the base, continue to the handle to collect excess paint. It can be reused.
 6 Lift everything up and off the material. Be careful! Pulling may smear the paint. Better to remove all layer by layer, lifting and then removing.
 - Leave the material to dry. The longer it takes to dry, the better.
- If you printed on clothes, then, as soon as they dry, you need to put a sheet of oiled paper or tracing paper over the drawing and iron it with an iron. This will secure the pattern and make it more durable to wear and washable.
- Leave the material to dry. The longer it takes to dry, the better.
Method 2 of 2: using a hoop
 1 Print your project on your computer. Large, dark, uncomplicated prints will be easier to work with. Print a black and white drawing or a drawing in dark colors — you should be able to see the sample through the screen. It should also fit inside the hoop.
 - If you don't want to use a computer rendering program, you can draw the drawing yourself. Just make sure it's the right size, dark enough, and won't print on your screen.
 2 Stretch a piece of clean, white fabric over the hoop. Unscrew the outer hoop and pull the fabric over the base of the inner hoop. Replace the outer hoop and screw it back on. It doesn't matter if the fabric is exactly centered; you will only use the material inside the hoop.
 - Thin material works well as a screen. Choose a mesh and sheer fabric.
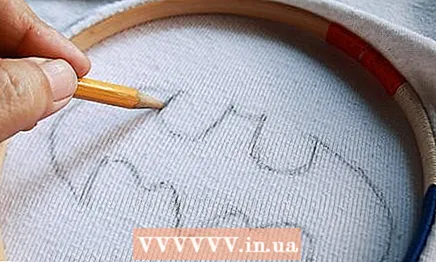 3 Place the hoop on top of the design and start copying. The fabric should fit snugly against the pattern. Use a pencil to copy your drawing; if you mess up the drawing, you can always go back and erase it. Just copy the outline.
 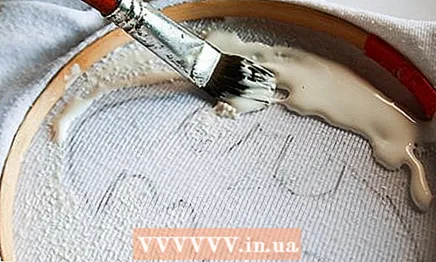 4 Turn the hoop over, cloth side up. Cover the outside of the design (its outline) with a layer of glue. No glue should get on the drawing; he must surround him. This glue will act as a shield when you apply the paint - if you go beyond the lines, the paint will not print onto the fabric; it will only remain on the surface of the glue.
 - Outside the drawing, the glue can go as crazy as it wants - the main thing is to make sure that it does not get on the drawing itself. When you're done, wait until it is completely dry. 15 minutes should do the trick.
 5 Replace the screen. The clean fabric should be as far away from the fabric as possible, separated by the width of the hoop. Straighten the fabric under the screen to align the pattern.
 - If you have an ink squeegee, use it to paint the material. If not, use a sponge brush and hold the screen firmly.
 6 Remove the screen and let the material dry. When lifting the screen, be careful not to smudge the paint! If the paint is not completely dry, it may run out. Allow a full 15 minutes for it to dry.
 - Iron the fabric following the directions on the ink bottle or paint you are using. Wear it to your health!
Tips
- If the edges of the stencil are uneven or you keep tearing them, then you are most likely holding the knife incorrectly. Change the position of your hand.
- Apply paint in one direction only! Otherwise, the paint will clump and take a long time to dry.
- If you are printing on a T-shirt, put a newspaper inside because ink may seep and print on the other side.
- You can look at magazines and select a drawing there, instead of drawing it yourself. Or print a photo and cut out the parts you need.
Warnings
- The carving knife is very sharp - be careful. When not using a knife, always set it aside or cover the blade.
- Use a cutting mat to avoid scratching the table.
- The paint will stain; wear old clothes.
What do you need
With Screen and Squeegee
- Pencil / pen / paints
- Cutting mat / durable surface
- Colored paper
- Carving knife
- Ink suitable for screen printing (fabric ink)
- Stencil
- The clothes or paper you will be printing on
- Squeegee
- Iron (if you print on clothes)
Using the hoop
- Drawing
- Pencil
- Clean cloth
- Embroidery hoop
- Brush / squeegee
- Ink or ink suitable for silk screen printing
- Iron (if you print on clothes)


