Author:
Ellen Moore
Date Of Creation:
16 January 2021
Update Date:
1 July 2024

Content
- Steps
- Method 1 of 2: Making a Snow Globe from Household Items
- Method 2 of 2: Create a snow globe from a store-bought set
- Tips
- Warnings
- What do you need
Do you want to have fun next weekend with your kids (or parents) by doing something together? Then you can make a snow globe! The snow globe looks cute and interesting and can be made using common objects found in every home. Alternatively, you can buy a ready-made kit online or from a craft store to make your snowball look professional and enjoyable year after year. Whichever you choose, read step 1 to get started.
Steps
Method 1 of 2: Making a Snow Globe from Household Items
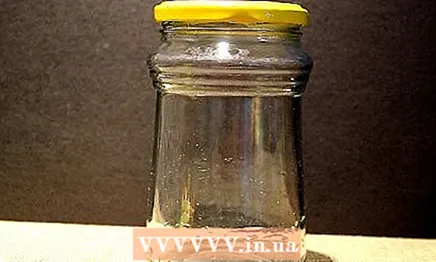 1 Find a glass jar with a tight-fitting lid. Any size will work, as long as you have the right figures to fit inside the jar.
 - Jars of olives, mushrooms or baby food are well suited - the main thing is that there is a tight-fitting lid; just look in the refrigerator.
- Wash the jar inside and out. To peel off a label if it doesn't come off easily, try rubbing it under hot soapy water using a plastic card or knife. Dry the jar thoroughly.
 2 Think about what you want to put inside. Anything can be placed in a snow globe. Cake figurines or small winter-themed children's toys (such as a snowman, Santa Claus, and a Christmas tree), which can be purchased from craft or gift shops, work well.
 - Make sure the figurines are made of plastic or ceramic, as other materials (like metal) can start to rust or ridiculously tip over after being submerged in water.
- If you want to get creative, you can make your own clay figurines. You can buy clay from a craft store, shape the pieces into any shape you want (making a snowman is easy), and bake them in the oven. Paint them with water repellent paint and they are ready to go.
- There is another suggestion: take a picture of yourself, your family or pets and laminate them. Then you can cut out each person along the contour and place their photo in the snow globe, it will turn out very realistic!
- Even if it is called snowy ball, you don't have to limit yourself to only creating winter landscapes. You can create a beach scene using seashells and sand, or something playful and funny like a dinosaur or ballerina.
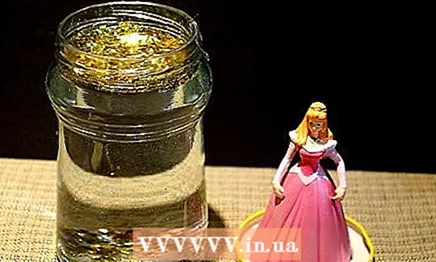 3 Create a decoration on the inside of the lid. Apply hot glue, super glue, or epoxy to the inside of the can lid. You can first rub the lid with sandpaper - this will make the surface rougher and the glue will hold better.
 - While the glue is still wet, place your decorations on the inside of the lid. Glue your figurines, laminated photographs, clay sculptures, or anything else that you want to place there.
- If your part has a narrow base (for example, laminated photographs, a piece of garland, or a plastic Christmas tree), it may be better to glue a few colored pebbles to the inside of the lid. Then you can simply squeeze the object between the pebbles.
- Keep in mind that the decoration you are making will need to fit into the neck of the can, so don't make it too wide. Place the figurines in the center of the lid.
- After you've created your plot, set the lid aside for a while to dry. The glue must be completely dry before you can submerge it in water.
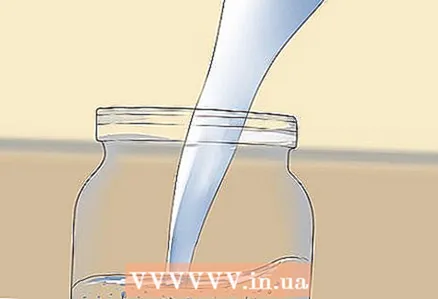 4 Fill a jar with water, glycerin, and glitter. Fill the jar with water almost to the brim and add 2-3 teaspoons of glycerin (which can be found in the baking section of the supermarket). Glycerin "thickens" the water, which will allow the glitter to fall more slowly. The same effect can be achieved with baby oil.
 - Then add sparkles. The amount depends on the size of the can and your tastes. You just need to add just enough to compensate for the fact that some of them will get stuck in the bottom of the can, but not too much, otherwise they will completely cover your decoration.
- Silver and gold sequins are great for a winter or Christmas theme, but you can choose any color you like. It is also possible to buy special “snow” for the snow globe online and at craft stores.
- If you don't have glitter on hand, you can make a pretty believable snow from crushed eggshells. Use a rolling pin to crush the shells well.
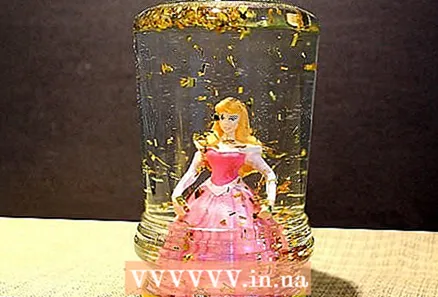
 5 Replace the cover carefully. Take the lid and secure it tightly to the jar. Close it as tightly as you can and use a paper towel to wipe off any water that has been expelled.
 - If you are in doubt that the lid will close tightly, you can make a ring of glue around the rim of the can before closing it. Alternatively, you can wrap some colored tape around the lid.
- Either way, sometimes you will need to open the jar to touch up details that will loosen up or add fresh water or glitter, so consider this before sealing the jar.
 6 Decorate the lid (optional). If you wish, you can finish your snow globe by decorating the lid.
 - You can paint it bright colors, wrap decorative tape around it, cover it with felt, or stick on holiday berries, holly, or bells.
- Once everything is ready, all you have to do is shake the snow globe well and watch the sparkles gently fall off around the beautiful decoration you've created!
Method 2 of 2: Create a snow globe from a store-bought set
 1 Buy a pre-made snow globe set online or at a craft store. There are different sets: some have grooves for photographs, others you need to sculpt your own clay figurines, and others provide a water ball, base and other materials to make the snowball look really professional.
  2 Collect the snow globe. Once you have the kit, follow the instructions on the package to put everything together. In some cases, you will need to paint some details and glue them to the base. After the decoration is installed, you will usually need to glue the glass (or plastic) dome to the base and then fill the dome with water (and snow / glitter) through the hole at the base. Use the supplied cork to plug the snow globe.
Tips
- Add sequins, beads, or other small particles to the water. Anything will do, the main thing is that they do not obscure the main decoration.
- For a funky effect, try adding a few drops of food coloring to the water before adding glitter, beads, etc.
- An item inside a snow globe can look more fun if you add glitter or fake snow to it. This can be achieved by first painting the object with clear varnish or glue, and then sprinkling glitter or fake snow on top of the wet glue. Note: This must be done before the item is placed in the water and the adhesive must dry completely. Otherwise, this effect will not work!
- Small plastic dolls, plastic animals and / or elements of board games such as Monopoly can be used as the main item, as well as a set of model trains.
Warnings
- If you decide to tint the water with food coloring, make sure to use light colors. By adding blue, green, black or navy blue, you won't be able to see anything in your snow globe. Also make sure the item is not stained by food coloring!
- It's possible that your homemade snow globe will start leaking, so make sure you place it on a surface that's safe for water!
What do you need
- A clean jar with a lid (glass jars are great!)
- Water
- Glue or epoxy
- Glycerol
- Sequins / Beads
- Small plastic item (s)
- Food coloring (optional)


