Author:
William Ramirez
Date Of Creation:
18 September 2021
Update Date:
1 July 2024

Content
- Steps
- Part 1 of 3: How to set up a server
- Part 2 of 3: How to connect to a server over a local area network
- Part 3 of 3: How to connect to the server over the Internet
If you set up a Minecraft server on a Mac computer, you can connect to it from any computer that has access to a local network or the Internet.
Steps
Part 1 of 3: How to set up a server
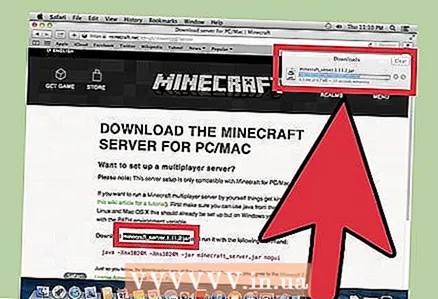 1 Download the Minecraft server files. This can be done on the official Minecraft website:
 - Go to address https://www.minecraft.net/ru-ru/download/server in Safari.
- Download the server JAR file.
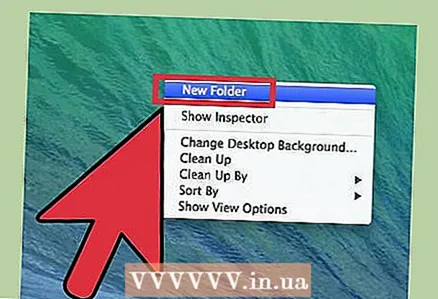 2 Create a new folder for server files. The server will be stored in it. Create the folder in an easily accessible place such as your desktop. The folder can be named whatever you want, for example "Minecraft Server".
 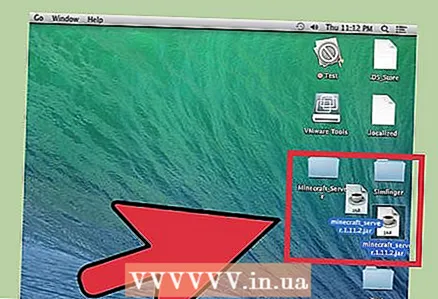 3 Drag the downloaded JAR file to a new folder. When you run this file, various server configuration files will appear in the folder. For now, just drag the downloaded JAR file into the created server folder.
 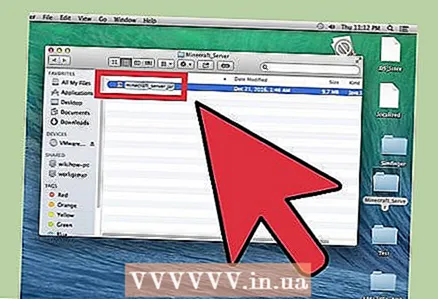 4 Rename the file to "minecraft_server.jar". The version number at the end of the file name can be removed to make it easier to enter commands.
  5 Start the TextEdit application. You will find it in the Applications folder. On your desktop, click the Go menu and select Programs.
  6 Open the Format menu and choose Plain Text. A text document will be created.
 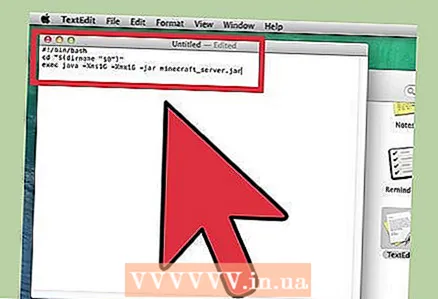 7 Paste the following commands into a text file. This set of commands is used to start the server. Instead of -Xms1G -Xmx1G can enter -Xms2G -Xmx2Gto increase the amount of RAM that will be allocated to the server from 1 GB to 2 GB:
 #! / bin / bash cd "$ (dirname" $ 0 ")" exec java -Xms1G -Xmx1G -jar minecraft_server.jar
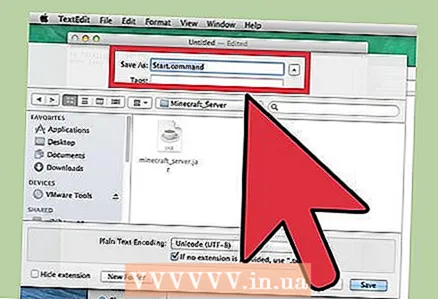 8 Save the file as.start.commandin the same folder as the JAR file. In the TextEdit window, click File> Save and save the file in the same folder as the server file downloaded from the Minecraft website.
  9 Open a terminal. It is located in the Utilities folder. On your desktop, open the Go menu and select Utilities.
 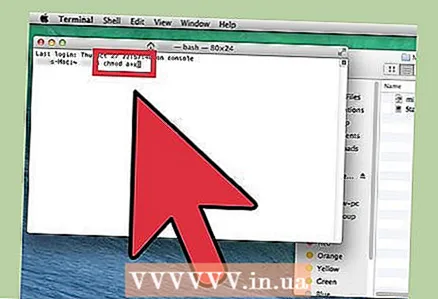 10 Enter.chmod a + x in a terminal window. Remember to put one space after a + x.
 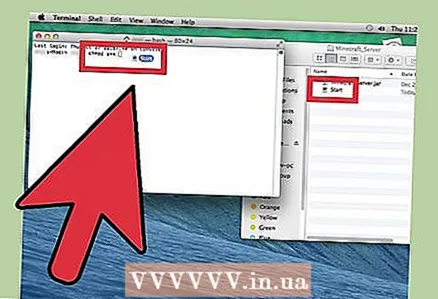 11 Drag the file.start.commandinto a terminal window. After the command chmod a + x the file path will be displayed.
  12 Click on ⏎ Returnto run the command. This will change the permissions on the "start.command" file and allow the server to start.
 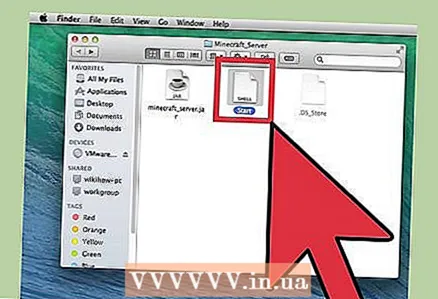 13 Double click on the file.start.commandto run it. The server will start. Error messages will be displayed, but this will only be the case the first time the server is started. It will generate several files in its folder.
 - The server will stop automatically after the first start.
 14 Open the "EULA.txt" file created in the folder. You need to make some minor changes to this file.
 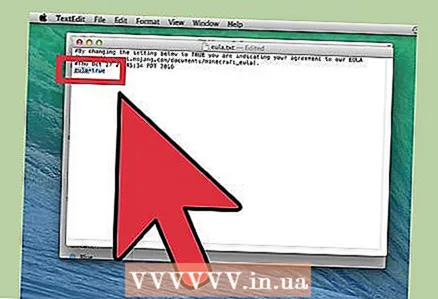 15 Change the line "eula = false" to "eula = true". This means that you agree to the terms of service for the Minecraft server software. Save changes to the file and close it.
 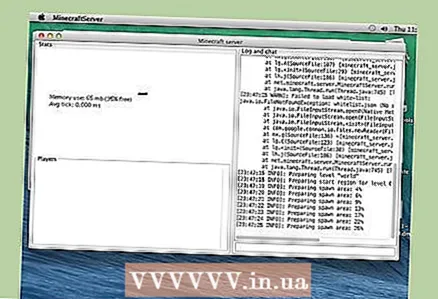 16 Double click on the file start.command. The server will start and the server command prompt will open. Additional files will also be downloaded and the server world will be created; all this will take a few minutes.
 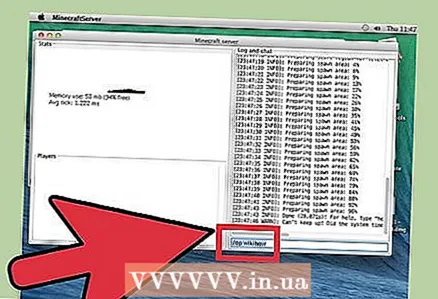 17 Enter / op username> at the server command line. Replace username> your Minecraft username. This will give you administrator rights when you connect to the server using your Minecraft account.
 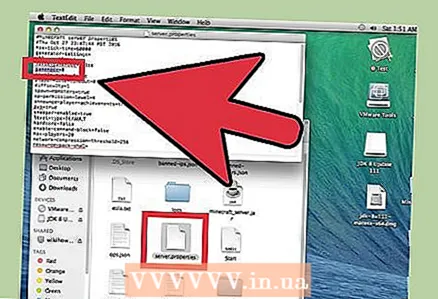 18 Change the server properties by editing the file.server.properties. Double click on this file and then select TextEdit in the window that opens. Change the values of the following entries to change how the server works, but remember that incorrect values can cause the server to malfunction. Reboot the server when you have made all the changes.
 - Recording gamemode has the following meanings: 0 - survival, 1 - creation, 2 - adventure, 3 - the viewer.
- In recording level-seed you can enter the key for generating the desired world.
Part 2 of 3: How to connect to a server over a local area network
 1 Determine the local IP address of the server. It is needed to connect to the server from another computer on the same local network.
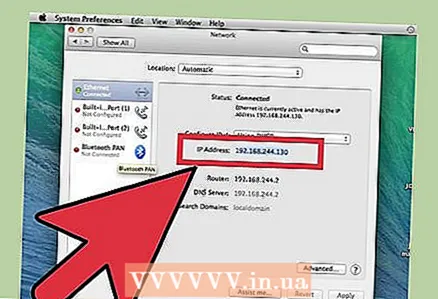
 - On a Mac running the server, click the Apple menu, then choose System Preferences> Network.
- Select your network connection, find the "IP Address" line and write down the address that appears on this line.
 2 Open Minecraft on another computer on your local network. There is no need to redirect ports or change other parameters if the other computer is on the same local network as the server computer. If the server computer is powerful enough, it can also run Minecraft, but this is not recommended for most computers.
 - If you want your friends to connect to your server over the Internet, read the next section.
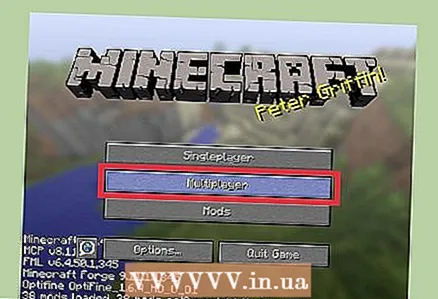 3 Select "Multiplayer" on the second computer. The process of searching for available games will begin. There is a high probability that your server will not be on the list of available servers.
 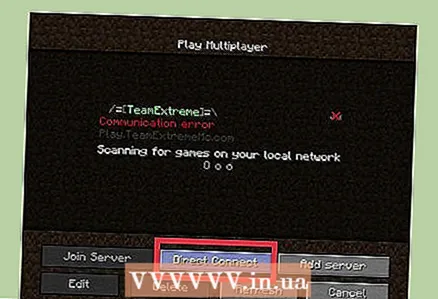 4 Click "Direct Connection". A window will open in which you can enter the address.
 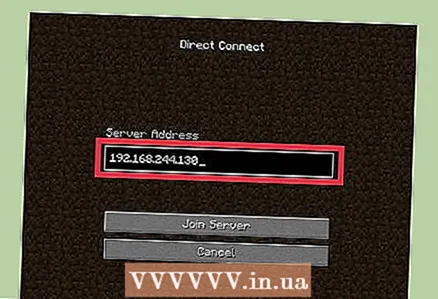 5 Enter the local IP address of the server. You will connect to the server and be able to play Minecraft. If the connection fails, make sure both computers are on the same local network.
 - Several computers can connect to one server through its IP address if the computers are on the same local network.
- If you are playing on a server computer, enter localhost.
Part 3 of 3: How to connect to the server over the Internet
 1 Determine the local IP address of the server. You will need it to correctly forward ports so that other players can connect to your server.
 - Open the Apple menu on your server Mac and choose System Preferences.
- Click "Network" and select an active connection.
- Make a note of the address that you find in the "IP address" line.
 2 Open your router's configuration page. In order for other users to connect to your server over the Internet, you need to configure your router to allow incoming connections. This can be done on the router's configuration page. If you are using a Netgear or Belkin router, you can access the configuration page from your web browser. If you have an Apple AirPort router, use the AirPort Utility from the Utilities folder.
 - Read this article for details on how to open the router's configuration page.
 3 Open the Port Forwarding section. Its location depends on the router model.Typically, this section is located under the WAN or Advanced menu. This section may be called "Applications and Gaming" or "Virtual Servers".
  4 Open TCP port 25565 for the IP address of your server. Enter the IP address in the "IP-address" line, and then enter "25565" in the "Port" line. Make sure "TCP" is selected as the protocol. Now save your changes.
 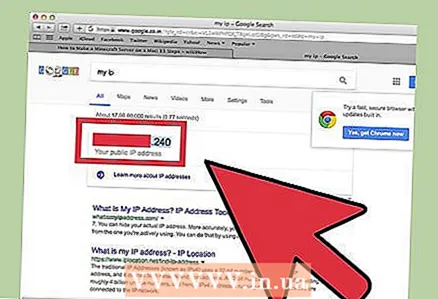 5 Find your public IP address. Your friends need to enter your public IP address to connect to your Minecraft server. To find your public IP address, open Yandex in the web browser of the server computer and enter “my IP address”. Your public IP address will appear at the top of the search results.
 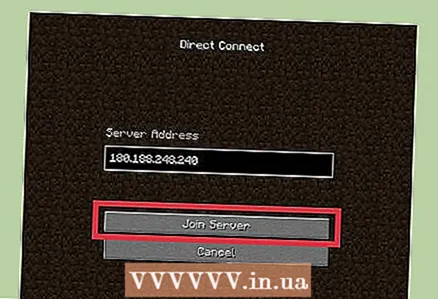 6 Enter the public IP address of the server in the Direct Connection menu on the other computer. To do this, start Minecraft on another computer, click "Network Play"> "Direct Connection", and then enter the server address.
  7 Check the server's public and local IP address regularly. Each time the server computer reboots, it receives a new local IP address from the router. In this case, you need to change the port forwarding rules to include the new address (otherwise no one will be able to connect to the server via the Internet). Moreover, your ISP may change your public IP address from time to time, which is entered by your friends to connect to your server.


