Author:
Bobbie Johnson
Date Of Creation:
6 April 2021
Update Date:
1 July 2024

Content
The samurai katana sword is a one-sided curved sword that first appeared in service with Japanese warriors in the 16th century. Having studied the technology of making samurai swords, you can make a similar sword and decorate the interior of your home with it. Follow the instructions and you will learn how to forge your sword.
Steps
 1 You will need a steel bar 5 cm wide, 1-1.5 cm thick and about a meter long.
 2 Heat the workpiece in the oven. It is necessary to heat the metal to temperatures of about 870 degrees so that it becomes softer and amenable to forging. During heating, sulfur and silicon impurities will oxidize and form carbon deposits. Removing carbon deposits and impurities will greatly strengthen the sword.
  3 When the workpiece is evenly reddened, place it on the anvil.
 4 Forge metal.
- Hit the hot workpiece with a hammer, turning it over. You will have to reheat the workpiece several times to tap the entire workpiece.
- Bend the blank to get the desired sword shape while it is hot and pliable. Forge the future shape of the blade. Try to keep the proportions.
- After you have given the overall shape to the blade, work on the shape of the tip, and then move on to shaping the point. The blade should be wider towards the back and sharpened closer to the edge.
- Prepare the part of the blade to which the handle will be attached.
 5 Sharpen your blade. Give the blade its final shape using sharpening stones and a grinder.
  6 Treat the blade with special clay. Other ingredients such as feathers or grass can be added to the clay. Apply clay to the back of the blade, leaving the edge uncovered. Then, place the blade in the furnace. Clay will help keep the back pliable and the edge firm
  7 Temper the steel. Quenching is the process of heating and cooling the metal. You will need water or oil for quenching.
 - Submerge the blade with the edge and point down. Thus, the edge will be more solid, the back of the blade is plastic, and this will allow you to reflect the blows of opponents without harming the blade. Hardening is a very important part of the blade making process, as the better the hardening is done, the stronger the blade.
 8 Let go of the blade. Heat it to a temperature of about 200 degrees and let it cool down to room temperature. This process will complete the hardening process and make the blade less brittle.
  9 Remove the clay from the blade and sharpen the edge.
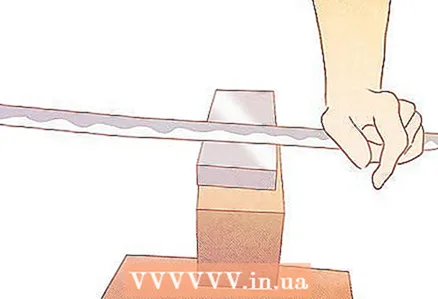 10 Buff the blade. Use sharpening stones and special polishing tools. When the blade is polished, hardened spots will be visible on it. Buff the blade to a shine to make it look really cool.
  11 Drill two holes where the handle will be attached.
 12 Make a handle. The handle should be long enough to comfortably hold the sword with both hands and to be well balanced.
 - Hard woods, such as yellow poplar or alder, are perfect for making a handle. Use a radial cut wood for maximum strength.
- Drive 2 copper pins into the handle. They will hold the handle and fix the blade.
 13 Place the handle on the blade. Insert copper pegs into the corresponding holes in the blade and creak the halves of the handle. Secure the grip with glue and a leather strap to keep the grip as tight as possible.
Tips
- Oil and water quenching has its advantages. Water quenching gives excellent hardness and oil quenching provides ductility.
What do you need
- Steel beam 5.1cm x 1.5cm x 1m * Open-hearth furnace
- Anvil
- Hammer
- Chisel
- Sharpening stones
- File
- Clay
- Hardening bath
- Polishing stones
- Drill
- Copper or brass nails
- Beam, 45cm long, made of hardwood
- Leather tape
- Glue


