Author:
Clyde Lopez
Date Of Creation:
26 June 2021
Update Date:
1 July 2024
Content
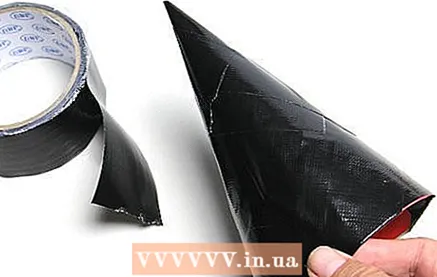
1 Roll a piece of paper into a cone. This will be the head of the rocket. You can use colored or patterned paper to make the rocket look interesting and unusual. 2 Wrap the resulting nose cone with duct tape. This will strengthen it and make it more resistant to water.
 - To make the rocket brighter, you can use colored tape.
- Color the plastic bottle - the body of your rocket. On it you can draw, for example, your logo.
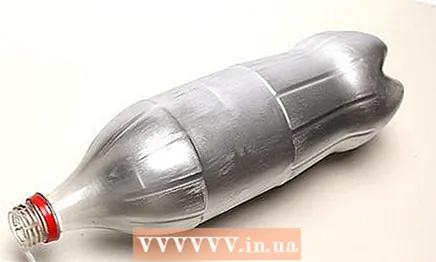
3 Attach the rocket head to the bottom of the bottle. This can be done with either glue or tape. - Try to do this so that the structure is as straight as possible and, at the same time, strong.
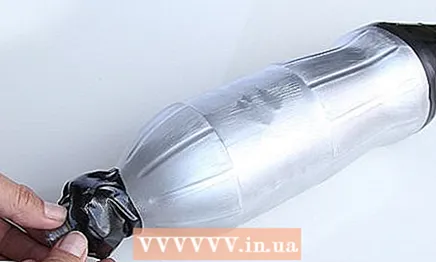
4 Take a piece of thin cardboard and cut 3-4 triangles out of it. Since these will be the tail keels of the rocket, try to cut the triangles as accurate as possible at right angles to keep the rocket upright stable. - Use cardboard, heavy colored paper, or brown paper. An unnecessary signboard, pointer is also suitable as a material.
- Attach the keels to the bottom of the rocket.
- Bend the sides of the triangles to increase the seam area. Glue them with tape or glue.
- If you line up the undersides of the keels with the neck of the bottle, the rocket will normally stand on its own.
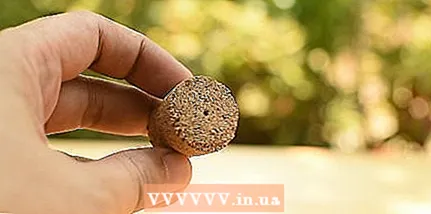
5 Add weight for weight. The cargo can be of any material, the main thing is that it gives weight to the rocket so that it can fly after launch. - Use plasticine or sculpting dough as they are soft and easy to shape and, unlike rocks, will not fall out when the rocket is fired.
- Apply plasticine or clay (about half a glass) to the grooves of the neck to form a rounded tip on the outside of the bottle.
- Wrap the resulting tip with duct tape so that the plasticine is securely attached.
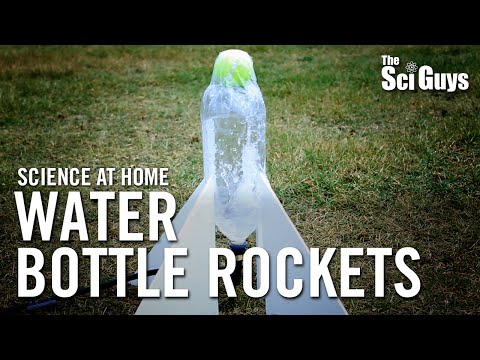
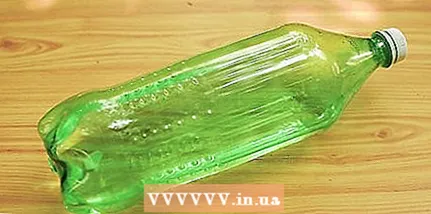
6 Fill the bottle with water. Pour 1 liter of water into a bottle. 7 Make a very small hole in the plug. The hole should be about the size of the bicycle pump needle. 8 Insert the stopper into the neck of the bottle as tightly as possible. Pliers can be used. 9 Place the needle from the bike pump into the hole. Make sure the needle is tight. 10 Turn the rocket upside down. Attach the valve of the bike pump to the neck of the bottle and position the rocket so that it doesn't hit your face when fired. 11 Rocket launch. Make sure you are in an open area. The rocket will take off pretty fast and high, so remove any obstacles and alert everyone nearby to launch. For start: - Holding the rocket by the neck of the bottle, pump air into it with a pump. The rocket is launched at the moment when the cork can no longer withstand the increasing pressure in the bottle.
- Let go of the bottle. When the rocket takes off, water will drench everything around - so be prepared to get a little wet.
- Do not approach the rocket after starting the air injection, even if it seems that the launch is not taking place. This can lead to injury.
Method 2 of 2: Two Bottle Rocket Launcher
- 1 Cut off the top of one of the bottles. Use scissors or a utility knife with replaceable blades. Make a neat, even cut so that the bottles can be glued to each other along an even border.
- Cutting off the top of the bottle will give the rocket extra aerodynamics and strength. The rounded tip will also soften the impact when the rocket lands.
 2 Leave the other bottle intact. It will serve as a combustion chamber holding water and compressed air. It will be attached to a launcher or other bottle.
 - 3 Decorate the bottles. Apply logos, patterns of your choice.
- 4 Place the weight in the cut bottle. You can use plasticine, just like in the same procedure in the first method, or cat litter. The filler is inexpensive, heavy and will stay in place if it gets wet.
- To place the filler, pour about 1.2-1.3 cm of filler into the cut bottle. Then add enough water to moisten it completely. Add another 0.6 cm and moisten again with water.
- Avoid placing too much - a dry layer can form and excess filler will fly out after launching the rocket. Too much filler in a rocket can also result in a heavy impact upon landing.
- Dry the inside of the bottle and use duct tape to hold the filler in place.
- 5 Combine two bottles. Connect them so that the cut-off bottle fits over the whole bottle. Press the bottles together so that the bottom of the cut bottle is aligned with the bottom of the whole bottle, and tape them together.
- 6 Take a thin piece of cardboard and cut 3-4 triangles out of it. These will be the tail keels of the rocket, try to cut the triangles as accurate as possible at right angles so that the rocket is stable upright and flies smoothly.
- Place the keels on the bottom of the cut bottle.
- Bend the sides of the triangles to increase the seam area. Glue them with tape or glue.
 7 Make a very small hole in the plug. The hole diameter must match the diameter of the bicycle pump needle.
 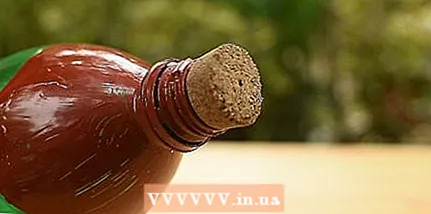 8 Insert the stopper as tightly as possible into the neck of an untouched bottle. Pliers can be used.
 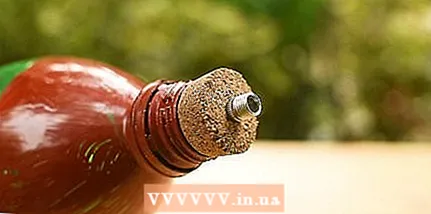 9 Place the needle from the bike pump into the hole. Make sure the needle is tight.
 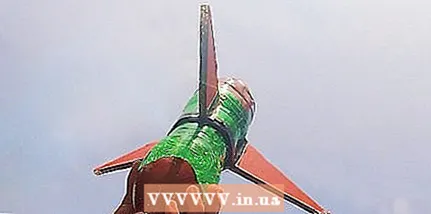 10 Turn the rocket upside down. Connect the neck of the bottle to the valve on the bike pump.
 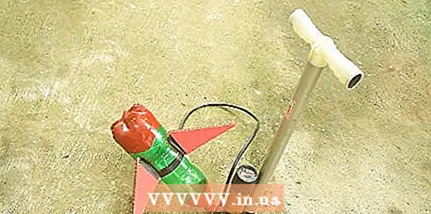 11 Rocket launch. Make sure you are in an open area. The rocket will take off pretty fast and high, so remove any obstacles and alert everyone nearby to launch. For start:
 - Pump air into the rocket. The rocket is launched at the moment when the cork can no longer withstand the increasing pressure in the bottle. This usually occurs at a pressure of about 80 psi (550 kPa).
- Let go of the bottle. When the rocket takes off, water will drench everything around, so be prepared to get a little wet.
- Do not approach the rocket after starting the air injection, even if it seems that the launch is not taking place. This can lead to injury.
Warnings
- Be careful when working with sharp objects and tools, especially if you are under 10 years old!
What do you need
Method 1:
- For the rocket:
- Sheet of paper 20 x 30 cm
- Bottle (a 2 liter bottle will work fine for a regular sized rocket, however if you want to make a mini rocket you can use a smaller bottle)
- Keel material (thick thick paper or thin cardboard)
- Adhesive tape (for decorating a rocket, connecting parts of a structure)
- Scissors
- Plasticine or clay
- Glue (optional)
- For the launcher:
- Water
- Bicycle pump with needle
- Cork
- Drill
- Bicycle pump needle diameter drill
Method 2:
- For the rocket:
- Two bottles (two 2 liter bottles or smaller bottles)
- Keel material
- Scissors
- Duct tape
- Plasticine or cat litter
- For the launcher:
- Water
- Bicycle pump with needle
- Cork
- Drill
- Bicycle pump needle diameter drill


