Author:
Ellen Moore
Date Of Creation:
17 January 2021
Update Date:
1 July 2024
Content
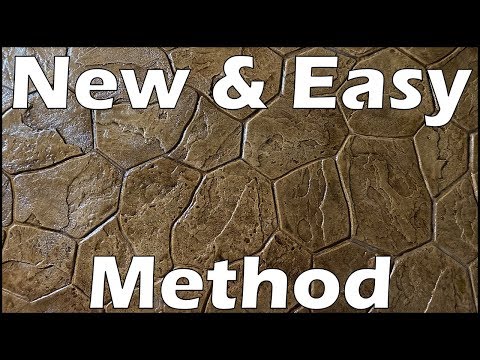
Decorative concrete is an attractive and economical alternative to natural paving materials and simple concrete pouring. You can get a lot of different options, and with the right approach, exactly the look you need.
Steps
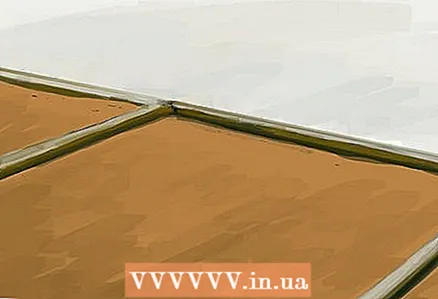
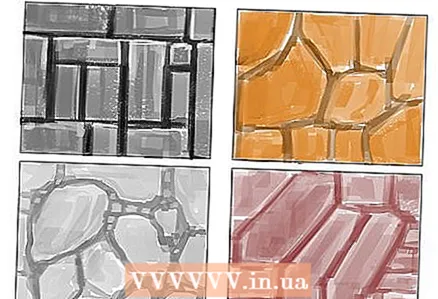 1 Choose a concrete color and texture that best complements the environment and surrounding structures. Pay particular attention to the direction of the seams between repeating patterns, such as brickwork, paving stones, or natural stone. Typically the patch should be imprinted so that the long lines of the specimen run perpendicular to the length of the patch. This will help reduce straight line errors and provide a more pleasing aesthetic appearance. As a rule, the texture is laid in straight lines, even if the area itself is rounded. Always make preliminary markings of how the stamping mats will be laid before starting to directly stamp the pattern on the concrete. The team must know in advance where the first mat will be located, as well as in what place the stamping mat does not fit in size, and in which direction the pattern will be stamped. It is very important to keep in mind the places where the site expands, as well as the joints (thin lines that you can see all over the concrete). Otherwise, the drawing may not coincide with the visual picture that you are holding in your head. A professional handler can come to your aid, who has enough experience, and he knows how to beat such places.
 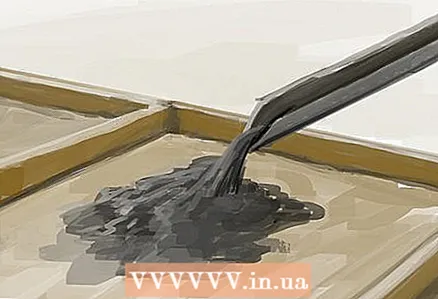 2 Pour concrete. Follow the standard procedures for earthwork and concrete subfloor preparation as outlined in the site specification and code for composition, depth and reinforcement. For pouring, you can use ordinary cement mortar, as well as water-reducing and air-entraining admixtures, accelerators. However, when using such impurities, it must be remembered that they should not contain calcium chloride. You can get detailed information on the composition of impurities from the manufacturer, as well as get recommendations on the type and the required amount of impurities for your work, since some additives can affect the color. The thickness of the cement layer must be at least 10.16 cm.
 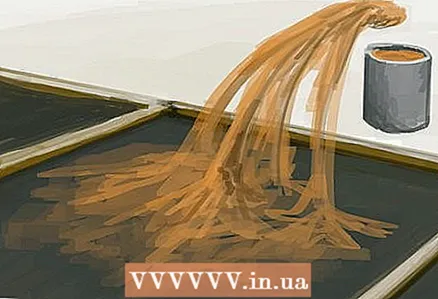 3 Adding color to concrete. There are two main technologies:
 - Add colorant to the mix: The liquid colorant is added to the mixer. This procedure allows you to evenly mix the dye with the cement mortar before pouring it.
- Common method: powder color hardener is applied directly to the freshly poured concrete surface. The hardener penetrates 0.3 cm into the surface, thereby staining it.
 4 Remember that powder color hardener can be sprayed only after the water that appears on the surface of the concrete after the initial installation (also called cement laitance) has been absorbed again. Spray the hardener with wide movements of the hand in order to cover as much of the area as possible in one movement. Then leave the surface on for a few minutes to allow the hardener to absorb and moisturize. Then, run over the surface with a wooden or magnesium alloy trowel. One pass should be enough; do not overdo it. If necessary, repeat the procedure in areas where natural concrete is visible. Once you have achieved the desired color, use a steel or Fresno trowel to finish the concrete surface.
  5 Apply a release agent. It is impossible to use stamping mats without it, since the composition has a special powder form, which prevents the mats from sticking to the freshly laid cement mortar. Typically, 3.5 kg of compound is needed to cover a 10 square meter site. Once the concrete surface has reached its optimum state for texturing, apply a release agent. To do this, it is better to use a brush to process the mats themselves and spray the compound over the entire surface of the site. The composition layer should lie evenly between the concrete and the textured mats; the layer should be thick enough to prevent wet concrete from seeping through the mats, but thin enough not to disturb the texture of the pattern.
  6 Select the color of the release agent used to coat the mold countertops in addition to the color of the concrete. A release agent with a darker tone will deepen the base color of the concrete and also add a play of color. Most of the release agent will be removed by flushing the site with water. Only 20% of the composition will remain on the concrete surface, otherwise the main color of the dye will dominate.
 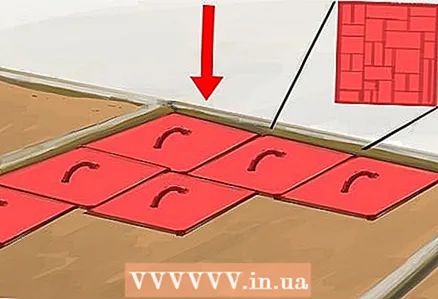 7 Add texture to the concrete surface. The procedure for imparting texture to concrete must be carried out at the optimal time. To do this, it is necessary to constantly check the condition of the surface in order to start work as soon as possible. The process itself does not require great strength efforts.
  8 Find a team to help you lay the stamping mats. Below is a diagram using a team of four to punch an area of approximately 37 square meters. More experienced crews can paint and stamp about 65 square meters at a time, but it is better to start with smaller areas. The process itself can be adapted to the specific needs of the project.
 - First worker: Sprays release agent throughout the entire process and spreads it over the entire surface. Identifies areas that need improvement.
- Second worker: lays down the stamping mats. The first mat must be carefully leveled, laid and tamped. Repeat the process, placing the second mat next to the first. The mats must be stacked close enough to each other to avoid sloppy seams between the patterns. Continue to install the mats, alternating between them after tamping. You will need at least three mats for small areas. Larger projects will require more mats.
- Third worker: tamping the laid mats. The mats should be tamped directly into the concrete using as much force as necessary to imprint the mat onto the surface. It's also important not to overdo it here!
- The fourth worker: gently removes the tamped mats, starting to lift on one side to loosen the suction. Then he hands over the mats to the first worker to prepare them for subsequent laying.
 9 Use a high pressure washer approximately 24 hours after the concrete has hardened (204 atmospheres recommended; but be careful as the concrete surface may be damaged). This is necessary in order to remove excess impurities from the concrete surface. Vary the distance between the spray and the surface to ensure that the release agent is removed unevenly and remains in cracks and deeper dents in the pattern. This will give a more natural, shaded aging effect.
 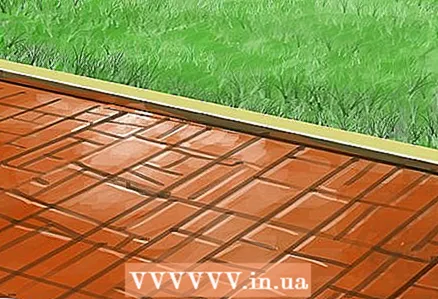 10 Cover the surface with a concrete surface sealant according to the manufacturer's instructions. When the surface is dry enough, apply a clean reinforcing agent using a roller. One gallon is enough to cover an area of about 200 square meters. A thin layer should be applied in one direction and the second layer should be applied in a perpendicular direction to avoid unwanted lines. Be careful not to build up sealant in the corners.
  11 3D stamped concrete is known as artificial stone, which combines the techniques of stamping and hand sculpting of concrete. For such concrete, water-based paint or acid stains are used instead of dyes.
Tips
- Always keep an eye on the weather. Postpone work if rain is expected.
- General coating requirements vary depending on the color chosen and the desired color intensity. Typically, 27 kg of dye is enough to cover an area of 30 square meters. Although lighter or pastel colors may require as much as 45 kg of dye per 30 square meters. Apply the hardener in different proportions, first apply two thirds of the hardener and one third during the second pass over the surface.
- The release agent settles during transport. Therefore, before using it, shake the contents of the bucket to break up the lumps and provide an appropriate feeling of airiness throughout the contents of the bucket.
- Use at least five 91 cubic centimeter bags of cement. Coarse aggregate should not exceed 3/8 and should not be reactive. Use the minimum amount of water, the total weight should not exceed 10 centimeters. And remember: NO highly water-reducing impurities.
- When spraying the hardener, there should be no water on the surface of the concrete. Do not iron it too hard, as the water will soak back into the surface and reduce the intensity of the color. Do not spray water on the cement as this will change the color intensity. Do not cover the surface with plastic. The hardener, like the release agent, will settle during transport, so shake the contents of the bucket before using it.
- When using liquid stain, follow standard concrete placement procedures. If you are using a colored hardener, you will need a tamper, screed, wood trowel or magnesium trowel to place the concrete. The surface of the concrete must always be exposed. Do not use the trowel until the last coat of hardener has been applied.
- You must have enough mats to cover an area equal to 1.5 times the width of the surface.
What do you need
- TOOLS: While texturing, you may find areas that need work, or you may encounter hard-to-reach areas that require additional tools to process them. Below is a list of tools you may need. Make sure you are well prepared before starting work.
- Stamping mats, soft mats, release agent, hardener or liquid colorant, finishing tools, hand rammer, long handle trowel, laminated trowel with rubberized handle, concrete finishing trowel, screed / bar.


