Author:
Eric Farmer
Date Of Creation:
10 March 2021
Update Date:
1 July 2024

Content
- Steps
- Part 1 of 3: Propeller Construction
- Part 2 of 3: How to glue wood
- Part 3 of 3: How to cut the blades
- Tips
- What do you need
It is necessary to spend a lot of time on preparation and work in order to make such a complex element as a wooden propeller. Pay close attention to detail. If you plan to use the propeller as a toy or decoration, then some mistakes and shortcomings are permissible. But if you are going to use the propeller in conjunction with the engine, then it is better to enroll in special courses in order to acquire the necessary skills. It is quite difficult to make a workable part, so do not be discouraged if the first results are far from ideal.
Steps
Part 1 of 3: Propeller Construction
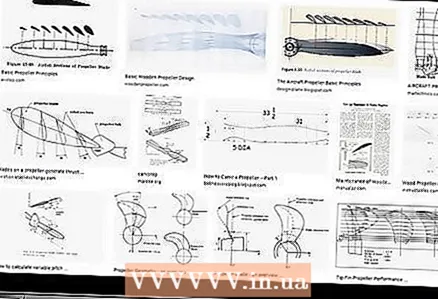 1 Find a design template. Try to find a suitable propeller design template. It is important to know the motor power, propeller diameter and rpm in order to find wood propeller drawings and templates for such specifications. Find a template online or borrow a special book from the library. Some books have sample drawings, which will do just fine.
 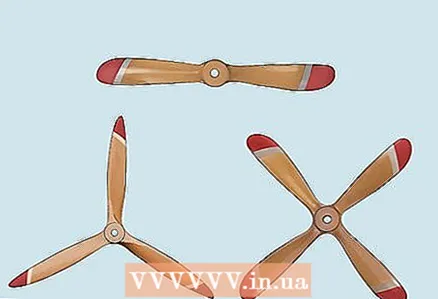 2 Determine the number of blades. Most often the propeller has two, three or four blades. Larger aircraft may use propellers with even more blades. The more powerful the drive motor, the more blades are needed to distribute power evenly. Although you can make a propeller with three or four blades if you really want to, if this is your first such experience, it is better to start with a simple propeller with two blades. The more blades, the higher the cost, the weight of the finished product and the time spent.
  3 Determine the length of the blades. As with the number, increasing the blade length allows a more powerful motor to be used. Also note that the maximum blade length is always limited by the distance to the ground. Measure the distance from the nose of the aircraft to the surface to understand the limitations.
  4 Aerodynamic profile. The propeller blade thickens near the motor shaft hub at a large pitch, while the blade tip is always thin with a slight pitch. Determine the blade width and angle of attack. The propeller blades are attached to the hub at an angle similar to the threads on screws and screws.
 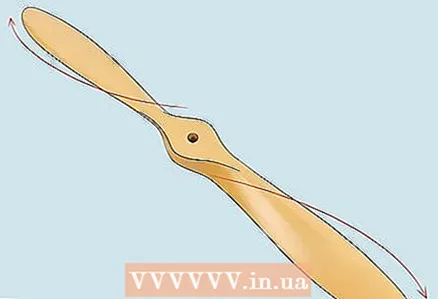 5 Correct propeller blade bending. The propeller blade resembles a curved wing. The curved propeller pushes air or water more efficiently. The ends of the blades always move much faster than the hub on the shaft. The blades need to be bent so that the propeller maintains the same angle of attack along the entire length of the blade. Use a special calculator to calculate the required slope.
  6 Select the material for the blades. The more reliable a wooden propeller is made, the better it handles aircraft vibrations. Use strong but lightweight wood like maple or birch. When choosing wood, pay attention to the grain texture. Straight and evenly spaced fibers will help balance the propeller.
 - Use 6-8 planks that are 2 to 2.5 centimeters thick and about 2 meters long. Spare planks won't be in the way either. The more layers, the stronger the propeller will be, even if each layer is very thin. To save time, you can contact material suppliers that produce plywood.
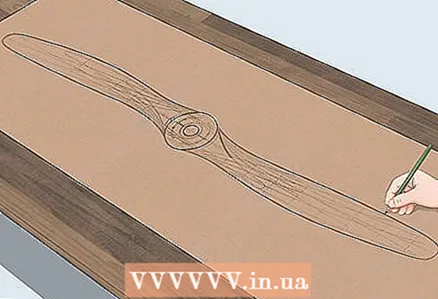 7 Make a propeller template. Determine the look you want and make a screw template out of thick cardboard. Work with actual size. Also draw a center hole and a separate blade pitch template. Cut out the template and use it to make the propeller.
Part 2 of 3: How to glue wood
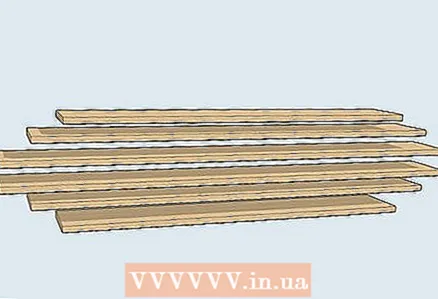 1 Arrange the wood planks correctly. Parts of different lengths will be required. The longest part should be in the middle, and the rest in decreasing order of length.
 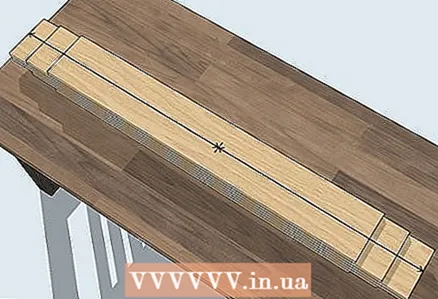 2 Measure the blades and make sure they are the same length. The propeller must be as balanced as possible in order to perform its functions correctly. All blades must be the same size and shape.
 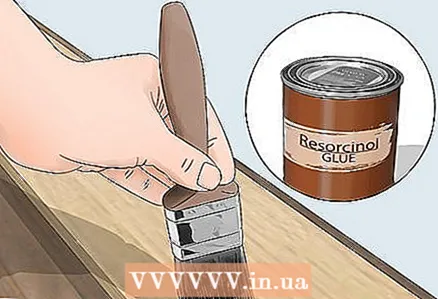 3 Glue the boards together. Use a very strong adhesive when making an aircraft propeller. There should be no free space or air between the boards. It may seem that it is much easier to use one thick board, but several boards of thinner thickness glued together will be much stronger.
 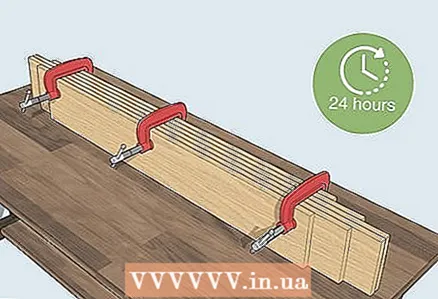 4 Use clamps or a vise to grip the structure tightly for 24 hours. It is very important that the boards are pressed firmly against each other until the glue dries. You can use a bench vise or several clamps for these purposes.
Part 3 of 3: How to cut the blades
 1 Place the template on the glued timber and trace the outline of the propeller. Draw a line along the entire length of the blade. Draw a hole in the center.
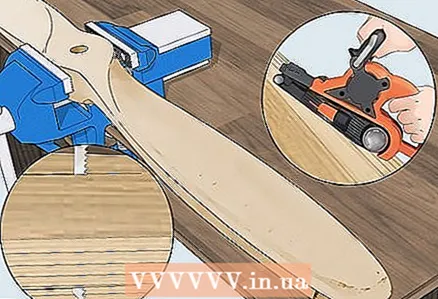
 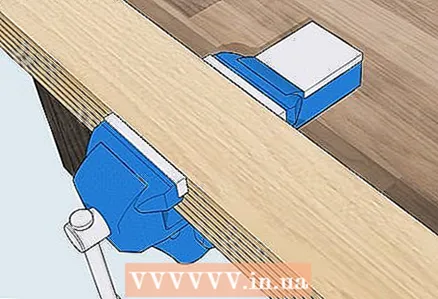 2 Secure the workpiece. A vise can be used to secure the propeller during operation. If there is no vise, then secure one side of the propeller to the frame with a clamp and work on the other side.
 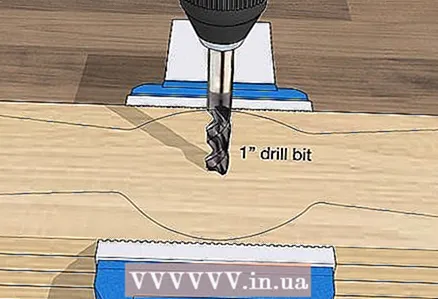 3 Drill a center hole. Mark the hole according to the template and drill it with a 25mm drill. It is desirable that this hole is located as much as possible in the center of the bar.
 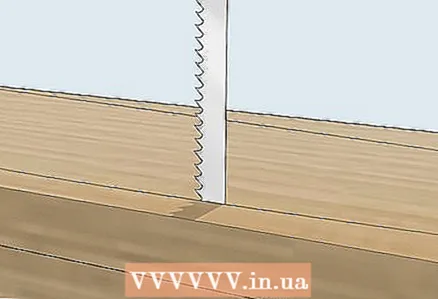 4 Remove excess wood. Cut the workpiece along the drawn propeller outline. You can use a hand saw and move as close to the contour lines as possible.
 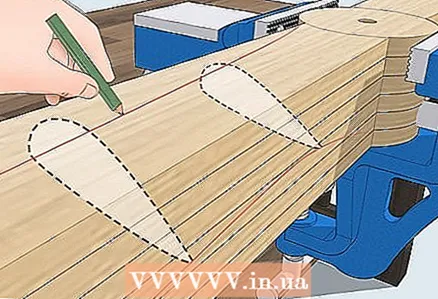 5 Mark the angle of the blade along the edge of the wood. Use the blade angle calculated with the calculator and transfer the bend outline to the workpiece. Draw a bend angle around the edge of the timber to indicate the tip of the propeller blade. Then draw a line along the length of the blade to indicate the shape of the bend. Repeat on the opposite side of the workpiece.
  6 Peel off excess material to obtain the desired angle. Use a saw to cut off any excess wood. Then use a chisel or belt sander to shape the part into a precise shape. Sand until the blade is smooth.
 - High precision of the finished product is required, so grinding can take up to 60 passes to get the desired result. Get ready to spend several hours on this kind of work.
 7 Repeat for the opposite corner. Turn the workpiece over and repeat on the back of the blade. Remember to keep the blades curved in one direction.
 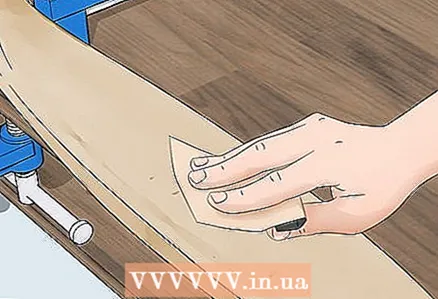 8 Unroll the propeller. Follow the same steps, observing all angles for the second blade. Both blades should be as smooth as possible. Sand the surface of the blade until it is flat and smooth.
  9 Check the balance of the propeller. Pass a straight bar through the center hole of the propeller and check how evenly balanced in weight are both blades. If the blades are horizontal, the propeller is well balanced.
 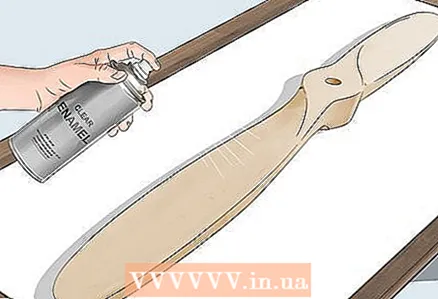 10 Cover the propeller with a coat of varnish. The varnish will seal the wood and protect the product from moisture and weather. Apply a coat of varnish all over the surface and let dry for 24 hours. Apply a second coat if desired.
 - You can also paint the tips of the blades with a bright yellow or red paint to make them visible as they rotate.
Tips
- Turn on a regular fan at home and pay attention to how the blades rotate and how they move the air to understand how the propeller works.
What do you need
- A dozen wooden planks about 1.5 centimeters thick, 15–20 centimeters wide and about 2 meters long (depending on the size of the template).
- Hacksaw
- A hammer
- Chisel
- Belt sander
- Strong adhesive
- Varnish
- Clamps or vise.


