Author:
Janice Evans
Date Of Creation:
4 July 2021
Update Date:
1 July 2024

Content
- Steps
- Part 1 of 3: Site Selection and Preparation
- Part 2 of 3: Digging the Cave
- Part 3 of 3: Completing the cave
- Tips
- Warnings
- What do you need
Need to urgently build a snow shelter? Have you decided to spend the night outdoors on the ski slope? Or are you trying to build the best snow fortress in town? It doesn't matter why you want to build a snow cave, carefully follow each step so that your construction does not collapse on you. If you are ready for a few hours of hard work and the weather conditions are favorable, you can make a snow cave to be proud of.
Steps
Part 1 of 3: Site Selection and Preparation
 1 Avoid rockfall areas and wind-blown slopes. Don't dig your snow cave in the path of a potential avalanche or rockfall. The slopes against which the wind is blowing can be dangerous if you stay overnight, as the cave entrance can be covered with snow from the wind.
  2 Find a place with deep snow cover. If you manage to find a snowdrift more than one and a half meters deep, then a huge part of the work will already be done for you. Look for areas where the wind has blown such drifts against the slope. Keep in mind that the space must be sized according to the number of people to be sheltered. The cave is 3 meters in diameter and is comfortable for two or three people.
  3 Check the consistency of the snow. Light and loose snow is likely to be difficult to work with, moreover, structures made of it are more likely to disintegrate. Fortunately, snow tends to thicken over time, so if you have time, shovel it into a pile and wait for it to get harder, then you will most likely still be able to form a snow cave out of it.
 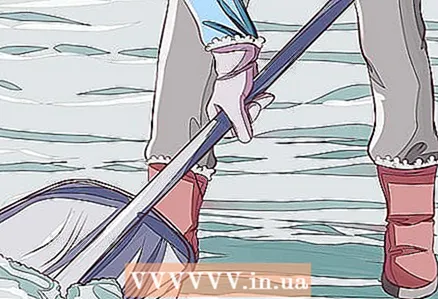 4 If the building conditions are poor, dig a pit instead of a cave. If you are in an emergency, you can alternatively dig a pit and use a tarp to cover it. Use ski poles or branches underneath the snow for tarps. It is easier and faster to dig it, but it will be much colder than the cave, and any avalanche can bury it under a layer of snow.
  5 Make sure you have the right items and equipment. Warm, waterproof clothing is vital when you're outdoors in the wilderness. Consider removing one or two bottom layers of clothing before starting work, because then you will have something to change in if you sweat while digging. In terms of equipment, having one or two compact snow shovels will greatly speed up and simplify the cave construction process. A smokeless light source is useful for overnight stays, but a candle or other small fire source can be used if you choose to provide a vent.
 - The vents will be discussed later in this article.
 6 Call a friend for help. We strongly recommend that you work with at least two people. Leave one person outside the cave with a free shovel throughout the construction process. In this case, if the cave collapses, he can quickly rescue people from the underside of the rubble.
Part 2 of 3: Digging the Cave
 1 Work slowly but methodically. Work in turns, taking turns, if your team has two or more people, take breaks for food. Working slowly but efficiently without sweating will help you stay warm longer than digging in a hurry. If you sweat, you begin to lose heat and increase your risk of hypothermia.
  2 Make drifts if required. If the snow drifts in your area are not deep enough, you will have to shovel the snow so that the snow drifts are at least 1.5 meters deep and large enough to accommodate all the people who need to be sheltered in the cave.
 - You can quickly create a large snowdrift by doing the following: find a small slope and push the snow down to its base with your shovels. Beware of large slopes with snow deposits higher than you decide to make your cave, as an avalanche can fill it up.
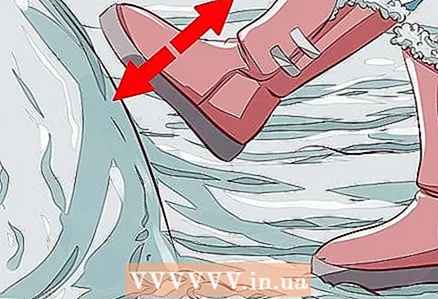 3 Pack the snow firmly. You can ram the snow with the soles of your boots or with a sheet of plywood, pressing on it from above with the weight of your body. If the snow is light and loose, it may need to be tamped several times as you make the cave, in addition to the final tamping when the cave is high enough.
  4 Leave your snowdrift for two to three hours - the cold wind will strengthen the snow. This will make the snow harder and reduce the chance of collapse when you start digging the cave.It is recommended to wait more than two hours, although if the snow is fine, dry and loose, you may need to wait up to 24 hours.
 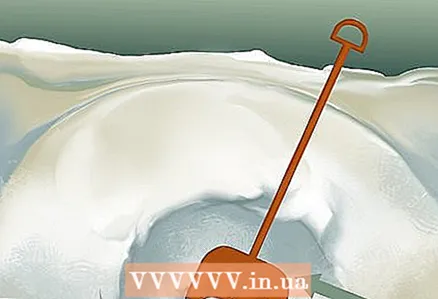 5 Dig a tunnel in the snow. If you've made a snowdrift, make the tunnel wide enough to crawl through, several feet deep and sloping upward. If you are digging a tunnel in deep snow, dig a trench 5 feet or more deep and then dig the tunnel from the bottom of the hole. The task will be much easier if you have at hand a compact snow shovel, which can be purchased at any store for tourism and outdoor activities.
 - If you're digging a cave for fun and don't mind spending a little more time, you can avoid some possible discomfort by making a "doorway" a few feet high instead of a tunnel. When the snow cavern is ready, cover most of the opening with snow, leaving a small tunnel to exit.
 6 Stick ski poles or branches into a snowdrift as a guide so for 30-50 centimeters. As you dig inside the cave, stop when you reach the tips of these items. Otherwise, the ceiling will come out too thin and the cave will either collapse immediately or become vulnerable to phenomena such as an avalanche.
  7 Form the vault of the cave. Shovel snow from the center of the snowdrift or drift to the outside through the entrance tunnel. Once you've cleared enough room for your body, you can stay inside the cave and push the snow out with your feet. Make sure the ceiling is no thinner than 30 centimeters to minimize the chance of collapse. Walls should be 10 centimeters or more thicker than the ceiling.
 - Try to make the floor of the cave higher than the entrance tunnel. This solution will help keep warm in the sleeping area, as cold air will accumulate at the entrance to the tunnel.
Part 3 of 3: Completing the cave
 1 At very low temperatures, you can strengthen the structure by sprinkling water over it. If it's less than 0 degrees Celsius outside and you have unnecessary water, water your cave outside. Frozen in the form of ice, it will strengthen the cave.
 - Never water the cave with water if the temperature is over freezing Celsius.
 2 Level the walls and ceiling from the inside to avoid water dripping. Scrape the walls and ceiling of the cave with a shovel to make them smooth. Uneven, bumpy surfaces will encourage seeping water to drip onto the cave floor instead of running down the walls and collecting around the edges.
 - If dripping is still a big problem, cut a groove in the wall that runs down the wall to the floor of the cave.
 3 Mark the cave exit. Use a brightly colored object or prominently protruding branches for this. To mark the edge of the cave. This will help people find the cave again later and prevent it from being destroyed by someone who missed the roof and stepped on it.
 - If you are in an emergency while waiting for rescuers, make sure the item is visible from the air and not obstructed by trees or other obstructions.
 4 Cut out benches and sleeping areas to the required sizes. The higher the benches and platforms for sleeping, the better, as the cold air will accumulate below, which means you will be warmer. You may want to include shelves for easier storage of equipment and other items and a longitudinal ditch to make it easier to sit or stand upright.
  5 Make ventilation holes. Snow caves can be quite isolated from the outside air, especially if the vapor you exhale forms a layer of ice on the ceiling and walls. To avoid choking, use a ski pole or other long object to make one or two holes in the sloped section of the roof. Make sure the holes are through.
 - Since the vents will cause some heat loss, you can cover the vent with a snowball or other object and take it out when the air seems stale or everyone is dizzy. Remove the object from the hole before going to bed.
 6 Place a layer of insulating material on the floor. Collect pine branches and spread them on the cave floor to reduce heat loss through the ground. Sleep on camping pillows, but remember that inflatable pillows will not keep you warm in cold weather.
 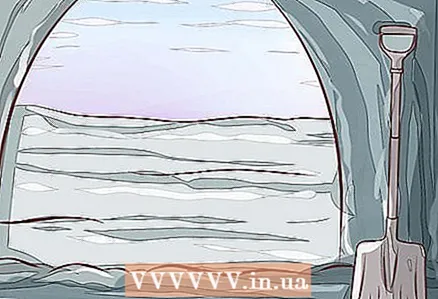 7 Take the shovels to the inside of the cave. While in the cave, make sure you have shovels with you so that you can dig yourself up if the cave collapses or if the entrance is blocked by a blockage of snow. During a snowstorm, regularly shovel the snow entryway.
 - If too much heat is escaping through the cave entrance, place your backpack or any other object that is easy to remove in the passage. Do not cover the entrance with snow.
Tips
- If water is dripping from the melting snow, compact the walls or ceiling with an additional layer of snow.
- If the snow is hard to ram and you have a large group of people, it is better and faster to make several small caves instead of one large one.
Warnings
- If you plan to sleep in your snow cave for several days, scrape off 1 to 2 inches of thawed snow after each night. This will preserve the porous structure of the snow and allow moisture to escape into the environment instead of accumulating inside the cave.
- Always leave the entrance uncovered if you have a burning candle or other source of fire. Using even a small primus or candle can be fatal as it can generate large amounts of carbon monoxide. Carbon monoxide is heavier than air and will not escape through the top vents.
- Building a snow cave is hard work. Share the load with others, with one person responsible for preparing calorie-rich hot meals for the entire work team.
- It is not recommended to light a fire inside the cave or install a camp stove there. Since combustion consumes vital oxygen and forms dangerous carbon monoxide. It will also lead first to the melting of the snow, then to its solidification in the form of an ice crust. This will lead to the accumulation of excess moisture in the cave and will adversely affect the physical condition of all people who live in it.
What do you need
- Large Snow Shovel
- Small spatula or scoop
- One or more assistants
- Ice ax / ice ax (optional)


