Author:
Clyde Lopez
Date Of Creation:
20 June 2021
Update Date:
1 July 2024

Content
- Steps
- Method 1 of 4: Making Mitts with Classic Gloves
- Method 2 of 4: Making mitts from socks
- Method 3 of 4: Sewing mitts
- Method 4 of 4: Knitting mitts with needles
- Tips
- Warnings
- What do you need
- Mitts made of ordinary gloves
- Mitts made of socks
- Fabric mitts
- Knitted mitts
Mitts, or fingerless gloves, look trendy and stylish. They keep your hands warm by keeping your fingers free. And best of all, they are easy to make yourself! For example, these gloves can be sewn or knitted from scratch. You can also remodel your existing pair of classic gloves, or make mitts out of a pair of socks! Whichever method you choose, the result is a new fashion accessory!
Steps
Method 1 of 4: Making Mitts with Classic Gloves
 1 Find a pair of gloves. These may be old or new gloves that you decide to redo. It is a good idea to use old gloves that have already been wiped on your fingers for this purpose, as this will give them a new life.
 - An excellent choice would be knitted gloves made of cotton or wool (angora, sheep or cashmere).
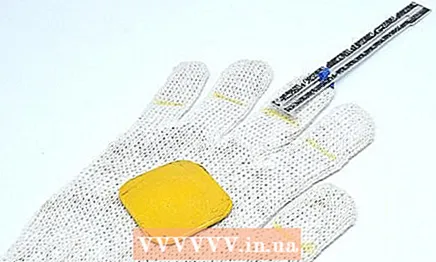 2 Try on gloves and mark at what level you want to trim their fingers. In most cases, this is done at the level of the upper edge of the lower phalanges. Use tailor's chalk (on dark gloves) or a pen (on light gloves) to mark.
 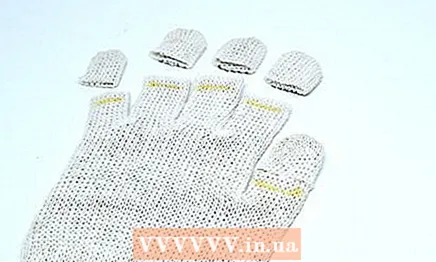 3 Remove gloves and cut off their fingers 5 mm above the marks. In the future, you will tuck the cuts so that the material does not crumble or bloom. After this operation, the gloves will acquire the desired finger length.
 - Measure the second glove over the one you already cut and make it identical to the first. This will give you two identical gloves.
 4 Cut off the thumbs of the gloves. Thumbs can be cut completely or approximately in the middle. If you want extra precision, try on the glove again and place a cut line on it as you did with your other fingers.
  5 Undercut the cuts. Tuck the finger cuts inward by 5 mm one by one. Sew on the hem with basting or blind stitches. Tie a knot and cut off any excess thread.
 - Put a glove on your hand, before tie a knot. In this way, the finger will stretch the seam to the required size.
- You can use threads to match the fabric or in a contrasting color.
 6 Try on the mitt and make sure it fits comfortably on your hand before making a second glove in the same way. Make the necessary changes to the product if necessary. When you are happy with the result, repeat the same with the second glove.
Method 2 of 4: Making mitts from socks
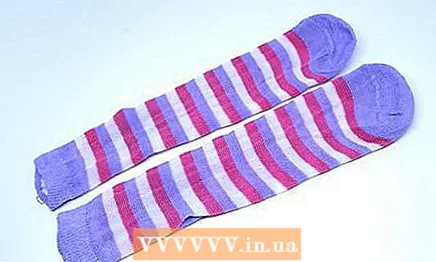 1 Find the right socks. It is best to take knee-highs for work. Choose a pair with an interesting pattern that will look good on mitts, such as stripes.
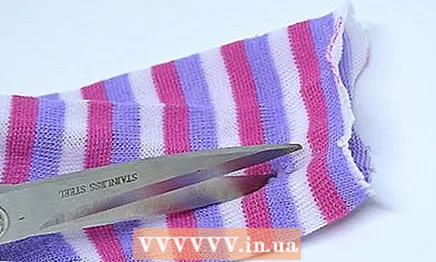
 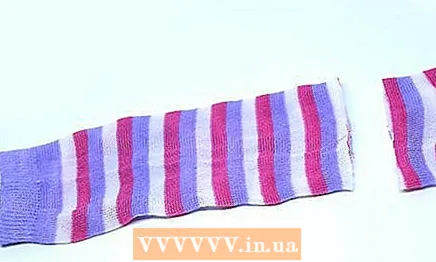 2 Cut off the sock completely. That is, remove everything from forefoot to heel. To do this, cut the top of the toe in a straight line just above the heel. Throw away the bottom of the sock or save it for other crafts.
 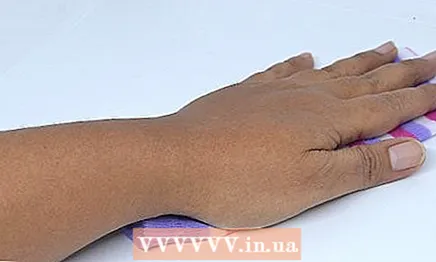 3 Try on a piece of sock over your arm. Place your hand on your sock. The upper ends of the lower phalanges of the toes should be located along the line of the processed upper edge of the sock (elastic band). The previously cut should be somewhere on the forearm beyond the wrist. Mark the location of the thumb set aside. If you want to make shorter mitts, additionally mark the length of the glove you need.
 - For most people, the thumb should be about 5 cm from the top edge of the mitt (sock elastic).
 4 Make a small vertical thumb slot. Find the labels you put in. Pinch the fabric horizontally between the marks and make a small vertical cut. Approximately 1.3 cm will be sufficient.
 - Don't worry if the finger hole seems too small for you. It will stretch. Moreover, it can always be increased.
- If you want to make the mitts shorter, cut the glove 1 cm further than the length mark.
 5 Try on a glove. Slide your hand into the former sock and insert your finger into the hole.At this point, you can enlarge the thumb slot if necessary. You can also give it an oval shape.
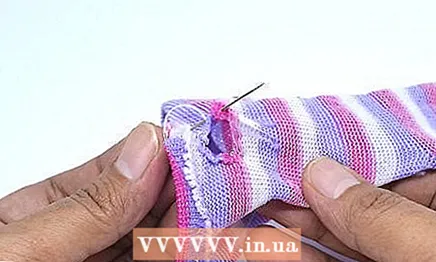
  6 Undercut the raw section of the glove. Remove the glove. Fold the cut edge inward 1cm. Secure the fold with tailor's pins, then sew on the sewing machine with a tricot stitch or zigzag stitch. You can also sew the glove by hand using basting stitches.
 - Threads can be used to match the material or in a contrasting color.
- This step is not critically necessary, but it allows you to make the mitts more tidy.
 7 Consider undercutting the thumb slit. This is not strictly necessary, as the knitted fabric of the sock does not crumble very much, but it will make the glove look neater. Fold the slits inward by 5 mm. Sew the hem by hand with basting stitches.
 - Threads can be used to match the material or in a contrasting color.
 8 Repeat the same steps to make a second mitt. Remember to try on gloves periodically during the manufacturing process. This ensures that two mirror-like products are obtained.
Method 3 of 4: Sewing mitts
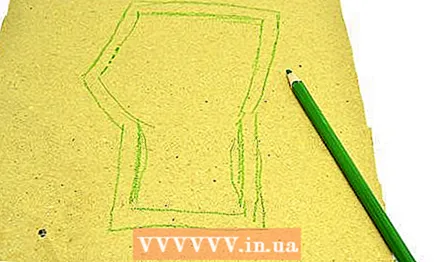 1 Make a pattern. Trace the outlines of the palm, wrist, and forearm on a piece of paper. Start the stroke at the height of the upper edge of the lower phalanges of the fingers and bring the lines to the level you need on the forearm. Then remove your hand. Draw a straight horizontal line on the upper edge of the mitt. Create an arcuate cut at the level of the thumb hole.
 - Make sure that the contours of the thumb hole smoothly connect with the contours of the glove itself.
- When stroking paths, indent slightly by hand, especially if the fabric you prepared does not stretch very well.
 2 Cut out a pattern. At the same time, make an indent of 1 cm on all sides of the pattern.This will provide you with a sufficient supply of fabric for seam allowances, which can be from 0.5 to 1 cm.
 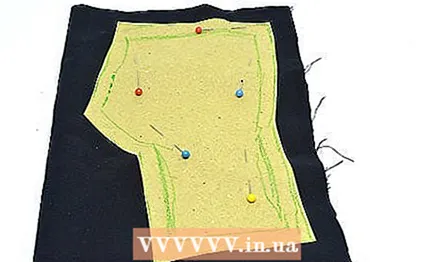 3 Transfer the outline of the pattern to the fabric. Fold the fabric in half, right side in, and then pin the pattern on top. Trace its outlines. Chip off the pattern, flip it over to the other side, and pin it down again to trace the contours of the second glove.
 - You can use any stretch fabric you like. Fleece or linen jersey is a good choice, since these fabrics practically do not crumble.
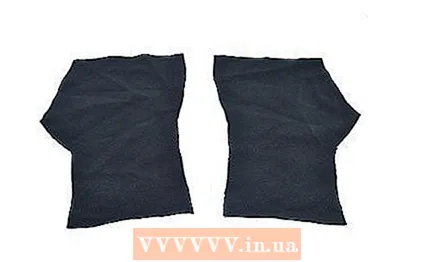 4 Cut out the fabric pieces. Try to cut the details of both gloves from two layers of fabric at once. This will make them the same. There is no need to add seam allowances at this step, as you did when you cut the pattern.
  5 Sew together the parts of the gloves. First, pin the pieces together. Place left and right seams with a 5 mm seam allowance. If the fabric is stretchy enough, use 1 cm seam allowances. Do not sew the top and bottom of the gloves, or the thumb holes.
 - If you are making gloves from fleece or underwear, use a knit stitch or zigzag stitch.
 6 Undercut the top and bottom of the gloves. Tuck the top and bottom edges of the gloves over to the wrong side 1 cm. Pin the collars with pins, and then secure with a stitch. You can use threads to match the fabric or threads in a contrasting color.
 - If you have taken fleece or underwear for work, you can skip this step. However, if you do decide to hem the fabric, use a knit stitch or zigzag stitch.
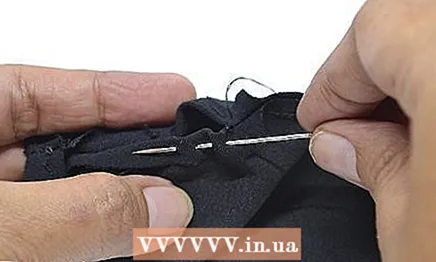 7 Manually undercut the thumb holes. Fold the fabric cuts around the holes to the wrong side 5 mm. Secure them by hand with basting stitches.
 - If you took fleece or underwear to work, you can skip this step.
 8 Turn the gloves right over. Now you can wear them!
Method 4 of 4: Knitting mitts with needles
 1 Cast on 40 stitches of yarn # 4 onto knitting needles # 5 (5mm thick). The dialed loops will determine the length mitts.If you need shorter mitts, use fewer loops on the knitting needles. If you need longer mitts, cast on more loops. Be sure to leave a long tail of yarn while doing this.
 - Yarn # 4 is a twisted knitting yarn of medium thickness.
- You can use a different type of yarn, but then you will need to choose the appropriate thickness of the knitting needles for it.
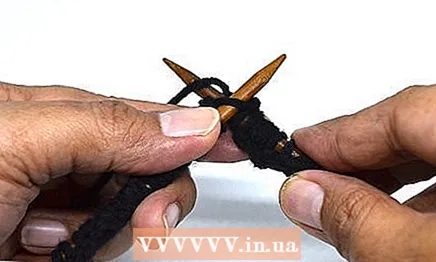 2 Tie the required number of rows with face loops to get a canvas that can be used to wrap the palm of your hand. In most cases, this will be about 48 rows of knitting. Be sure to knit each row with front loops. As a result, on both sides of the knit, you will get a well-stretchable pattern of alternating rows of front and back loops. When knitting, do not alternate rows with front and back loops, otherwise your mitts will not stretch well enough.
 - Alternatively, you can work with pearl knit. Then the knitted fabric will stretch well in both directions.
 3 Close the hinges. Once the knit is long enough to wrap around your palm, close the loops. Cut the thread, leaving a long tail. Pass the ponytail through the last loop and pull gently to tighten the knot. Don't cut the ponytail.
 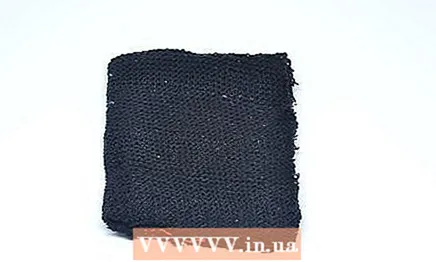 4 Fold the knitted fabric in half. Match the first and last rows of knitting. This is where the side seam will be located. Place your hand on the folded canvas, aligning the ends of the lower phalanges of the fingers with one of its narrow edges. Mark the level at which the top and bottom points of the thumb set aside are located.
 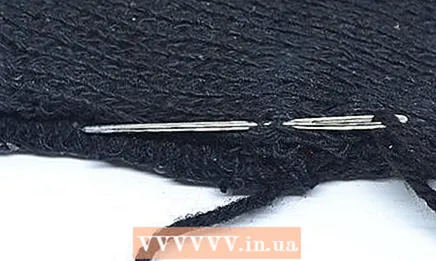 5 Sew a section of the side seam from the top edge of the mitt down to the thumb. Insert a long tail of yarn into your knitting needle. Sew the side seam over the edge to where the thumb joint begins. For most people, this distance is 5 cm.
 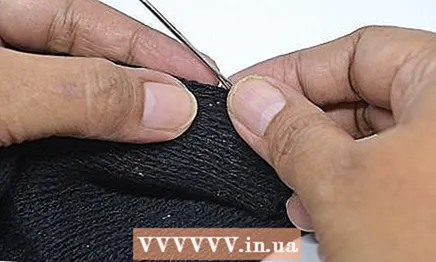 6 Hide the remaining end of the thread in knitting. Once the seam on the top of the mitt is as long as you need it, tie a knot on the threads and weave the remaining tip back into the seam (towards the top of the mitt). Cut off the excess.
  7 Sew a section of the side seam from the bottom edge of the mitt down to the thumb. Insert another ponytail of yarn into the knitting needle. Sew the bottom of the seam with overstitching stitches. Stop when you reach the bottom of your thumb joint. You will be left with a hole in the side seam for your thumb.
 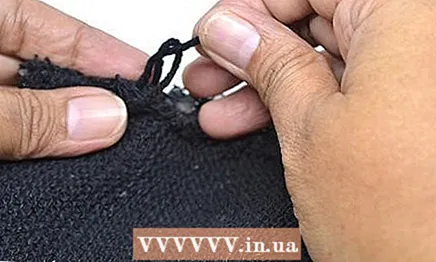 8 Hide the remaining end of the thread in knitting. As before, tie a knot on the thread and then weave it back into the resulting seam. There is no need to run the thread to the very bottom edge of the mitt, a few centimeters will be enough. Cut off the excess tip.
 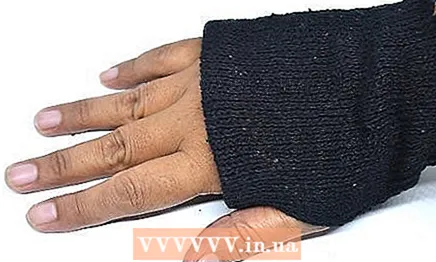 9 Make a second mitt. This type of knitting is completely symmetrical, so you can use the same steps to make a second mitt. There is also no need to turn the mitts inside out as they will look the same on both sides.
Tips
- If you are using regular commercial mitts made of fine synthetic knitwear, be sure to remove them by the ends, otherwise they may creep. To prevent this from happening, you can carefully scorch raw fabric sections with a match or lighter so that the fabric melts and cannot pull the loops.
- If desired, mitts can be decorated with rhinestones, beads, old jewelry and other decor.
- Also, mitts can be made from the sleeves of a jumper or sweater. For this, the same method is suitable as for socks.
- You can use tights instead of socks.
Warnings
- Be sure to be careful when handling scissors and needles. Remove all sharp objects to a safe place as soon as you are finished working with them.
- Be careful if you decide to burn your purchased mitts. Work with them in a well-ventilated area away from flammable objects.And remember to let the melted fabric cool down before putting on the mitts.
What do you need
Mitts made of ordinary gloves
- Gloves
- Tailor's chalk or pen
- Scissors
- Needle
- Threads
Mitts made of socks
- Socks (preferably knee-highs)
- Pen
- Scissors
- Needle
- Threads
- Tailor's pins
- Sewing machine (optional)
Fabric mitts
- Pen or pencil
- Paper
- Scissors
- Textile
- Sewing machine
- Tailor's pins
- Threads
- Needle (optional)
Knitted mitts
- Knitting needles number 8
- Twisted knitting yarn of medium thickness (# 4)
- Yarn needle
- Scissors


