Author:
William Ramirez
Date Of Creation:
23 September 2021
Update Date:
1 July 2024

Content
- Steps
- Method 1 of 6: Preparation
- Method 2 of 6: Preparing the fabric
- Method 3 of 6: Sewing the blanket
- Method 4 of 6: Create a border
- Method 5 of 6: Batting, lining, and quilting the blanket
- Method 6 of 6: Edging the blanket
- Tips
- Sources & Links
A patchwork quilt is a real piece of art, the result of a quilt, or patchwork. Stitching is the procedure for stitching pieces of fabric together to create a patterned quilt or any other household item. Patchwork can be a very fun and rewarding hobby that can be done alone or in a group. Here's how to dive into this fun process!
Steps
Method 1 of 6: Preparation
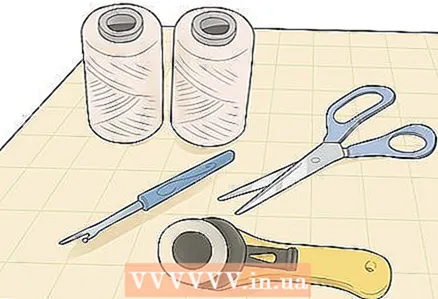 1 Get everything you need ready. To start the sewing process, all the necessary tools should be at your fingertips. Collect them, clear the work area and get started! You will need:
 - Cutting knife
- Scissors
- Ruler
- Thread (several types)
- Substrate
- Ripper
- Safety pins
 2 Choose a fabric. Different types of fabric will wear out differently over time - so it's best not to overdo it with mixing. Using cotton fabrics cottons will probably be your best choice. Also, think about color and size - otherwise, you might end up with a quilt that feels flat and awkward.
 - Stay in the same color palette, but don't use the same shades, or your quilt will appear monochromatic and dull. Think about how to combine light and dark shades and refrain from using extremely harmonious colors.
- Don't choose fabrics with only small or large prints. The rich variety of both will create a dynamic, vibrant effect. You can choose one fabric and match the rest with it according to the type of basic print.
- Consider using a very bright fabric as your base fabric. This will allow the fabrics around to sparkle with new, brighter colors.
- You will also need fabric for the back, border, weave, and batting.
- If you stick to using high quality 100% cotton fabrics, there should be no problems with cross-dyeing of fabrics. If the fabric is old or of inferior quality, wash it first.
 3 Purchase a patchwork kit. A beginner needs such a kit to facilitate the learning process. They are packaged sets of screed materials and usually include a sample, pre-cut fabric, and instructions. However, the sewing thread, batting and fabric for the reverse side may not be included.
 - Make sure the kit you purchased is appropriate for your level. Most of the kits have sewing skill marks. Some are designed to suit the needs of low-skilled beginners (usually involves working on a relatively light wall carpet, after which you can move on to sewing a quilt). An alternative to this set is the so-called “textile roll”, that is, a collection of equal strips of fabric rolled up like a roll. One roll is enough to make a small wall carpet quilt.
Method 2 of 6: Preparing the fabric
 1 Decide on the design. Decide on the size of the blanket and how you will shape the pieces of fabric. The easiest option is to work with square fragments.
 - You can settle for larger squares or smaller squares that make up larger blocks. Look at the materials you have and determine their capabilities in this regard.
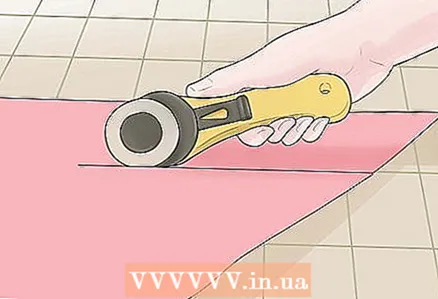 2 Start cutting the fabric. Grab the cutting knife and start the fun! Nevertheless, a number of calculations must first be made - you need to take into account the stock for seams and the full size of the product.
 - You will need a 0.6 cm margin on all sides of each piece of fabric. So, if you ultimately want squares with 10cm sides, cut out a square with 11.25cm sides. If you want 4 squares to make up one block with 10cm sides, each piece should be 6.25cm long.
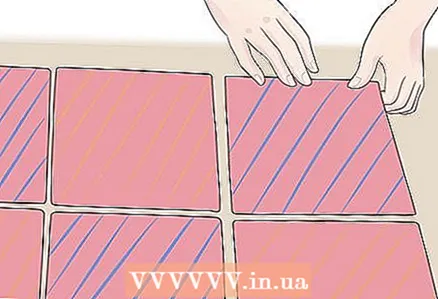 3 Lay out your pieces. It will be much easier to collect the entire quilt right now than in the middle of the sewing process. Free up some space on the floor to get an idea of what the final result will look like.
 - You will see how each piece of fabric matches the surrounding pieces. Pre-assembling the entire blanket will help to avoid cluttering of pieces of the same color or size. You will also be able to judge the size of the final product.
Method 3 of 6: Sewing the blanket
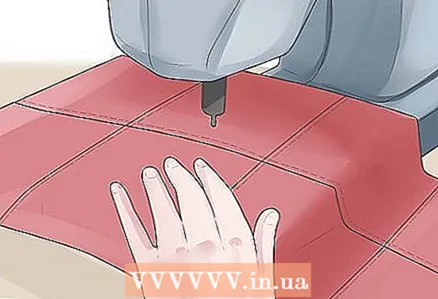
 1 Start sewing the rows. Disassemble the pre-laid product on the floor into rows and collect each of them in a pile, following from left to right. You can use tape or some other method to indicate which row is which.
 - Take the topmost square and place it face up. Then grab the second square and place it face down on top of the first. Clip their right sides together.
- Machine these squares together with a 6mm seam gap. You may be tempted to line up the edge of the fabric with the presser foot of the sewing machine. Adjust the needle if necessary. Remember, the closer your padding is to 6mm, the better.
- Open the sewn pair with the right side up. Take the third square and pin it with the right side to the second square. Repeat the previous stitching step, keeping the gap in mind. Do the same for the remainder of the row and subsequent rows - but don't stitch the rows!
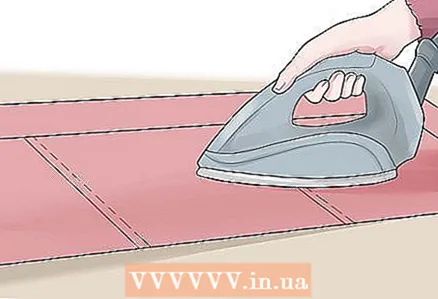 2 Press the iron on the fabrics. It may seem like a tedious and unnecessary chore, but afterwards you will be glad you did it. And, yes, there is one major difference between pressing and regular ironing: the pressure is a little more gentle. If you blow off some steam, the result will be even more impressive. Make sure to press your seams to one side without revealing them.
 - Press seams one way for even rows and backward for odd rows. Continue repeating for each subsequent row.
- Once you've finished two rows, line up the seams. Do they really touch? Excellent! Now secure the seams with pins so that the squares also line up.
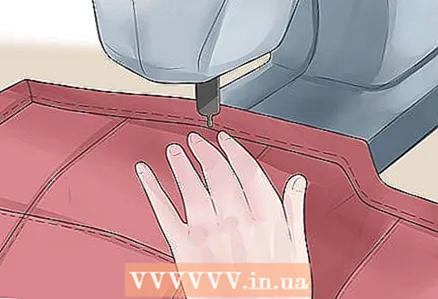
 3 Sew the rows together. With all the seams lined up, it will be very easy to sew the rows. Follow the lines you just formed and return to the sewing machine.
 - If the result isn't perfect, don't be upset. Patchwork is a skill that requires a lot of practice. But the patchwork look of your quilt itself should help mask any imperfections.
Method 4 of 6: Create a border
 1 Take four strips of fabric. It is not necessary to use the fabric you previously used for this, quite the opposite - a contrasting color will help add a little zest to your blanket. Each stripe should be the same length as one side of the quilt and at least 7.5 cm wide.
  2 Determine the length of the border fragment. There are many ways to do it, but the simplest one is shown below:
 - Cut the edge carefully. Then, lay two of the border stripes across the middle of the quilt, lining up one end of the stripes with the edge of the quilt. The other edges of the strip "hang" over the side.
- Secure the pin in the border stripes where the blanket ends. Then, in the spot marked with a pin, carefully cut with a cutting knife, using a ruler.
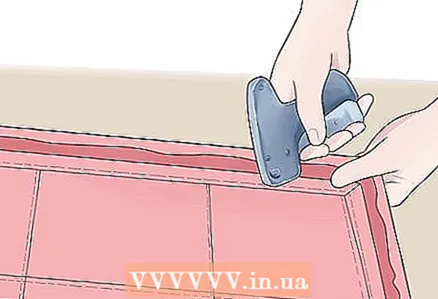
 3 Secure the pins at the edges. Fold the border strip in half, end to end, to find the center. Attach the center of the strip to the center the edges the quilt tops and secure the ends of the strip to the ends of this side of the quilt.
 - Place pins along the strip to secure it. If the stripe is slightly shorter than the quilt and the other two stripes are longer, this is not an error. This just goes to show why it is so important to start at the center and ends when fixing the pins.
 4 Sew on the border. Attach the opposite side of the quilt and sew both borders to the edges. Expand the borders by working from the front of the quilt.
 - Repeat the process on the other edges. Lay the 2 remaining border strips across the center of the quilt. Place a pin to mark where you will cut, go through with a cutting knife, attach and sew. Run the iron again.
Method 5 of 6: Batting, lining, and quilting the blanket
 1 Choose batting. It is material sandwiched between the front sides of the quilt pieces. There are many options available when choosing batting, which makes the selection process quite daunting. Nevertheless, adherence to the main principles guarantees your subsequent success. Mostly, you come from the elasticity of the beam (loft) and fiber.
 - Loft is a rather unusual term for describing the thickness of the batting. A low loft means the batting is thin. Low loft fabric is much easier to work with, but using it will result in a thinner product.
- Fiber is what the batting is made of. Polyester, 100% cotton, cotton and polyester blend are the three most common options, and none is necessarily better than the others. Wool and silk are also available, but are more expensive. Another relatively new option is bamboo, but this is too much.
- Polyester is a cheap choice for hand tie, especially if it's a low loft. It does not require frequent tightening, although the fibers tend to move to the edges of the quilt over time.
- Cotton. It presents good opportunities for machine stitching and assumes frequent stitching. It may shrink slightly over time, but a catastrophic roll-off should not occur. 100% cotton is identical to flannel.
- A cotton blend (usually 80% cotton and 20% polyester) is probably the best choice. This fabric is not too expensive and does not shrink as much as 100% cotton does. It is also good for machine sewing.
 2 Cut out the lining. It should be the biggest part. The batting should be smaller than the back of the quilt and larger than the top points of the quilt. The latter will represent the smallest area of the blanket.
 - As long as the padding is a few centimeters larger on all sides of the front of the duvet, you're fine. The reason the back side should be larger is that usually the stitch is made from the top of the quilt and batting, so the lining on the bottom may move slightly. The extra centimeters are your insurance in case the lining is suddenly smaller than the front of the blanket.
 3 Collect the layers. Basting is extremely important during the screed process. It can seem very tedious, but following this step with the right care will result in a professional looking result. Basting is a way to temporarily hold three layers together during the stitching process.
 - Iron the pad and lay it face down on the floor. Gently pull (but do not pull) the fabric and tape it to a hard, flat surface.
- Spread out the batting and cover it with the top of the quilt. Press both layers together to remove any unevenness. This will also help the front of the blanket adhere to the batting. When the two layers are smooth and flat, gently twist them together.
- Gently unwind the front of the blanket and the batting on the lining, smoothing any unevenness in the process. Make sure the lining extends beyond the edges of the blanket on all sides.
 4 Clip them together. Several options are possible here. Below is a variant of a machine screed. However, you can always baste in the traditional way or use a temporary fixing spray.
 - Secure the top of the blanket every few centimeters from the center. Use basting pins - they are curved and easier to work with.When the pins are in place, remove the tape and make sure all layers of the blanket are well spread and completely flat.
- If there are folds or excess fabric, it's time to fix the problems. If the fabric is too loose, wrinkles will appear during sewing. Once sewing has begun, there is no way to tidy up the lining other than headaches and fiddling with the ripper. However, using a complex pattern for the lining will help hide any small mistakes.
- Secure the top of the blanket every few centimeters from the center. Use basting pins - they are curved and easier to work with.When the pins are in place, remove the tape and make sure all layers of the blanket are well spread and completely flat.
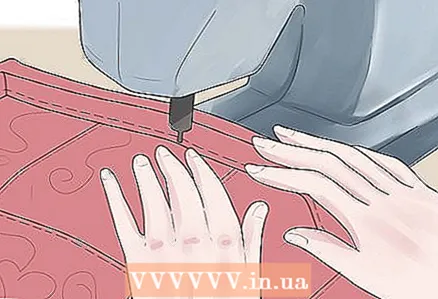 5 Start sweeping. The quilting machine reveals many possibilities. The first is to let the seams and fabrics themselves be your guide. Sewing alongside the seams themselves is called “bridging stitching”. If you want to arouse more visual interest in the quilt, you can sew lines or patterns in other directions.
 - It is advisable to start quilting from the center and gradually work towards the edges. Dealing with this pile of fabric while sewing can be tricky, so it’s best to roll up the sides that you will turn back as you approach the sewing edges. You can use the walking presser foot in the process, which is nevertheless unnecessary, but greatly simplifies the decomposition of the layers as they pass through the clipper.
Method 6 of 6: Edging the blanket
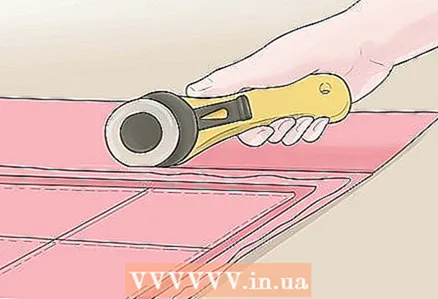
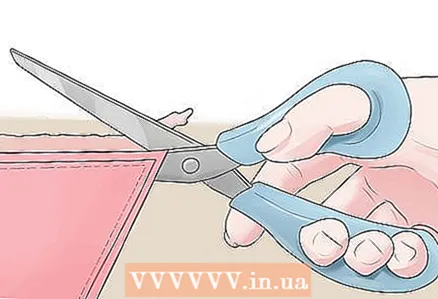 1 Start cutting. You must remove excess batting and lining. Use a cutter and a ruler for a neat, square edge. Then start adjusting the stripes for the border itself.
 - Cut the edge off the strips. You will need four stripes along the length of the edges, but smaller than the width of your border. The approximate width is 5-7.5 cm, depending on the size of your quilt.
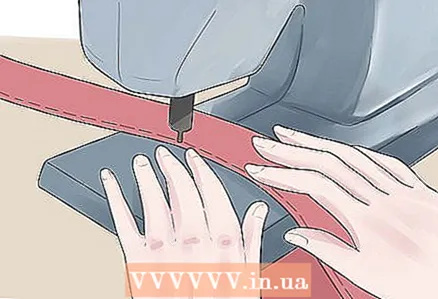 2 Sew the stripes together to create one long stripe. It may sound counterintuitive, but it is the easiest way to start the tilting process. Open the seams and fold them longitudinally in half. Iron it because you want a well-defined fold around the edge of your quilt.
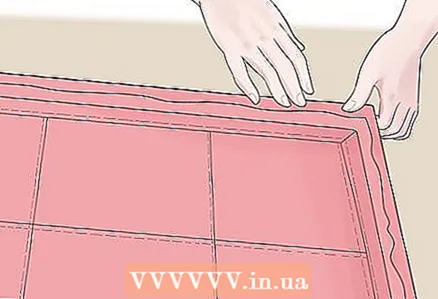
 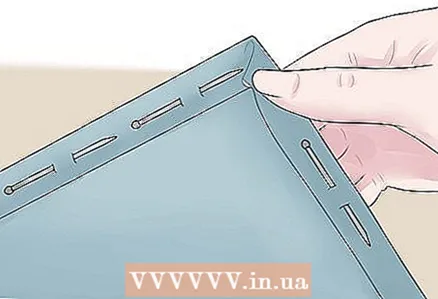 3 Pin up the edging. Starting towards the center of one side, that is, joining NOT near the corner, which would make the process even more difficult, attach the edges of your strip to the edges of the back of the quilt.
 - When you get to the corner, you will need to cut the tape at a 45 degree angle. To do this:
- Fold the strip at a 45-degree angle when you reach the corner of the blanket. Insert a pin to secure the edging in this position.
- Fold the strip down to match the edges of the next side of the quilt. The fold should line up with the edge of the last side you attached to. You will have a small triangle - place another pin at the same angle on the other side of the small flip part of the triangle.
- When the strip returns to the beginning, fold the ends so that the strips touch each other. Iron the meeting point to create a pleat in both folds. Cut the strips approximately 0.6 cm from the fold. Pin together and sew a seam straight over the markings on both strips. Open the seams.
- When you get to the corner, you will need to cut the tape at a 45 degree angle. To do this:
 4 Sew on to the quilt. You're almost done! Sew the piping to the back of the quilt with 1 inch (0.6 cm) of stock. If your machine has a walking foot, use it here. When you get to a corner, stop about 0.6 cm from the end of that side. Raise the presser foot and turn the blanket in the other direction. With the folding triangle unfold in the other direction, continue sewing from the beginning of that side.
 - When all four sides have been sewn to the back of the quilt, fold the rolled edge of the piping to the front of the quilt and secure with a pin. The corners should snap into place. Pin to keep everything in place before machine sewing.
- Using thread of the same color or invisible thread, if you do not want the seam to be visible on the back side, carefully sew the piping to the front of the blanket.Turn the needle gently as you get to the corners and continue sewing around the quilt. You can double stitch at the beginning and end of the seam.
Tips
- Always check with people with significant experience in patchwork or the store's patchwork staff who are aware of tie-down tools and materials required.
Sources & Links
- http://www.learnhowtomakequilts.com/
- http://www.diaryofaquilter.com/p/beginning-quilting-series.html


