Author:
Bobbie Johnson
Date Of Creation:
4 April 2021
Update Date:
1 July 2024

Content
- Steps
- Method 1 of 4: Using thread.
- Method 2 of 4: Using Natural Materials
- Method 3 of 4: Using photography and fabric
- Method 4 of 4: Performing Activities on the Doll
- Tips
- Warnings
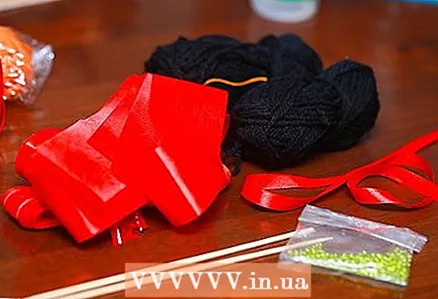
- What do you need
- Method one: using threads
- Method two: using natural materials
- Method three: using photography and fabric
How it happened that the voodoo doll is connected with the fate of the individual is not known, but it is very famous in mystical circles, along with the Ouija board and tarot cards. The funny thing is, you can make it from just about anything!
Steps
Method 1 of 4: Using thread.
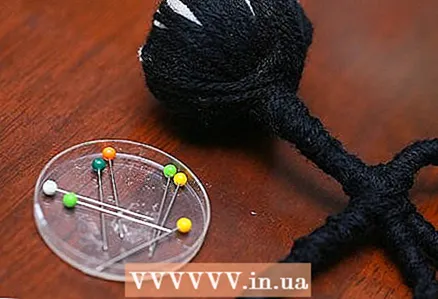
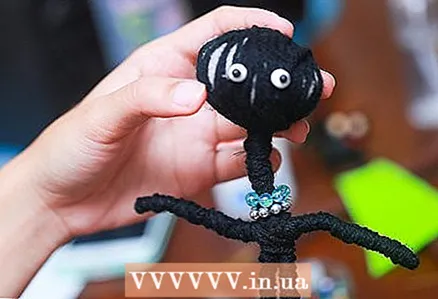
 1 Wrap the yarn around the foam ball. This will be the head - it all depends on how large the head you want to get. Whatever the size, wrap it with yarn (or some kind of thread) until the foam is visible. Secure the ends of the thread with glue.
 - If you don't have a ball, you can just make it by winding the thread. Wrap over and over and over over your fingers, then remove and, forming a figure eight, fold both rings together. Now start wrapping it around until you have a ball. You need to wrap tight! Then either stick the end of the thread inside or glue it on.
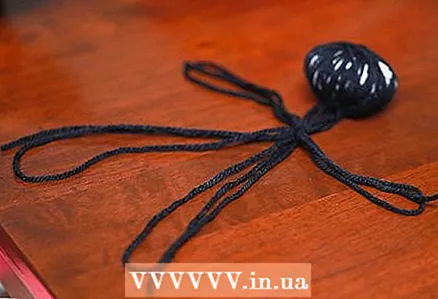 2 Choose the length of the torso and loop your threads in several layers along the length of the torso. Make two such loops. One loop will be like the left arm and leg, and the other will be the right arm and leg.
 - Do you understand? Let's say you want the torso to be 12 cm long (for the doll to be cute, the head must be larger than the torso). Take a piece of thread and measure a 12 cm loop, then again and 2 more times. Once you have measured 4 or 5 of these loops, cut off the thread. Repeat the same action again.
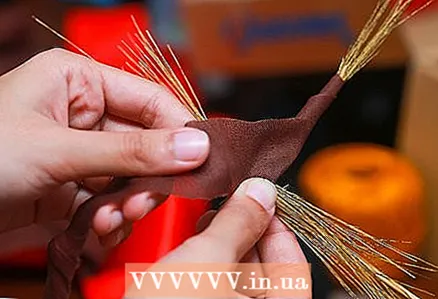
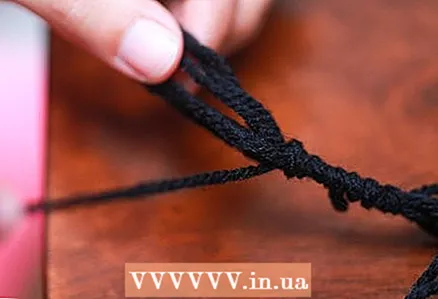 3 Wind these two pieces from top to bottom to form a strip. We start at the bottom of the loop and wrap it, moving upward. Do it really tight. Secure the ends of the thread with glue. You should have 2 wrapped pieces of rope, each 12cm.
 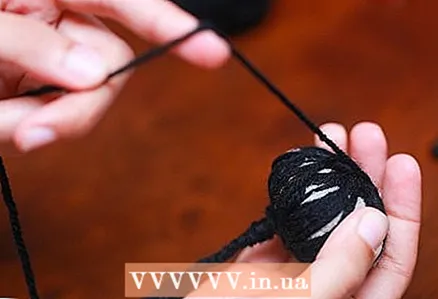 4 Wrap the head several times, tie the ends of the thread and leave a piece 3 to 5 cm long to fasten everything together at the end.
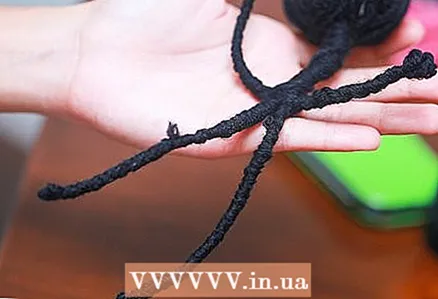 5 You have the limbs of the doll. Those two bushes of thread that you just wrapped around? Place under your head in the form of arms and legs. The piece of thread that you left in the previous step will serve to shape the body.
  6 Wrap this thread from underarms to thighs. Start at the top and work your way down, and so again in the opposite direction. If you want your doll to be complete, then wrap it a few more times.
 - Near the end, make a couple more loops around the shoulders in an "X" shape. It will turn out like a mummy. Finally, glue the rest of the string to the doll's back.
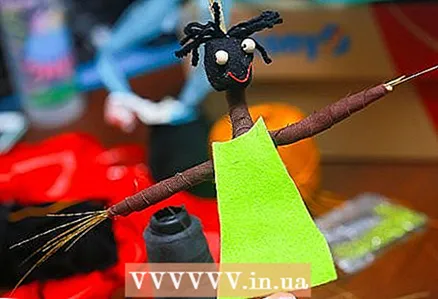
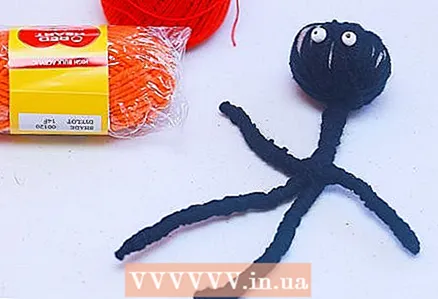 7 Glue or sew on the eyes. If you have a needle and thread, then sew on buttons instead of eyes and you will have pretty eyes. Alternatively, take a couple of beads and glue them in place of the eyes. Tadada, yes! The voodoo doll is ready.
Method 2 of 4: Using Natural Materials
 1 Collect materials. To make a New Orleans voodoo doll, you will need some basic materials: two sticks, some padding (such as moss, pine needles, or grass), string or string, and glue. If you want to dress up the doll a little, you can use buttons, feathers, scraps of clothing and other decorations that belong to the person you are making the doll on.
 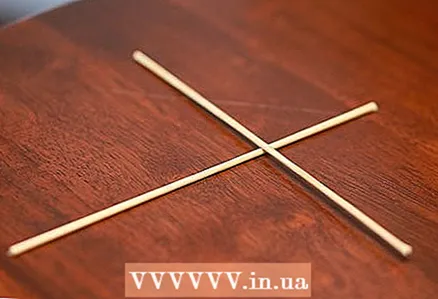 2 Use two sticks to make a cross. The long stick will be the body, and the short one (located about a quarter of the way from the top edge of the long stick) with the arms. Tie them together cross-to-cross with a rope or cord; you should end up with an X in the center of the doll.
 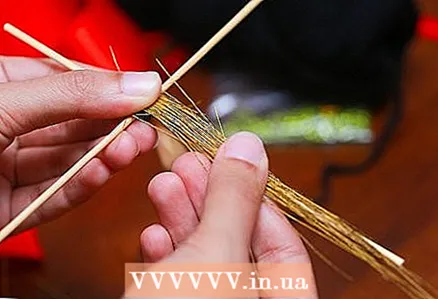 3 Wrap the padding around the sticks. Start in the center, then work towards the head, down again towards the arms and legs.
 - If you are using moss, try not to rip it to keep your doll stronger.
 4 Wrap the padding in a cloth. Remember to leave some of the padding uncovered, for example on the head (hair), at the ends of the arms and at the bottom. Secure the fabric with glue. You can also secure with a few stitches with a needle and thread.
 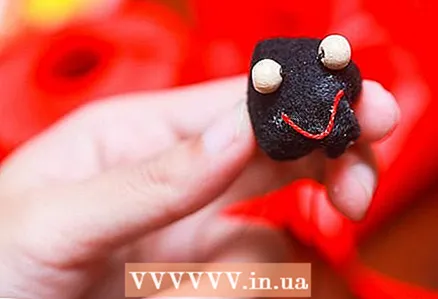 5 Add a face (if desired). Use a thread and a needle to secure the beads in place of the eyes or glue two dark grains. Add a button or mouth ball.
 - This step is at your discretion, voodoo dolls and without a face have the same power.
 6 Wear a voodoo doll (if desired). This can give the doll a sense of personality and identify it as a man or a woman. You can also give the doll accessories such as a bag.
 - Remember that the voodoo doll should symbolize a real person or spirit. If this is a person you know, then you need to charge the voodoo doll with his personal energy. To do this, you will need something personal, such as hair, a piece of clothing, or a photograph.
- A mojo bag is a bag that a person carries over their shoulder and holds spells, prayers, or other magical items.
- A gri-gri bag usually contains a few lines from the Koran and a few small items for good luck.
Method 3 of 4: Using photography and fabric
 1 Find a full-length photo of the person you want to make a doll for. This is where Facebook comes to the rescue. Try to find a full face photo.
  2 Print your photo on paper to transfer the image to fabric. Make it as big as possible. You will end up with an A4 size doll.
 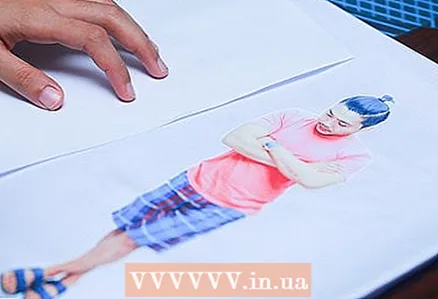 3 Transfer the image to an ironed white cloth. Follow the instructions that came with the tissue transfer paper. Usually, you just have to hold the heated iron on the photo for a few minutes.
 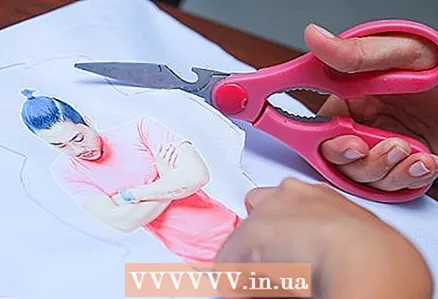 4 Cut out the person, leaving room for the seam. Approximately 2.5 cm from each edge is sufficient. This will give your doll volume and fill it with something. It's also easier to cut a photo!
 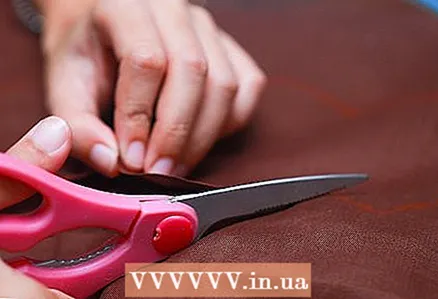 5 Cut the same shape out of the remaining fabric. This will be the back of the doll. You can use a colored cloth. Voodoo dolls come in a variety of sizes, colors and shapes.
 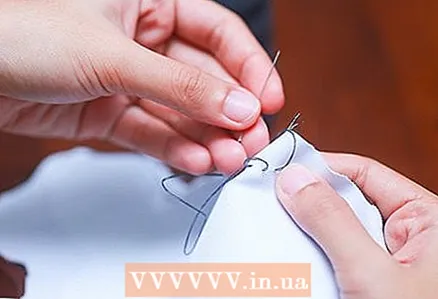 6 Sew the pieces together. Lay the image face down on the wrong side of the fabric. Leave a hole near the center for packing. When done, trim off any excess fabric around the edges.
 - If you do not get neat stitches, it does not matter, when you turn the doll inside out, nothing will be noticeable.
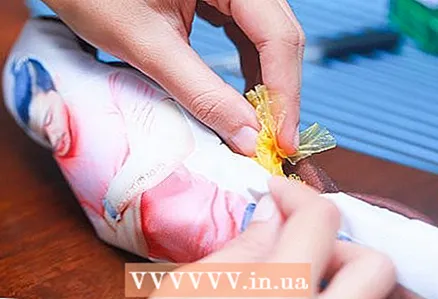 7 Stuff the doll. You can use scraps of fabric, wool, yarn, cotton, and any other suitable material. If you stuff with cotton, the doll will turn out to be very light, so if you want to imitate life, then fill the doll with something heavier, for example, rice.
 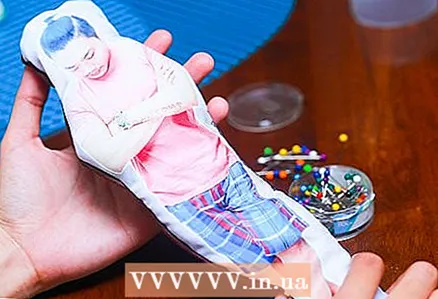 8 Sew the hole through which you stuffed the doll. You have created life! What to do with it now? Will you use your power for good ... or for evil?
 - Mwuahahahahhaha.
Method 4 of 4: Performing Activities on the Doll
 1 The doll can be used for good or for evil. Although the malicious use of voodoo dolls is more common these days, they can also be used for blessing and good luck.
 - To do evil, you need needles and ropes. Needles are needed to hurt and ropes to tie or hang. If you're using your voodoo for good (after all, what goes around comes around), keep reading.
 2 Find needles with colored heads. The colored heads represent the area that the needle will affect. For example, if you want to do something good, then the yellow needle symbolizes success. By injecting into the heart, we influence emotions, into the stomach - on health, and into the head - on thoughts.
 - Yellow: Success
- White: Healing
- Red: Strength
- Purple: Spirituality
- Green: Money
- Blue: Love
- Black: Reflecting / attracting negative energy
 3 “Activate” the doll. If you haven't used it for a long time, then you can reactivate it - sew on small objects, jewelry or just sew a few stitches on it.
 - Your voodoo doll cannot be activated all the time. If you ban her in a drawer for years, what will that mean in the end? In order for the spirits to know that you need something, you must refer to your doll. As with any relationship, you need to communicate with your doll.
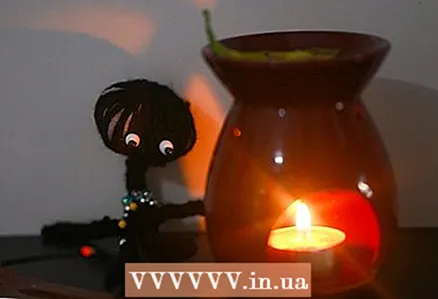
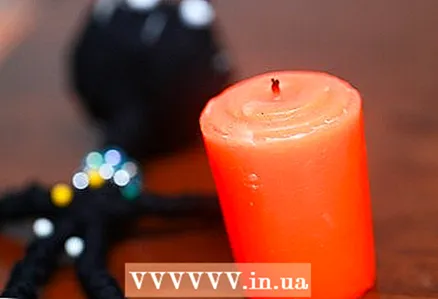 4 Use your doll with candles and messages. Light a candle of the appropriate color (just like with needles), write your wish on a piece of paper and place it under the candle. Hold the doll in your hands and concentrate on your desire.
 - After that, place the voodoo doll next to the candle and wait until it burns out. After 9 days, burn the paper and scatter the ash.
 5 Make an altar for your voodoo doll. She needs a home too! Since keeping the doll next to you on the bed is not the most suitable place, make an altar for it where you can concentrate on it if necessary. When you have a certain desire, place the doll on the altar and focus your energy on it.
 - Don't make the altar big. The place for the doll is a couple of candles and something to decorate, that's all you need. If your doll personifies someone, then personal items (nail tips or hygienic lipstick) of that person should also lie nearby.
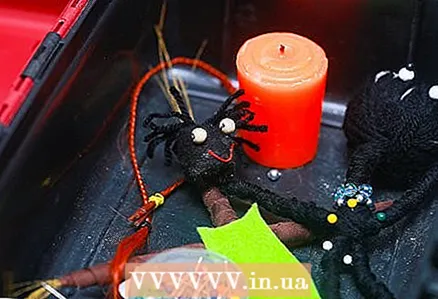 6 Create a kit. You can give it as a crazy gift or keep it for yourself. Place the doll in a box along with candles, several colored-headed needles and small pieces of paper. It will be a memorable birthday present.
 - Make sure that the person to whom you are giving such a gift understands its purpose correctly! Some people can take a voodoo doll very seriously, and some will just laugh as a relic of the past. If you're not sure, keep the doll with you and tell them that you spent your days wishing them the best - and that you have physical evidence!
Tips
- Most sects emphasize that all the evil that you apply to the doll will return to you. Think about this before you do anything. Whatever happens, it will also affect you.
- If there is text or drawing in the photo (for example, on a person's shirt), then remember to rotate the image horizontally before printing so that the image is normal when it is on the doll. You can also cover the area with a heart-shaped piece of red fabric.
Warnings
- Voodoo is a sacred, spiritual path. Respect his roots.
- Don't do this kind of thing in front of other people you don't trust and don't know well. Many people take it badly.
- Insects and small parasites are very common in moss. Inspect it very carefully before starting work.
What do you need
Method one: using threads
- Small ball of foam rubber
- Yarn
- Eyes (buttons or beads)
- Glue
Method two: using natural materials
- 2 strong sticks, different lengths
- Rope, cord, or other tying device
- Cloth scraps (strips of 5 cm)
- Needle and thread matching or contrasting color with your fabric
- Glue
- Beads, buttons, feathers or other decorations (optional)
Method three: using photography and fabric
- Full-length photograph of a man
- Transfer paper to fabric
- White cloth
- Iron
- Thread and needle
- Filler (cotton wool, scraps of fabric, rice, etc.)


