Author:
Sara Rhodes
Date Of Creation:
12 February 2021
Update Date:
1 July 2024

Content
- Steps
- Method 1 of 3: Double bed
- Method 2 of 3: Platform Bed
- Method 3 of 3: Single Captain's Bed
- Tips
- What do you need
Do you have a loose metal bed? Or maybe you just put the mattress on the floor with no frame at all? Have you ever thought about buying a wooden bed frame? It can be a wonderful decoration, as well as you get rid of the annoying squeak of metal parts. But remember, they are not cheap. Here's a simple plan for how to assemble your own bed frame to fit any size (and height!) You want.
Steps
Method 1 of 3: Double bed
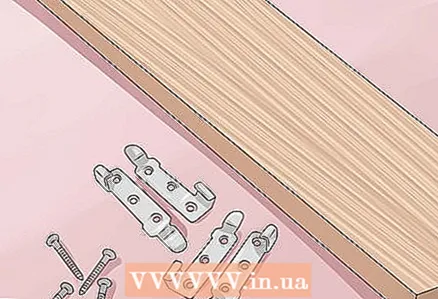 1 Buy whatever you need. See the “What You Will Need” section for an exact list of items. Our goal is to assemble a bed frame that will fit a double mattress (60 "wide x 80" long). In addition, you will need to go to the repair supplies store to purchase three main items:
 - Mounts for the bed
- Wood
- Wood screws
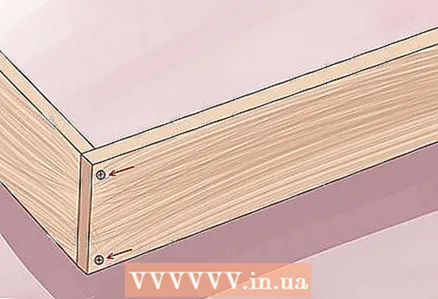
 2 Install the bed mountings. This hardware is very important for creating a rigid connection between all the sides in the frame. Place the fasteners on the ends of the boards and legs. Double-check that everything is well secured. Repeat these steps for all corners.
 - These mounts can be difficult to find in hardware stores. In this case, check online stores.
- Bed mounts are usually sold in a set of 4.
- Instead of the bed mountings, you can use 8 long wood bolts. When tightened, they make the bed very strong. These bolts are also much easier to find than bed mounts.
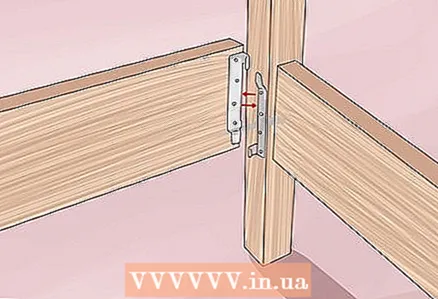
 3 Attach the crossbars. Screw the crossbars to the sidewalls approximately 12 inches (30.5 cm) apart. This will provide maximum weight support.
  4 Make supporting blocks. Cut a notch in the blocks and beams as shown in the illustration. It should be 1.5 "x 3.5" with a wide side to match the wide side of the block.
 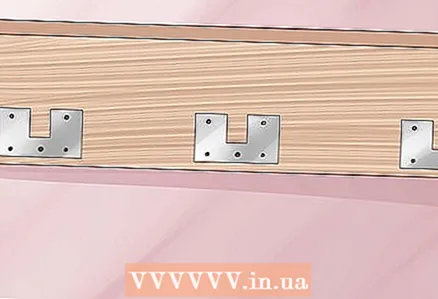 5 Attach supporting blocks. Attach each block with screws in the middle of the board at the headboard and at the foot of the bed, as shown in the illustration.
 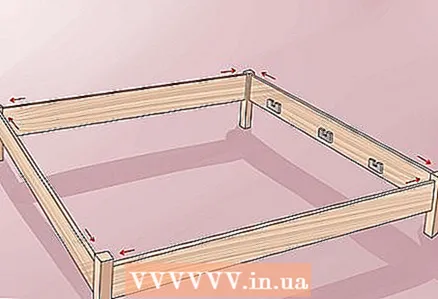 6 Connect the sides. Connect all sides with legs using fasteners.
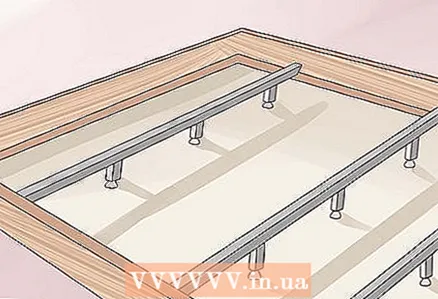
 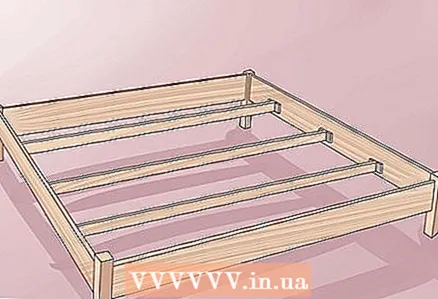 7 Install support beams. Insert the support beams between the two blocks.
 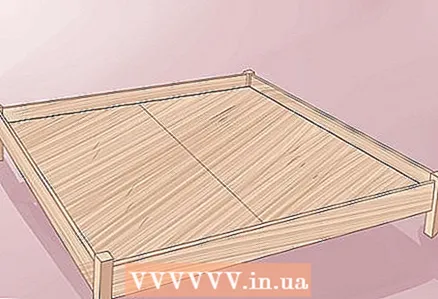 8 Insert the plywood mattress backing. Place the plywood sheets on the support rails and beams. They should fit under the inside of the frame. Once you're done, you can place the mattress on the frame.
 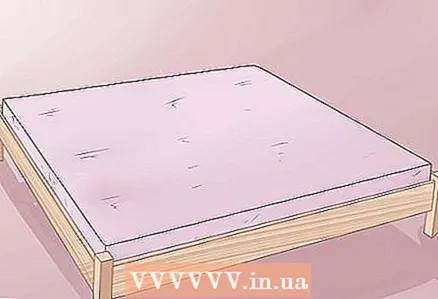 9 All is ready. Enjoy your new bed!
Method 2 of 3: Platform Bed
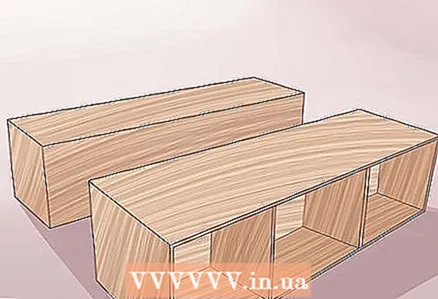
 1 Gather all materials and supplies. You will need a circular saw, some simple corners, 3-inch square-head screws, some MDF or plywood, and wood. From wood you will need:
 - Two 2x4 '' boards 85 '' long
- Five 2x4 boards 67 '' long
- Eight 19 3/8 2x4 boards 19 3/8 '' long
- Two 2x12 boards 75 '' long
- Four 2x12 boards 57 '' long
 2 Assemble the base of the frame. Using wood screws, butt-joint the 75 "2x12 boards and the two 57" 2x12 boards. You should have a 60x75 box.
 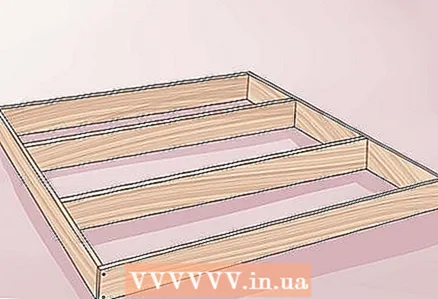 3 Add stiffeners for the base. Place the remaining 57 "long 2x12 planks by dividing the box into three equal pieces, and then secure them using the screws.
 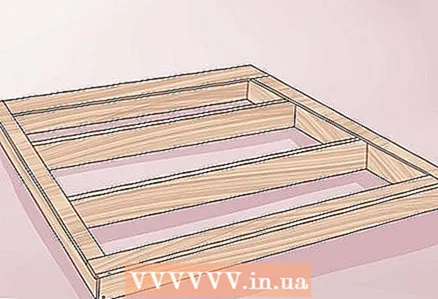 4 Assemble the platform frame. Using wood screws, butt joint 85 "long 2x4 boards and two 67" long 2x4 boards. You should have a box of 70x85 inches.
 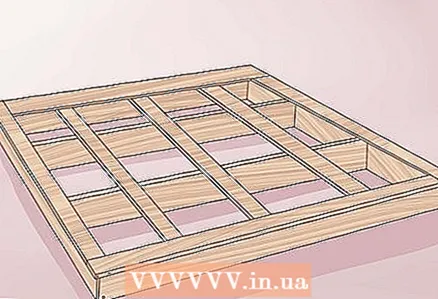 5 Provide stiffeners for the frame. Position the remaining 57 "long 2x4 boards by dividing the box into four equal pieces, then secure them using the screws.
 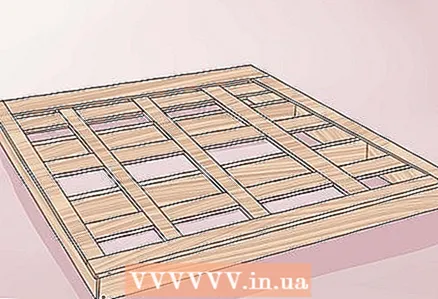 6 Place the platform supports. Now add 2x4 boards 19 3/8 "long between the stiffeners, two per section. Arrange them evenly and in level so that the leftmost and second from the right, as well as the rightmost and second from the left sections of the support are at the same level. Also attach them all with screws.
 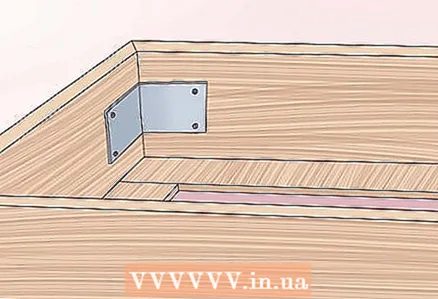 7 Strengthen connections and seams. Reinforce the inner corners of the base and platform with corners. You can also add corners to other joints on the inside to add strength.
 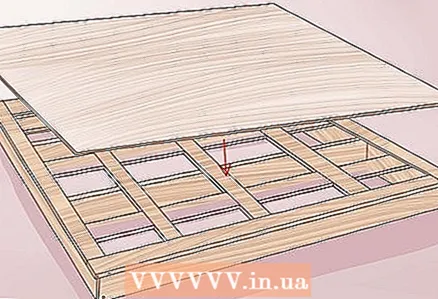 8 Lay a plywood cover. Trace and cut the plywood to fit the size of the platform. You will most likely need two sheets of plywood to cover it completely. Screw the plywood to the stiffeners so that the heads do not protrude above the surface of the platform.
 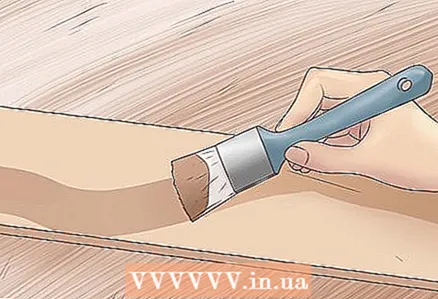 9 Paint the bed. Sand with sandpaper and then paint or stain the bed with the color of your choice.
 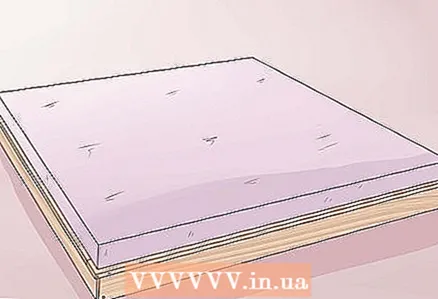 10 Ready! Place the platform on top of the base where the bed will sit. You can attach the platform to the base with several well-placed corners if you like. Now all that remains is to put a double mattress on top!
Method 3 of 3: Single Captain's Bed
 1 Gather all the materials you need. You will need two Expedition bookshelves from Ikea (2x4 squares), a few feet of Velcro, a saw, square screws, 24 simple corners with mounting screws, and boards of the following sizes:
 - Four 2x10 boards 38 '' long
- Six 2x10 boards 28 '' long
- Four 1x10 boards 16 '' and 3/4 '' long
 2 Collect the crates. Use the planks to assemble two shelves that will share the weight of the bed with the Expedit shelf. They are assembled from two 2x10 planks 38 "long and two 2x10 boards 28" long. You should get a box measuring 38x31 inches. Fasten the boards together with three screws for each section. Place a corner in the center of each joint.
 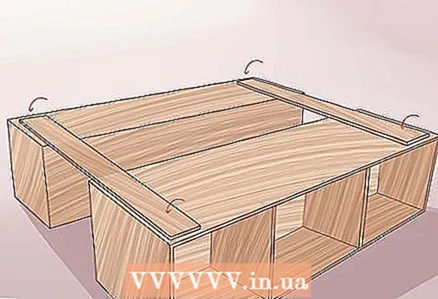 3 Place the rib in the center. Add another 2x10 plank with a length of 28 inches in the center and secure it in the same way to divide the drawer into 2 sections. Secure it with a corner on each side at the top and bottom.
 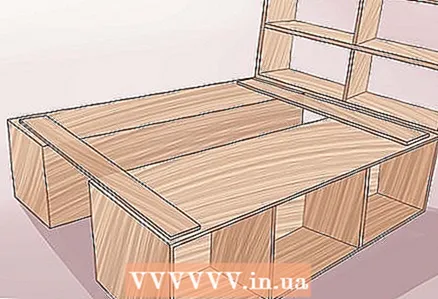 4 Add additional shelves as desired. If you want shelves, you can easily add them by cutting the 1x10 board into 16 and 3/4 inch lengths.Place the shelf at the desired height and secure with two corners on each side.
  5 Attach the back wall for the shelves. Trace the plywood and cut out the back wall for the shelves with a hacksaw. Secure it with nails using a hammer or nail gun.
 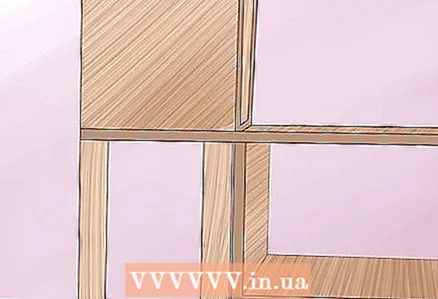 6 Attach the legs to the shelves. You will most likely want to attach the legs to the bottom of the shelves to prevent them from scratching the floor when you move the bed. You can easily buy them in different stores.
 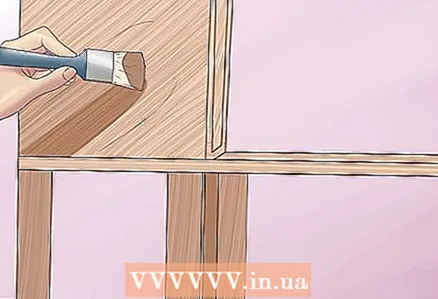 7 Paint all four shelves the same color. After the shelves are ready, you will need to paint them and the Expedit shelf in one color. Use spray paint that is suitable for laminate flooring.
 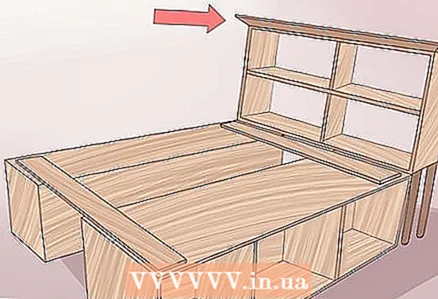 8 Attach the plywood to the shelves. Cut a sheet of plywood to measure 38 x 75 inches. Place both shelves so that they are facing outward and the Expedit shelf fits between them. Secure the plywood with nails by nailing 2 nails through the plywood to the sides of the shelves.
 - You can glue the non-slip rug under the rugs if you like.
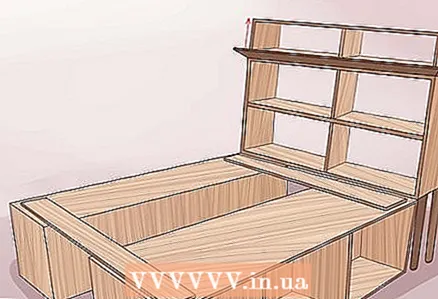 9 Adjust Expedit shelves as needed. Adjust Expedit shelves to blend in with the edges of your shelves.
 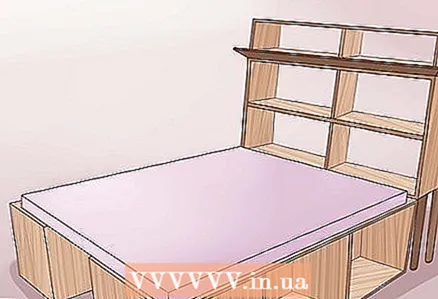 10 Add finishing touches. Ikea makes several useful additions to Expedit shelves. You can add baskets, drawers or just doors. They are all sold in various colors. Enjoy your new bed!
 - This bed can only be used by children as it will not support a lot of weight.
Tips
- Use different sized blocks to make a luxurious four-poster bed! (larger diameter turned bars will make your frame look great)
- Sand all sharp corners with sandpaper to make the frame smooth.
- Drill pilot holes before twisting parts together.
- Tint the wood using a color you like to make it look even more pleasing.
What do you need
- 8 sets of bed mountings
- 4 bars 4x4x21 inches (10.1 cm x 10.1 cm x 53.3 cm) for legs
- 2 planks 2x6x60 inches (5cm x 15.2cm x 1.5m) - for headboard and leg boards
- 6 blocks of 2x4x8 inches (5 cm x 10.1 cm x 20.3 cm) - for supporting blocks
- 2 boards 2x6x80 inches (5 cm x 15.2 cm x 2.032 m) - for boards
- 2 boards 2x4x80 inches (5cm x 15.2cm x 2.032m) - for supporting bars
- 3 planks of 2x4x80 inches (5cm x 15.2cm x 2.032m) for supporting beams
- 2 two panels of plywood 3-1 / 4x5 ft, 3/4 in. (1 mx 1.52 m, 1.9 cm)
- Pack of 2-1 / 4 '' (5.7 cm) screws
- Pack of 1-1 / 4 '' screws (if not included with the bed mounts)
- Saw
- Drill
- Sandpaper
- Stain (optional)


