Author:
Laura McKinney
Date Of Creation:
1 August 2021
Update Date:
1 July 2024

Content
Growing a rose from the seeds is a challenge because most of the flower seeds you get won't sprout no matter how attentive it is. Fortunately, most roses produce a lot of seeds inside the fruit, so a high germination rate is not required. You should remember that the rose tree will grow up to have different characteristics or shape from the parent plant, especially roses, grafted or crossed between two varieties.
Steps
Part 1 of 3: Harvesting rose seeds
Allow the rose to grow by leaving the dead flower on the plant. Flowers are usually pollinated by insects or self-pollinate in some varieties, so it is not necessary to pollinate by hand, unless you want to cross separate varieties. Do not cut flowers, but instead, should keep flowers on the plant. After wilting, the flower develops into a rose fruit.
- Attention: The resulting seeds can grow into plants with other properties. This happens when you collect seeds from a hybrid rose or have been pollinated from a neighboring rose.
Pick a rose when ripe. Newly planted roses are usually small and green, and then gradually change color as they grow until they are red, orange, brown or purple. You can either harvest the seeds at this point or wait until the pods start to dry and wrinkle. Don't wait for the pods to become too dry and turn brown to harvest, as the seeds inside may be dead.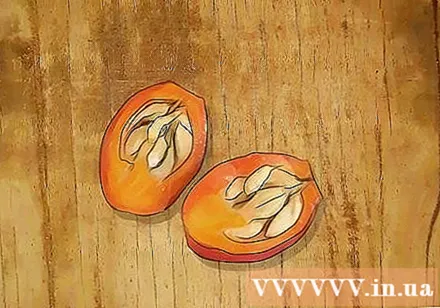
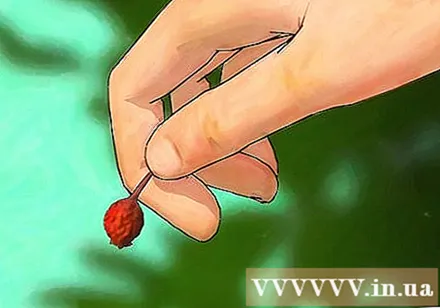
Cut out the rose and get the seeds. Cut the rose with a knife to see the seeds inside. Pull the seed out with the tip of a knife or other tools.- Different rose varieties will produce fruits with different amounts of seeds. A rose can have from a few seeds to several dozen.
Remove the dough from the seeds. The powder will prevent seeds from sprouting. The fastest way to remove flour from seeds is to sift the seeds or sift them, pour water over them, and rub them on the surface of the seeds. advertisement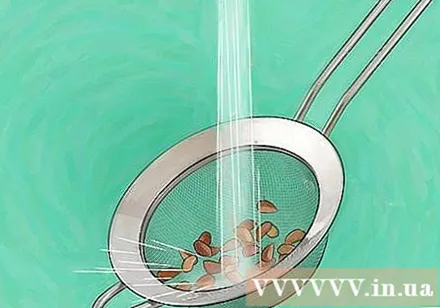
Part 2 of 3: Helping seeds sprout
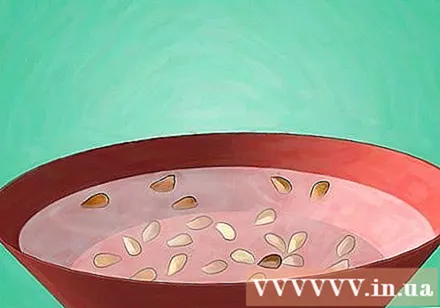
Soak seeds in diluted hydrogen peroxide solution (if desired). A mixture of water and hydrogen peroxide can minimize the growth of mold on seeds. Stir 1.5 teaspoons (7 ml) of 3% hydrogen peroxide into 1 cup (240 ml) of water. Soak rose seeds in this solution for at least 1 hour.- Some studies have shown that a little mold growth may actually help break the shell around the seed. However, you should still use the method above to prevent too many mold from growing.
- You can also sprinkle some anti-fungal powder on the rose seeds.
Place rose seeds on damp material. Rose seeds do not usually germinate if they are not stored in cold and wet conditions like winter climates. Place the rose seeds between two layers of slightly damp paper towels or in a container with unsalted river sand, mud moss or Vermiculit.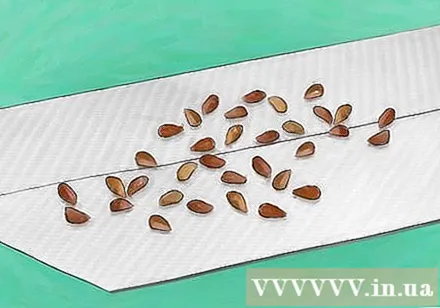
- This is the first step in the rose growing process, called stratification. If you are buying rose seeds outside the store and on the package label says stratified, you can skip stratification at home.
Refrigerate the seeds for several weeks. Place rose seeds and damp material in a plastic bag or nursery tray in a plastic bag or multiple nursery trays, then store in a cold area in the refrigerator, such as in the refrigerator's empty vegetable drawer. .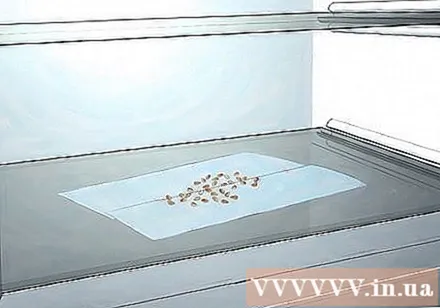
- Do not store seeds in the same place as fruit or vegetables in the refrigerator to prevent chemical release and prevent seed growth.
- Keep the seed medium moist. Add a few drops of water to the paper towel whenever it dries.
Remove seeds from the refrigerator. Try to take the seeds out of the refrigerator during their normal germination times, such as early spring. Make sure the environment outside of the refrigerator is about 21 degrees Celsius. The seeds will not germinate until they are removed from the refrigerator. Depending on the rose variety and the seed, the germination time can take 4-6 weeks. Usually, more than 70% of the seed will never sprout. advertisement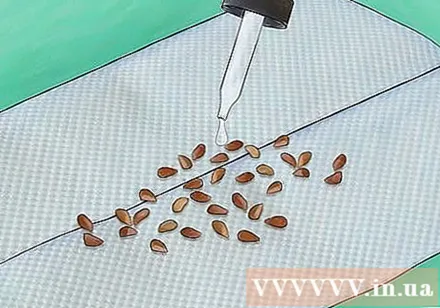
Part 3 of 3: Growing seeds
Place the sterile seed nursery soil mixture in the nursery tray. The small nursery tray can help take care of many seeds at the same time. In addition, using a perforated drinking cup on the bottom also makes it easy to observe the state of the rooting.
- Conventional soil should not be used, as it tends to drain poorly and makes the seedlings more susceptible to rot.
Planting seeds. Seeds purchased from the store can be planted immediately. If you made your own germination using the same procedure above, plant the seeds as soon as they germinate. Put the seed down because that is the root. Gently cover the soil layer 6 mm deep. Each seed spaced at least 5 cm apart to reduce competition.
- Sprouted seeds can be seedlings in a week. Store-bought seeds do not require home stratification, so it can take up to several weeks to develop into seedlings. Seeds that do not undergo stratification but apply the above germination process can develop into seedlings after 2-3 years.
Keep the soil warm and moist for the seedlings. Keep the soil moist, but not too wet. Temperatures in the 16-21ºC range are ideal for most rose varieties. Seedlings usually thrive if lit for 6 hours (or more) per day. However, you should research the mother rose to get an idea of what your seedling's preferred growing medium.
Know when to replant the seedling. The first two leaves that grow from a seedling are called cotyledons. The seedling, when it produces a number of "true leaves", has a typical rose-leaf shape that can survive replanting. The planting process is also easier if the seedlings are replanted in large pots for 1-2 years, and then re-planted.
- It is best to replant the seedling as soon as you notice the roots surrounding the nursery tray.
- Do not move seedlings out until the last winter frost has not expired.
Take care of the rose plant. Once the seedling appears to be healthy again after being planted, you can start watering as usual. Applying fertilizer several times according to the package directions during warm growing season can help the plant grow and bloom. Keep in mind, however, that some varieties of roses won't bloom during the first year. advertisement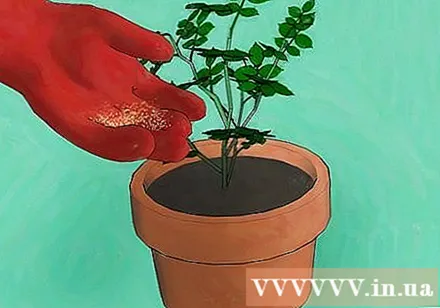
What you need
- Country
- Paper towels (or see the instructions for the alternatives)
- Rose fruit or rose seed
- Hydrogen peroxide 3% (if desired)
- Mixed seed nursery soil
Advice
- Ask about the varieties of roses available at the nursery to find one that is appropriate for your climate and garden conditions.
Warning
- Do not rely too much on the advice of putting seeds in water to check the ability of seeds to germinate and grow. This may work for some plants, but rose seeds can still float, whether they are flat or not.


