Author:
William Ramirez
Date Of Creation:
20 September 2021
Update Date:
1 July 2024

Content
- Steps
- Part 1 of 3: On Windows
- Part 2 of 3: On Mac OS
- Part 3 of 3: How to Find a Font in Word
- Tips
- Warnings
This article will show you how to install a font on a Windows and Mac OS X computer to use the font in Word.
Steps
Part 1 of 3: On Windows
 1 Download the font from a trusted site. Do this because the font may contain malicious code. Never download a font with an .exe extension. Most font formats are ZIP, TTF and OTF.Many free fonts can be found on the following sites:
 - fonts-online.ru/fonts/free
- allfont.ru/free
- ffont.ru/fonts
- allshrift.ru
 2 Extract the font (if needed). If you downloaded the font as a ZIP file, double-click the file, and then click Checkout (top of the window)> Checkout All> Checkout (bottom of the window).
 - Skip this step if you downloaded the font as a TTF or OTF file.
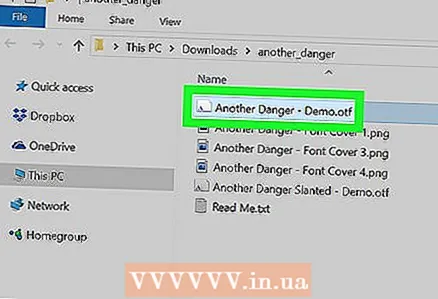 3 Double click on the font file. The font will open in a preview window.
 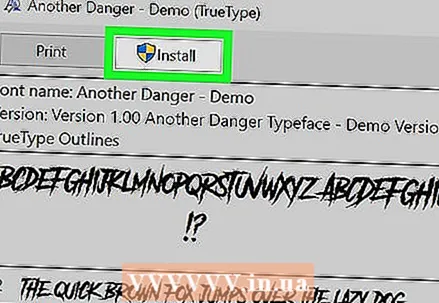 4 Click on Install. It's at the top of the preview window.
  5 Click on Yesif prompted. Installing the font requires administrator rights, so you may need to confirm your actions.
 - If you are logged in as a guest (not an administrator), you will not be able to install the font.
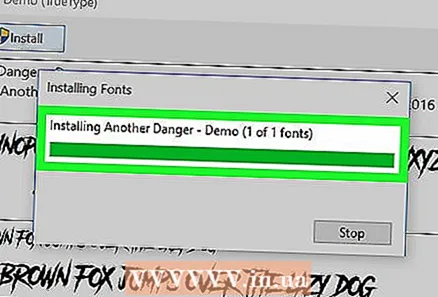 6 Wait while the font is installed. This usually takes a few seconds. Once the font is installed, it will be available to any program that uses system fonts, including Microsoft Word.
Part 2 of 3: On Mac OS
 1 Download the font. There are many sites on the Internet with free fonts that you can use on your home computer. Mac OS supports the most popular font formats: OTF and TTF. Free fonts can be found on the following sites:
 - fonts-online.ru/fonts/free
- allfont.ru/free
- ffont.ru/fonts
- allshrift.ru
 2 Extract the font (if needed). If you downloaded the font as a ZIP file, double-click the file to open it.
 - Skip this step if you downloaded the font as a TTF or OTF file.
 3 Double click on the font file. The font will open in a preview window.
  4 Click on Install font. It's at the top of the preview window. The font will be installed and can be used in any text editor, including Microsoft Word.
Part 3 of 3: How to Find a Font in Word
 1 Remember the name of the installed font. Fonts in Word are listed alphabetically, so you need to know the first few letters of a font name to find it.
 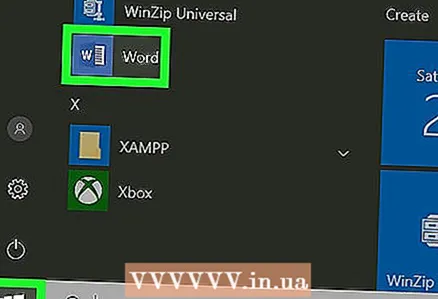 2 Open Microsoft Word. Click on the blue icon with a white "W".
 - If Microsoft Word is already open, close it and then reopen it. The new font will not appear in Word until you restart the program.
 3 Click on new document. You will find this option at the top left of the home page. A new Word document will open.
  4 Click on the tab the main. It's at the top of the Word window.
  5 Open the Font menu. Click on
  to the right of the name of the current font in the toolbar.
 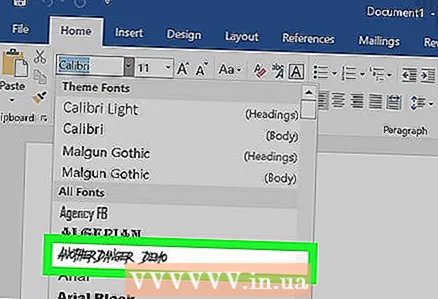 6 Find a new font. Scroll through the menu and find the name of the installed font.
  7 Use a font. Click on the font name and then enter any text. You may need to adjust the font size to make it look ok.
Tips
- When you install the font, it will be available in all programs in the Microsoft Office suite.
- If you want to send a Word document to another person, save it as a PDF so that the installed font remains in the document. To do this, in the Save window, click File Type (Windows) or Format (Mac), and then choose PDF.
Warnings
- Some characters will not be available in a particular font.


