Author:
Eric Farmer
Date Of Creation:
4 March 2021
Update Date:
1 July 2024
Content
- Steps
- Method 1 of 3: Folding the paper dagger
- Method 2 of 3: Making a dagger by gluing paper
- Method 3 of 3: Making a papier-mâché dagger
- Tips
- What do you need
Using a variety of methods, almost anything can be made with paper, including a dagger. To fold the dagger, you can use the origami technique, cut out a shape, glue the pieces together to form a three-dimensional object, or soak paper into pulp and use it as glue.
Steps
Method 1 of 3: Folding the paper dagger
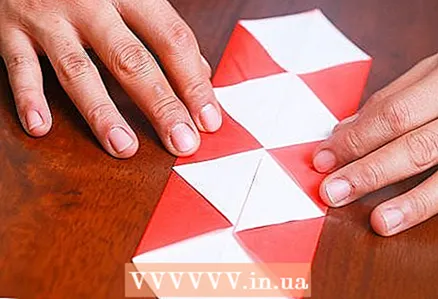
 1 Take a square piece of paper. To make it easy to fold, the paper should not be too thick. By the way, if you are new to origami folding, take a larger piece of paper.
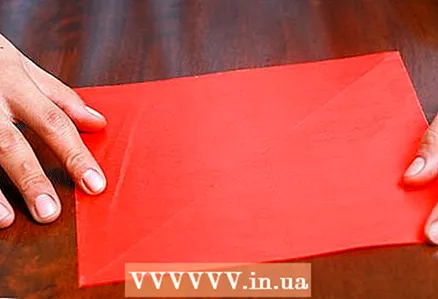
  2 Place the fox paper back side up. The front side of the sheet should face the table. You can also use plain paper, but be aware that the folds are more noticeable on the double-sided sheet. In addition, the piece of paper should lie in front of you in the shape of a square, not a diamond.
  3 Fold the sheet horizontally. Fold the top corners with the bottom corners so that a fold line appears in the middle. Expand the sheet.
  4 Fold the sheet vertically. Fold the corners on the left side with the corners on the right side. Make a fold in the center. Expand again.
 - At this point, the sheet is still square, but with vertical and horizontal folds in the center.
 5 Turn the sheet over. The right side of the paper should now be facing up.
  6 Fold the paper in half diagonally. Place the top left corner of the sheet against the bottom right corner, creating a diagonal crease. Expand the sheet.
 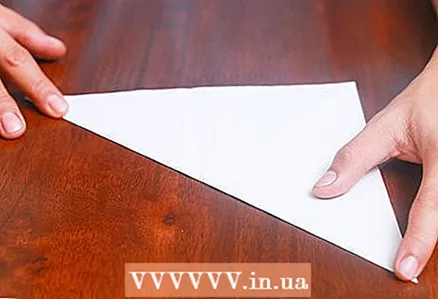 7 Fold the paper diagonally with the other side. Align the bottom left corner of the sheet with the top right corner to create a diagonal fold line. Expand the sheet.
 - At this point, the sheet is still square, but with vertical and horizontal folds on one side and diagonal folds on the other.
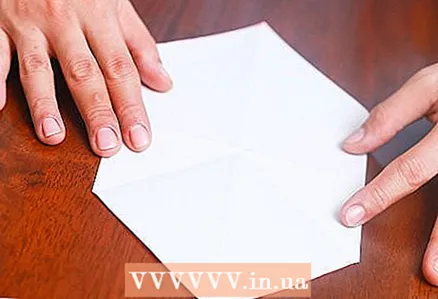
 8 Flip the paper over. Rotate the sheet 45 degrees so that one edge is facing up. You should now have a diamond in front of you.
  9 Bend the two side corners. Bend the sides of the diamond so that their corners touch the center of the diamond. Smooth out the folds and leave the sides folded.
 - This will end up with a small square in the center with a triangle at the top and bottom.
 10 Flip the paper over. The back of the sheet will now be facing you.
  11 Fold the sides towards the center. Make a vertical crease and fold the sides towards the center line. Thus, you will make the narrowing of the previous figure.
 - Due to the bending of the sides, the edges of the side triangles should flip over.
 12 Bend these edges towards the center. After folding the sides, the inverted edges will stick out. Fold them towards the center, smoothing out the side folds.
 - As a result, you should have four rhombuses surrounded by triangles, pointing inward.
 13 Fold the second rhombus from the end in half horizontally. Fold the bottom under the top, not the other way around. This technique is called outward fold.
  14 Fold inward to the other side. Pull out the bottom and fold the paper back halfway between the fold made in the previous step and the bottom of the same diamond. This will create an inward fold, the essence of which is to create a bulge in the paper.
  15 Make a handle. For the handle it is necessary to make a "flattening" fold. Fold inward where you folded the paper under the bottom of it. Then make small outward folds that run diagonally from the side corners of the small rhombuses on the bulge to the outer edges. They should be no larger than the lower tip of the small rhombus created by the bulge. You will also need to unfold part of the bulge. Pull the sides of the handle along the folds inward, using the fold outward as a guide to smooth out some of the bump. Smooth out the folds. Now you have a handle of some kind,
  16 Square the bottom edge. Bend the small triangle at the bottom of the handle to make a right angle.
  17 Make another bulge. Look at the small diamond above the handle. Make a horizontal outward fold at the top of the diamond and an inward horizontal fold in the middle. With folding, you need to make another layer above the handle so that the bottom of the fold aligns with the top of the handle. Smooth out the folds.
  18 Use another flatten to create the blade. Bend the vertical folds inward along the blade, flush with the handle. Make slight outward folds at the bottom corners of the corner blade. Making the folds inward meet in the middle, smooth out the triangles at the bottom of the dagger guard.
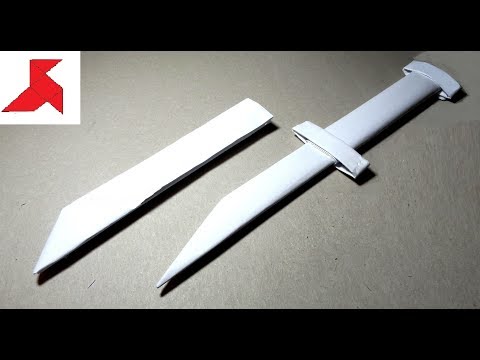
  19 Turn over. The dagger is ready.
Method 2 of 3: Making a dagger by gluing paper
 1 Draw a dagger on a piece of heavy paper or cardboard. For clarity, use the ruler and dagger patterns. Take one solid piece, but it should be thick enough so that the cut pieces are not difficult to align.
  2 Cut out the dagger. Take scissors or a cutting knife to carve out the dagger you have created.
  3 Circle the pattern. Use the dagger as a template by tracing it on other sheets of paper. You will need at least ten sheets, although you can make more to make the appliqué more durable.
 - To simplify the process, you can make multiple copies of the same dagger pattern.
- You can use any type of paper for this project, but medium weight paper will do just fine. You can even craft a dagger from book pages.
 4 Cut out the dagger. Cut each dagger with scissors or a cutting knife.
  5 Glue the daggers together. Line up all the daggers and glue them together with PVA glue. Smooth out each layer so that there are no wrinkles. Add as many layers as necessary until the dagger is at the desired thickness and strength.
  6 Cut the dagger. Trim off any edges that stick out from the dagger.
  7 Compress the dagger. Place the dagger between two pieces of parchment paper and place something heavy on top. Leave it to dry overnight.
  8 Add details. For example, you can add layers to the handguard to make it more visible, or you can glue various objects to the handgrip to make it look like jewelry.
  9 Paint the dagger. Color the dagger to make it look real. You can add a swirl pattern to the handle and paint the gems in different colors.
Method 3 of 3: Making a papier-mâché dagger
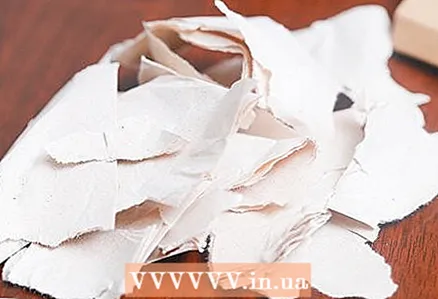 1 Tear the paper into pieces. To do this, you can use colored paper or waste paper, such as newspapers.
  2 Fill a bowl or bucket halfway with scraps of paper. Pour water on top. Leave the paper overnight to absorb the water.
 - To speed up the process, pour boiling water over the paper. Leave it alone until the water cools down.
 3 Shred the paper with a blender or electric mixer. Shred the paper to a liquid state.
  4 Remove excess water. Squeeze the water out of the gruel with your hands.
 - You can also use stockings or a colander to remove the water. Just leave it over the sink for about 30 minutes until the water drains.
 5 Add glue. Add PVA glue or wallpaper glue to the mixture. Add enough glue to make the consistency resemble clay.
 - Do not add glue if you want to save the papier-mâché for other projects. Roll it into balls and let dry. Dilute them with water and only then add glue.
- Some recipes do not require glue, but the finished product will be more durable with it.
 6 Shape the gruel. Shape the papier-mâché into a dagger on parchment paper. For this step, you can use a mold, if you have one.
  7 Let the dagger dry. Depending on the thickness, this process can take several days.
  8 Paint the dagger. If you want, you can paint some details on the finished dagger.
Tips
- To make the dagger even stronger, apply varnish to it.
What do you need
- PVA glue
- Paper
- Scissors or cutting knife
- Water
- Bucket or bowl
- Blender or mixer
- PVA glue or wallpaper glue
- Dye
- Brushes


