Author:
Marcus Baldwin
Date Of Creation:
21 June 2021
Update Date:
1 July 2024
Content
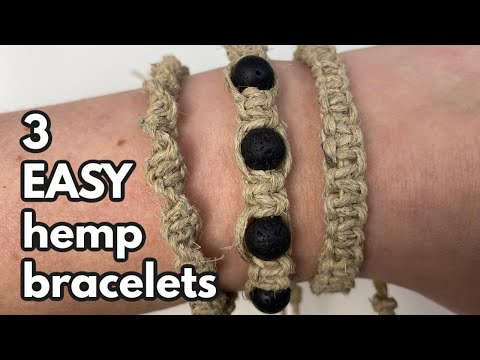
Making a bracelet from hemp thread with your own hands is not at all difficult. These bracelets are perfect for any style and clothing, and can also be a meaningful gift to a friend. With such a gift, you will show what you are capable of and save money. This article introduces some of the weaving methods: macrame, spiral method and bead method.
Steps
Method 1 of 2: Macrame
 1 Cut the thread. Measure and cut 2 long strands of about 150 centimeters each. Connect the ends and and bend the threads in half. Tie a knot at the fold.
  2 Secure one thread. It will help a lot if you pin one end of the thread to the left of the knot, for example, to a needle pad or pin it to your jeans with a pin. This will make it easier to knot.
  3 Divide the threads. Need 4 hemp threads. For weaving in this way, it is important that the 2 inner threads remain motionless. The bracelet is woven with side threads around the middle ones.
  4 Make a loop. With the left thread, wrap all 3 remaining, forming the shape of a number 4.
  5 Tie the first knot. Take the right thread and place it on the left thread, which forms the shape of the number 4, then pass it under the rest of the threads so that the right thread is on the left, that is, pass it through the loop formed by the left thread.
  6 Tighten threads 1 and 4 (i.e.e left and right) and you get a knot. Make sure that all knots are tightened equally so that the bracelet is flat and some knots do not bulge.
 - 7 Tie a knot on the other side. Tie a knot on the other side in the same way. Then alternate: node on the left, node on the right.
 8 Continue to weave. The length of the bracelet depends on the width of your wrist, so braid until the bracelet fits your hand.
 - 9 Tie a knot at the end. Tie a regular knot at the end of the bracelet. Cut off the excess and fix the bracelet on your hand. Enjoy your DIY decoration!
Method 2 of 2: Weaving with the addition of beads
- 1 Select beads. You will need hemp thread (natural or dyed) and beads or beads of your choice. The beads will fit into which the thread will fit. But the best option would be grain beads.
- 2 Cut the thread. You will need 3 strands 40 centimeters long. The ends will eventually be braided together.
- 3 Tie a knot at one end. Tie 3 strands together and tie a knot. Then measure out 5 centimeters and tie another knot. These knots will be used to adjust the size of the bracelet to the width of the wrist.
- 4 Start braiding. In the place of the knot, start to weave a classic pigtail. The right thread is superimposed on the central one, then the left thread is superimposed at the intersection of the right and central threads. Repeat the steps.
- 5 Continue to weave. Braid until you reach ⅓ of the desired length of the bracelet.
- 6 Add beads. When the right thread is in the center, put a bead on it, then overlap the right thread with the left one. Do the same for the other side. Repeat the steps until ⅓ of the bracelet is complete.
- 7 Finish braiding. When you are finished with the beads, weave a regular braid until you have braided the remaining ⅓ of the bracelet. Tie a knot and cut off any excess.
- 8 Enjoy the beauty of your bracelet! You can weave several of these bracelets and combine them into one wide bracelet.
= Spiral bracelet
- Cut the thread. You need 4 threads. The length of the thread should be 3 times the width of the wrist. Measure and cut 2 strands. The other 2 strands should be 5 times the width of the wrist.
- Tie the threads together. Lay the threads on the table so that the shorter ones are in the center and the long ones are on the sides.Tie a knot at one end. Do not tie a knot directly at the end, leave some thread so that later it will be easier for you to fix the bracelet on your wrist.
- Make a loop. Take the right long thread and thread it over the center threads, forming a semicircle shape.
- Tie the first knot. Take the left long thread and thread it into the formed semicircle above the threads. There should be a knot around the center strands. You will only use the side strands to weave the bracelet.
- Continue to weave. Continuing to weave only on the right side, create knots. Put the left thread above and below the threads, and also thread it into the knot itself. After you make a couple of knots, a spiral forming will become noticeable.
- Finish braiding. When there are enough braided knots to wrap the wrist, tie a knot and cut off the remaining ends. You can fasten the ends of the thread, or you can just tie a knot.


