Author:
Gregory Harris
Date Of Creation:
10 August 2021
Update Date:
1 July 2024

Content
- Steps
- Part 1 of 3: Getting Started
- Part 2 of 3: Painting the glass
- Part 3 of 3: Drying the paint and then using the painted object
- Tips
- Warnings
- What do you need
- Additional articles
The very thought of painting on glass can be a little scary, but not everything is as scary as it might seem. If you have a pattern that you can circle, then working with glass will be quite simple and fun, and this article will help you take your first steps in the art of painting on glass.
Steps
Part 1 of 3: Getting Started
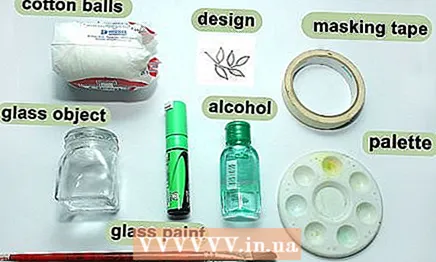 1 Gather the required materials. Painting on glass will require slightly more materials than just paints and brushes. In addition, you will need to properly prepare the glass for painting in order for the paint to hold better. It should also be borne in mind that after the end of the work, some paints need to be baked in the oven for fixing. Below is a list of what you need to draw:
 - glass object for drawing;
- cotton balls;
- medical alcohol;
- pattern printed on paper;
- masking tape;
- glass paints (stained glass);
- brushes;
- plate or palette;
- oven (optional).
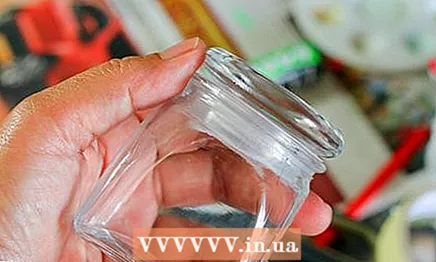 2 Pick up the glass object to color in. You can paint cans, cups or wine glasses. You can also try painting a glass panel. To make a panel, it will be easiest to remove the glass from the photo frame. When the work is finished, the glass can be inserted back into the frame and hung up for everyone to see. Just remember to make sure that the glass of the photo frame is real, as some frames come with plexiglass.
 - When displaying a panel in a photo frame, you can either remove or leave the back panel-substrate. If you decide to leave it, then it would be better to cover it with a white sheet. Glass paints are usually transparent, so they look best on a white background.
 3 Clean the glass with soapy water. Even if the glass surface appears clean, it still needs to be washed. The slightest traces of grease, dirt or dust can prevent the paint from adhering securely to the glass surface.
 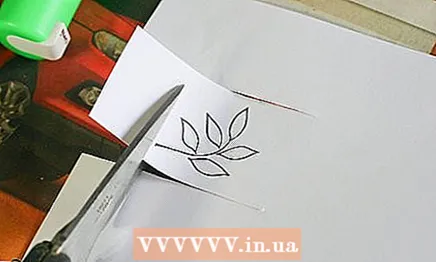 4 Prepare your design and drawing template. The template will need to be printed on paper. If you are going to paint a cup or jar, then the paper should be cut so that it fits inside the object.
 - The best templates are outline drawings, like those found in coloring pages.
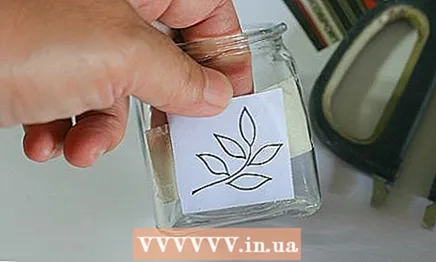 5 Position the template where the design is to be applied. If you plan to use a glass object for food or drink later, then the drawing should be located where it will not touch your mouth.Even though the paint description states that it is "non-toxic", this does not mean that it can be safely consumed in food.
 - If you are going to paint on flat glass, place the drawing template face down on the glass. Tape it around the edges and turn the glass over to the other side.
- If you are painting a glass cup, place the template inside it. Adjust the position of the template so that the drawing is in the right place. Press the template against the glass and tape it with tape.
- Don't forget to leave the fields. If you are going to frame the glass panel, make sure that your drawing will not be overlapped by the frame.
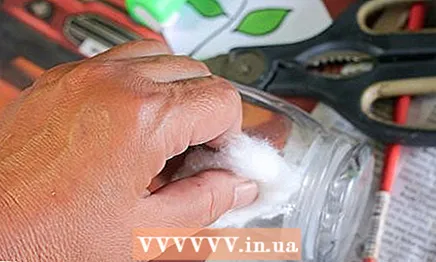 6 Wipe the glass surface with rubbing alcohol. Moisten a cotton ball with alcohol and wipe the entire surface of the glass object with it. Any greasy fingerprints can interfere with the good adhesion of the paint to the glass.
 - Try not to touch the area of the glass where the drawing will be applied anymore.
Part 2 of 3: Painting the glass
 1 Take the outline on the glass and squeeze some paint out of it onto a sheet of paper. This must be done because the first extrusion of the path usually looks like an untidy blob. To prevent this from happening on the glass, it is better to squeeze the outline onto the paper.
 - Some of the glass contours are "volumetric".
- Most contours are available in black, however, contours in other colors are sometimes also found, such as silver or gold.
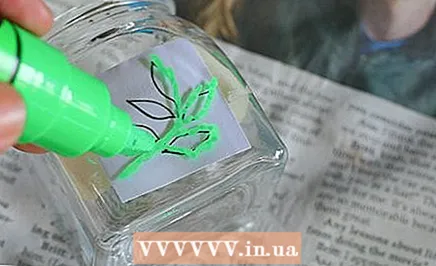 2 Circle the outlines of the template drawing with a regular or volumetric outline on the glass. Keep the tip of the outline close to the glass and start tracing the drawing. In this case, your movements should be long and continuous. If you work with short strokes, your lines are likely to be uneven and unkempt. Also, try not to touch the tip of the outline to the glass itself, otherwise the outline will be squeezed out with a too narrow strip, and the paint will tend to stick to the tip of the outline.
 - If you are left-handed, try to start tracing the drawing on the right side. If you are right-handed, start tracing the paths on the left. This will prevent you from accidentally smearing the fresh result of your work.
 3 If necessary, correct the finished contours of the drawing. Examine the result carefully when you finish tracing the paths. If you notice any ugly bumps or lumps of paint, wipe them off with a cotton swab moistened with rubbing alcohol. If the paint has time to dry, then it can be knocked off with a paper knife.
 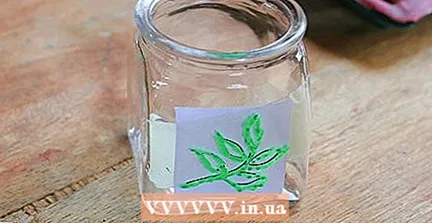 4 Leave the outline to dry for a day. The circuit must be completely dry before proceeding. In most cases, this takes about 6-8 hours. Nevertheless, it would be better to first familiarize yourself with the instructions attached to the circuit, since the drying time may vary, depending on the specific manufacturer.
 - If you are short on time, you can dry the paint with a hairdryer. This will speed up the drying process. Just be careful and be sure to set the hair dryer to the lowest heating temperature.
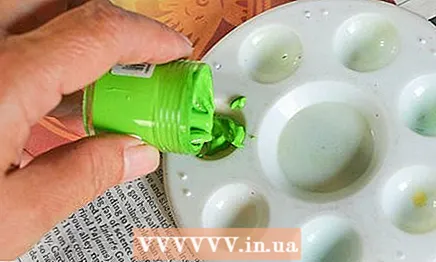 5 Squeeze some paint over the glass onto a palette or plate. If the paint you are using is packaged in a pointed tube, then it can be used to paint glass directly from the tube. Also, paint can be pre-squeezed onto a palette or plate to work with with a brush; this will give you better control over the drawing process.
 - For painting on glass, you can use both synthetic and natural brushes. Synthetic brushes are usually the cheaper option, but they tend to leave behind brush marks. Brushes made of soft natural hair will cost more, but the paint with them will fall on the glass smoother.
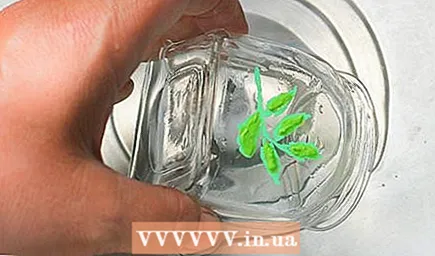
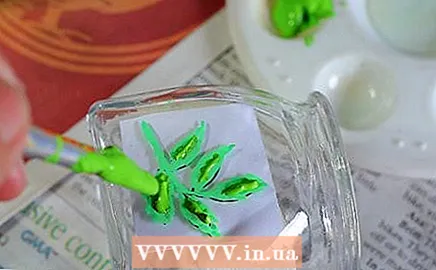 6 Paint over the space of the glass within the outline of the drawing. Do not press too hard on the brush, otherwise you may erase the existing paths. Just use the brush to stroke the areas of the glass that you want to paint. If in some place the paint is too thin, wait for it to dry before applying a second coat.If you rush to apply the second layer, then this may simply damage the first.
 - When dry, the paints on the glass shrink slightly. Try to paint over the entire space of the glass as close to the contours as possible. If you have difficulty with this, for example, in corners or on small elements of the picture, use a toothpick to distribute paint in hard-to-reach places.
- The thicker you apply the paint, the better it will even out. This will reduce the number of brush strokes visible.
- To create a marbled effect, drop a few drops of two or more tones of paint on the area to be painted. Take a toothpick and lightly mix the paint. Just do not overdo it, otherwise you will get a solid color instead of a marble effect.
 7 Be sure to rinse and dry your brush before moving on to a different paint color. Whenever you need to change paint, dip your brush in water and rinse to remove paint. Gently squeeze the brush onto a paper towel. If there are traces of paint on it, rinse the brush again. If the brush leaves no residue, continue squeezing until there is no excess water on the bristles. If water gets into the paint, it can lead to the formation of bubbles in it.
 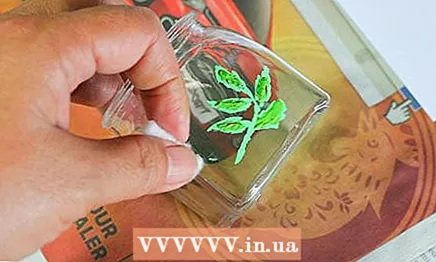 8 Correct the drawing again if necessary. Examine your work carefully for any blots that need to be corrected. It will be easier to fix the drawing while the paint is still wet than after. To wipe off excess paint, use cotton swabs, brushes and toothpicks soaked in alcohol. This is usually required when you accidentally go beyond the contours of the drawing with paint.
 - If bubbles form in the paint, pierce them with a pin or needle. This must be done before the paint dries.
Part 3 of 3: Drying the paint and then using the painted object
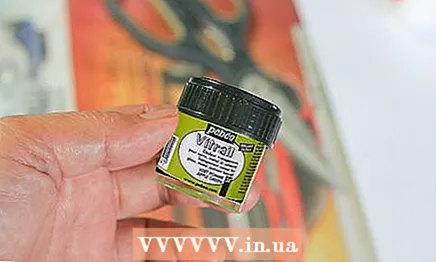 1 Read the instructions that came with your glass paint. Some paints need several days to dry before the painted object can be used, while others need up to a month to dry. There are paints that require oven baking to fix. Since the instructions for working with different paints vary greatly, you should definitely read the instructions for the paints you are using.
 - Some instructions will tell you that you should give the paint a certain amount of time to “cure”. This means that the paint just has to dry.
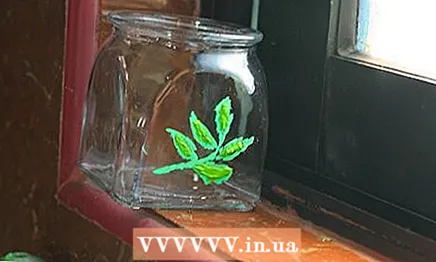 2 Allow the paint to dry at least 48 times. The paint will then feel dry to the touch, but will need to be handled carefully. Nevertheless, it all depends on the specific brand of paint, so the paint may not dry out at all during this time. If the paint remains sticky or soft like rubber, then it has not yet set and needs further drying.
 - Most glass paints are fully cured after 21 days.
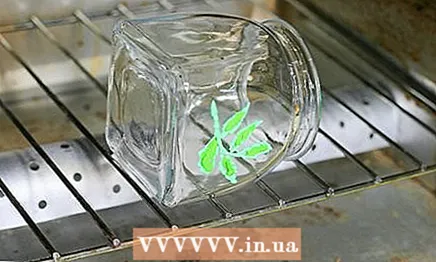 3 Consider baking the painted object to hold the paint more securely. This will allow you to wash the item in the dishwasher. Place the painted object on a foil-lined baking sheet in a cold oven. Turn on 175 ° C heat or use another temperature recommended by the paint manufacturer. Bake the item for about 30 minutes, then unplug the oven, but don't rush to take it out. Just let the oven and item cool slowly. Removing the glass quickly from a preheated oven may cause it to crack.
 - Most glitter paints cannot be baked in the oven. You will need to let the paint dry for 21 days. The instructions will definitely tell you if your paint can be baked.
- If you have used paints of different brands, then they may have different requirements for the temperature and duration of baking. In order not to burn the paints, choose the lowest temperature and the shortest baking time.
 4 Learn how to properly wash the painted object. Most glass paints, after drying, require delicate handling of the painted object, so it can only be washed by hand with a soft cloth or sponge. If you've baked the paint in the oven, then the painted object can be washed on top of the dishwasher. Do not soak painted glass in water, even if the paints were baked in the oven. This will cause the paint to peel off. Also, you should never rub the glass with a coarse sponge, as this will damage the paint layer.
  5finished>
Tips
- After baking the paint, the drawing on the glass can be decorated with beads and rhinestones, gluing them with superglue.
- If you are painting with paint directly from the tube without using a brush, remember to wipe the spout after each use. This will prevent paint from accumulating on the tip of the tube and clogging it.
- Try to keep the outline on the glass upside down. This will allow the paint inside it to flow to the tip and you will not have to squeeze the tube so hard to work, and it will also reduce the likelihood of air bubbles forming in the paint.
- Most paints, including glass paints, dry 1-2 tones lighter. Some paints become more transparent after drying. Keep these features in mind when you design your project. You may need to apply multiple layers of paint to get the desired result.
Warnings
- Do not rub painted objects with a coarse sponge. Always use only a soft sponge or cloth.
- Never wash glass objects that have not been baked on in the dishwasher. This will cause the pattern to slide. Baked items can only be washed on the top shelf of the dishwasher.
- Do not stain areas of the item that will come in contact with food, drinks, or lips. Even non-toxic paints are not always safe to eat.
- Never soak painted glass in water, even if the paints have been baked. Water will seep under the paint and cause it to peel off.
What do you need
- Glass object for drawing
- Cotton balls
- Rubbing alcohol
- Pattern printed on paper
- Masking tape
- Glass paints (stained glass)
- Brushes
- Plate or palette
- Oven (optional)
Additional articles
How to make a kaleidoscope How to get a realistic skin tone How to mix colors to get turquoise How to draw shadows
  How to draw anime and manga faces
  How to draw anime hair
  How to draw and publish manga
  How to learn to draw on your own
  How to draw a Sharingan How to remove oil paint from brushes
  How to paint with oil paints
  How to draw an anime character
  How to learn to draw
  How to dilute latex paint


