Author:
Joan Hall
Date Of Creation:
27 July 2021
Update Date:
23 June 2024
Content
- Steps
- Method 1 of 4: Upload YouTube Videos
- Method 2 of 4: Create Clips from Videos
- Method 3 of 4: Adding Effects
- Method 4 of 4: Using Movie Maker to Edit Videos
- Tips
Editing YouTube videos is easy. Many people don't even know that YouTube has a free video software that lets you create small clips from your videos by adding various transition effects. You can also add various effects to your videos, as well as stabilize and rotate the image. In addition, there are many professional video editing software that you can buy or download for free.
Steps
Method 1 of 4: Upload YouTube Videos
 1 Create a YouTube account. If you already have a YouTube account, then simply sign in to the site. To use the YouTube video editor, you need a YouTube account.The video editor and video management tab allow you to combine various videos and images, crop videos, add music, add various special effects. If you don't have a YouTube account, it's easy to create one.
 - Go to YouTube and select “Sign In” at the top right of the page. Next, select the "Create an Account" option. All you need is a Google email. If you don't have a Google mailbox, then select “Create Account” at the bottom of the Google registration page, and you'll be taken to the correct page where you can create one.
- Once you've created your YouTube account, you'll need to navigate to the video editor. Select the icon at the top right of the page and then "Creator Studio". Select the video manager on the left side of the screen, and then you will see the video editor page that appears at the top. Click on it.
- You can also enter YouTube.com/editor directly into the video editor window.
 2 Upload videos to work on YouTube. You can use up to 50 clips and 500 images for one video. First, you will need to upload the videos you want to use.
 - To upload a video from your computer, simply click the Add Video button at the top of the window (it appears after you enter the site). Select your privacy settings. Select the video you want to download. While it is loading, you can edit the basic and additional information, then set the visibility settings for updates to this video.
- Click Publish if you want to make the video public. Click private, link access, or limited access, and then share the video. You will receive an email notifying you that the video has been uploaded.
- To download videos from your iOS device, sign in to YouTube. Open the download guide in the upper left corner and go to the “My Channel” section. Click on the download icon. Select the video you want to download and press the confirm button. Provide video title, description, tags and privacy settings. Click the download icon.
- Videos will be automatically added to the video editor.
 3 Explore the editor tabs. In the video editor, you will see four tabs. They contain a variety of video editing and enhancement functions.
 - The first tab on the left contains all the videos you've uploaded. It looks like a camera icon. In it you can view your clips and images.
- The second tab contains Creative Commons videos. These videos are completely free to use as they do not claim ownership. You can search for specific Creative Commons videos by entering keywords in the search bar and clicking the Creative Commons icon at the top left of the video editor.
- The third tab allows you to add music. It looks like a musical note.
- The fourth tab contains transitions that you can choose to create the effect of transitions from one video to another. It resembles a tie.
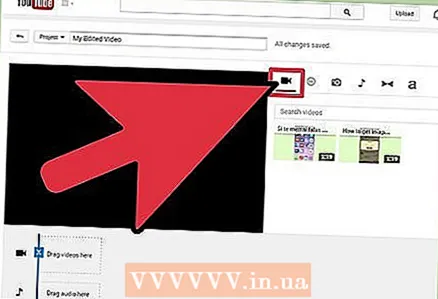
 4 Bring your videos to the timeline. You can choose from either the videos you've downloaded or the videos from Creative Commons (or both). Move these videos with the mouse wherever you want. Click the "+" icon that appears at the top of the video to add it to the timeline.
 - You can also drag the selected image or clip below onto the timeline where it says “Drag videos here to begin editing”.
- If you want to add two videos, just click on both videos and move them down in the timeline.
Method 2 of 4: Create Clips from Videos
 1 Cropping video. You can shorten the length of the video after it is in the timeline. You may not want to include some parts and want to delete them, or maybe you just need to make the video shorter.
 - Place your cursor over the video that you have moved to the timeline. Select the scissors icon that appears in the video window. This tool allows you to trim your video.
- Grab the ruler on the left and move it to the right - this will delete everything at the beginning of the video.You can do the same with the end of the video by dragging the right ruler to the left. Move both rulers to get the desired result. Click the save button - this will cut everything that is indicated in white and gray colors.
- To cut something out of the middle of a clip, you need to move the video twice in the timeline, and trim each of them.
- To make the video longer, simply drag the ruler from the center. If you extend the video beyond its length, it will repeat itself.
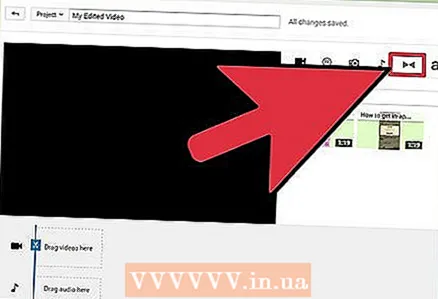 2 Add transitions. To add a transition effect, select one of the options offered in the corresponding tab at the top of the video editor. This tab's icon resembles a tie.
 - Drag the transition you like between the two clips. You will have 15 different transitions available, but remember that getting too carried away with transition effects looks unprofessional.
- To combine multiple clips, simply drag and drop them onto the timeline and place them in the order you want.
Method 3 of 4: Adding Effects
 1 Select the effects icon. By moving the cursor over the video in the timeline, you can select effects - for this, an icon will appear on the right in the video window. It looks like a magic wand.
 - In the window that appears, you can choose the effects you want to apply to your video - for example, you can make it black and white, change the brightness and contrast, stabilize it, and so on.
- The icon in the middle allows you to rotate the video.
 2 Add video enhancements. You can add filters to your video, change the color of the picture and make it look better.
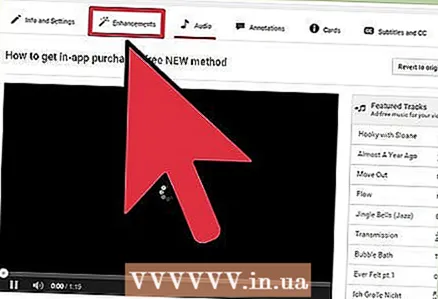
 - To apply video enhancements, go to the video manager on your YouTube channel. Select the video you want to edit and click the “Edit” button, then go to “Enhancements”. Among the proposed options, select the one you like, and then click "Save as".
- Effects such as image stabilization (if the video is shaking), slow motion, adding gaps, cropping, rotating, blurring faces and filters will be available to you.
- Your video must be less than 2 hours long and have less than 100,000 views - only then can you use additional ones.
- You will be able to preview all changes by dragging the line in the center. This will allow you to view the old and new version (they will be shown opposite). Select the "Quick fixes" tab and then the enhancement you like, or the Filters tab to see the available filters.
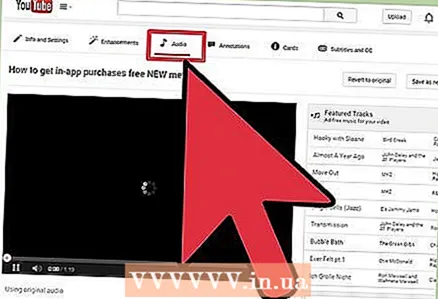
 3 Add background music. You can add music to your video by selecting tracks from the music tab at the top of the video editor.
 - Under the control box, select the video you want to edit, click the edit button and select the audio. You will be able to add songs located on the right side of the screen. You can also search for songs by name using the search bar. When you're done, hit save.
- You won't be able to upload your own audios or trim audio from clips. If you're using audio, YouTube will add ads to your video.
- Any audio editing may take some time.
 4 Add notes and captions to your YouTube videos. Click on the video editing button. It's at the top of the screen, right above your video.
 - Using this button, you can also create a title and description that will appear below the video.
- You will need to choose a category and tags as this will help other people find your video in search. If this is not done, then hardly anyone will find and view your video.
Method 4 of 4: Using Movie Maker to Edit Videos
 1 Choose a video editing program such as Movie Maker. Windows Movie Maker is free software that comes with Windows by default. It is very similar to YouTube video editing software. However, in this case, you will be editing the video on your computer and then uploading it to YouTube.
 - On MAC computers, the analogue of Movie Maker is iMovie. You can also try professional video software such as Adobe Premiere or Final Cut Pro. However, they are expensive.
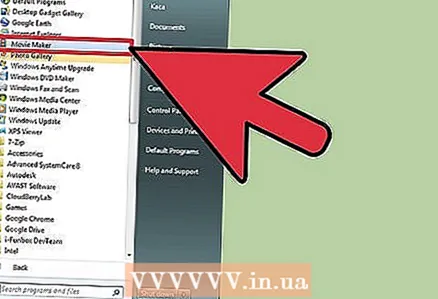
- If your PC is running Windows, you can find Windows Movie Maker under the Start menu items. Transfer video files from your phone or camera to your computer using a USB cable. Then launch Movie Maker.
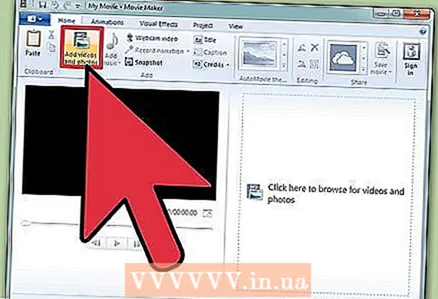 2 Select a video in Movie Maker. This is quite simple to do, much like in YouTube video editing software. You can also place videos on the timeline.
 - Select “Capture from video device” in the left panel. You will be able to choose a title for the video and a location on your computer where you want to store the footage. When the next screen appears, select the best playback quality on your computer.
- Choose if you want to take some part of the video or all of it. It depends on your footage. A window for capturing video should appear. Check the box "Create clips after the wizard completes". Use the controls to fast forward or rewind the video to the point you want to capture. Click "Start capture". When you've captured the footage you want, click “Stop capture” and then “Finish”.
- This will help you split your footage into clips. Select as many clips as you want to use and drag and drop them onto the timeline.
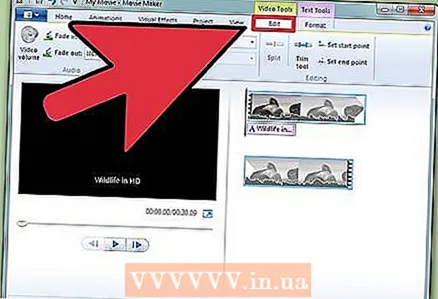 3 Edit the clip. Then you can edit your video, divide it into smaller segments, or delete some fragments if you don't like them. For example, a piece of video may be redundant or of poor quality.
 - Select a video. Click "Show storyboard" and click on the clip. It will appear in the media player. When you hit the play button, you will see a small button at the bottom right of the screen - this is the edit button.
- Click this button when you want to delete a section of the clip. This will split the timeline in two. Delete the fragment in the middle that you do not need by right-clicking on it, and then selecting “Delete” from the menu that appears.
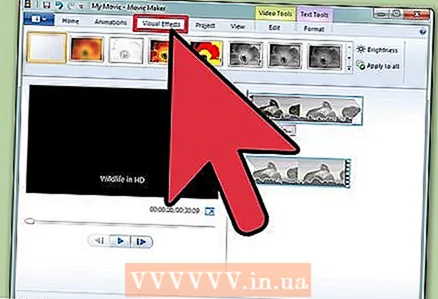 4 Add video effects. Sometimes it is necessary to improve the quality of a video - make it brighter or add filters and other special effects. It's easy enough to do this in Movie Maker.
 - To improve the quality of a video, select the desired video and right-click on it. From the menu that appears, select Video Effects. You will have many options to enhance your clip, such as decreasing or increasing brightness, adding toning, and so on. Select the desired effect and save the result.
- If you want to decrease or increase the volume of the audio on the video, simply select the clip and then click the audio button on the left. Increase or decrease audio volume and save.
- To add credits (of the video authors), go to the credits entry and click on the clip. Select tools from the top menu, and then go to "Titles and Credits". Choose where the credits should appear. In the window that appears, write the text.
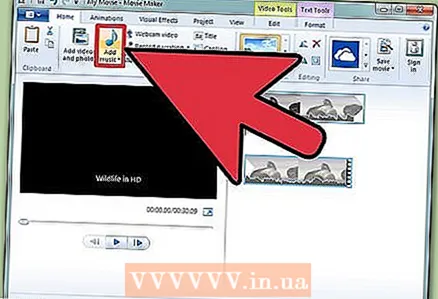 5 Add music. To add music to your video, select the timeline view. Import your music files into Movie Maker - they will appear at the top of the screen.
 - Drag the music file to the audio section where you want it to start playing in your video. Save.
 6 Export the video file. Select the file and then save the movie file from the top menu.Click "Start" and then upload it to You Tube.
Tips
- YouTube usually accepts videos up to 1080 x 720 and 1920 x 1080 pixels (this corresponds to a 16: 9 screen ratio), higher resolutions mean longer download times. There is also a limit of 1 gigabyte in size and 15 minutes in length (with rare exceptions for certain user groups). Most video file formats can be downloaded: WMV, AVI, MOV and MPG.
- Learn video editing and improve your video skills, learn to use storyboards and scripts.


