Author:
Carl Weaver
Date Of Creation:
22 February 2021
Update Date:
1 July 2024
Content
- Steps
- Method 1 of 3: Choose Paintings Professionally
- Method 2 of 3: Match paintings for a specific room
- Method 3 of 3: Hang pictures
The right wall decor combined with sensible furniture placement and interior decoration can turn a “good” room into a “great” one, but even a Mona Lisa will look ridiculous on your wall if you hang a picture crookedly or choose the wrong place for it. Don't waste time hanging and re-hanging photographs, postcards, and paintings looking for the “perfect combination” for a particular room. With the smart tips below, you'll be able to hang paintings and family photos wisely on the first try.
Steps
Method 1 of 3: Choose Paintings Professionally
 1 Choose pictures with appropriate content. Sometimes the images we like the most are not very suitable for decorating a room. If you have a lot of paintings, in most cases it is best to choose the most expressive and professional ones. The paintings on the walls will be seen by almost all your guests, and many of them will not be able to appreciate an ambiguous photograph with a joke, understandable only to “their own”, or a clownish low-standard work of art. For the entryway and living room, standard family photographs (even better if done professionally) or traditional art work best. Save the kitsch for the basement, and the photos of your naked baby for the family photo album.
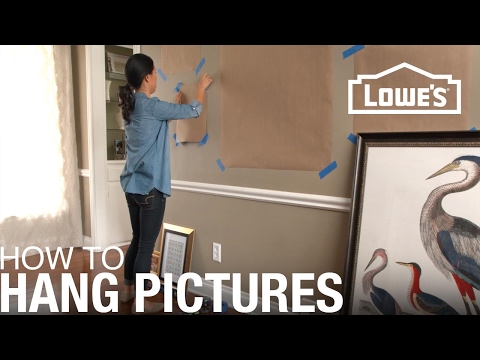
  2 Plan your picture composition ahead of time. If you plan on hanging multiple paintings in a specific location, this is great - playing with the placement of the paintings and the exact spacing between them can create stunning visuals. Before you hang several pictures together, make "outline" for this group of pictures. If you are sure you can erase the pencil marks later, easily trace around the pictures with a pencil, otherwise put the pictures on a roll of paper and cut along the outline. Tape the resulting squares and rectangles to the wall to get an idea of how your composition will look. It is much easier to move the paper squares around than to re-hang the paintings.
  3 Start with large paintings or photographs. Large paintings, especially those that you are very proud of, deserve a prominent position in the room. Hang them at eye level or higher where you can see them. Give them priority - a beautiful painting can also serve as the centerpiece of a room. Do not hang pictures too close to the corners of the room - you will inadvertently give them a “crammed in” look. Leave 30-60cm to the corner.
 - Provided that the painting does not clearly drown out the smaller paintings, use it in a multi-painting composition. If you are not sure how to place a large painting as part of a group, you can place it in one of the lower corners of the composition and hang the second largest painting in the upper corner opposite. Place the small paintings in two unoccupied sections of an imaginary rectangle containing both large paintings.
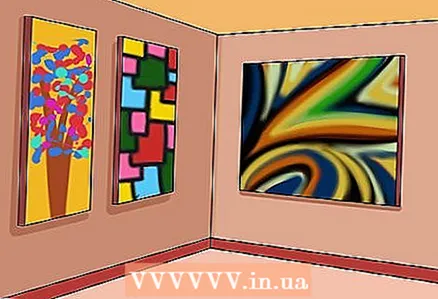
 4 Group small paintings into rows or groups. There is no need to make massive landscapes or prim portraits the centerpiece of the room. A group of small paintings can be very beautiful if the paintings are grouped into a visually pleasing motive. Arrange the paintings according to the needs of the room. Clear, straight vertical or horizontal rows can work well in tight spaces, while a large, cloud-like arrangement of photographs or paintings of varying sizes can give a room a modern look.
 - The most important thing when grouping pictures is to place the frames clearly at an angle of ninety degrees in relation to each other (to hang pictures absolutely straight, you can use a tool called "level"). Also make sure that the distance between the paintings is the same throughout the composition.
- An additional advantage of small paintings is that they are much more versatile than large paintings. A short row of small paintings can transform a cramped bedroom, and a few old family photos on the stairs will visually show your family's history.
 5 Coordinate the framework. As a rule, when grouping pictures, frames should be combined. This does not mean that all pictures in a composition should have the same frames (although this is certainly permissible). Rather, it means that all frameworks in a particular group should have a common theme. For example, a group of paintings with black frames will look better than a group of paintings, some with metal frames, some with bamboo frames, etc.
 - Experiment by creating a specific pattern of frames - for example, hang alternately blue and white frames in a checkerboard pattern. This pattern can be considered as the "main theme". Rather than matching pictures with the same frames, it is more important to create the impression that the pictures were hung in accordance with a certain logical purpose.
- When in doubt, remember that white and black go well with almost everything.
Method 2 of 3: Match paintings for a specific room
 1 Choose paintings to suit the style of your room. At first glance, this may seem like an easy task, but it's easy to forget that different paintings will create different visual impressions in a particular room.Unless you have chosen an avant-garde, discordant incongruity of paintings with a room, try to choose a painting according to the purpose of the room. Classic landscapes and portraits are great for the living room, while small family photos are great for the hallway, staircase, bedroom, and bathroom. Impressionist images of fruit and crockery serve as a mouth-watering addition to the kitchen. Use common sense - you know what effect you want to create in the room, so use those photos and paintings that will help you with this task.
 - Abstract paintings can be incredibly striking additions to a room; however, if you're planning to hang a painting that is just a bunch of shapes and colors, it might be a good idea to choose colors that go well with the rest of the room's décor (see: How to match colors).
 2 Respect the space and don't overload the walls. One of the main advantages of any room is its sense of space. A high ceiling can make you feel like you're in a church. Large windows can take your gaze to the horizon. Don't let your paintings and photographs destroy the natural sense of the room's space! The abundance of photographs can make the wall look like a cluttered board of honor.
 - The paintings on the wall should never compete for space - if you have to remove old paintings from the wall to make room for new ones, you might want to consider a new home for your paintings.
- Many walls look best with one or two paintings. Or even no pictures at all. Whether you have a beautiful wallpaper, an incredible carpet, or a stunning centerpiece, take your time to distract attention from it with an impressive collection of paintings.
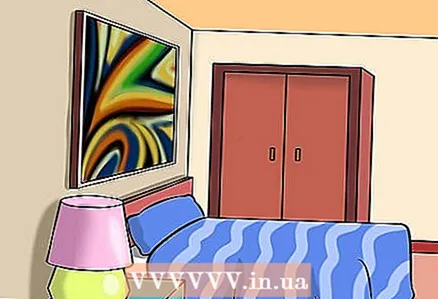 3 Visually enlarge a small room with large paintings. A large picture can make a cramped room appear larger. Likewise, paintings hung high on the wall will enhance the room's perception of the size of the room, drawing attention away from the imposing wall space at eye level. For example, a colorful print hung high on the wall will give a cramped bathroom a sense of dignity.
 - Use large paintings, but do not cover the entire surface of the wall. From the fact that you cover the whole wall of a cramped room with one picture, the effect will be depressing.
 4 Don't let huge rooms overshadow your paintings. Large, spacious rooms pose special challenges. Tall plain walls with rarely hung paintings look more like a modern art museum than a family home. Hang the paintings so that there are no huge blank areas on the wall. Furniture can help out in this case: tall bookcases and wardrobes take up a lot of wall space.
 - If you have interesting wallpaper or even solid colored walls, you can leave more white space between the paintings. The mortal sin of simple, unadorned walls is that they make the room cold and closed, more like a box.
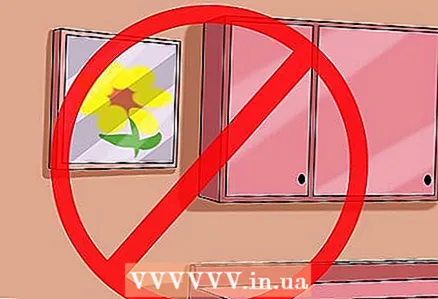 5 Consider the arrangement of the furniture. Furniture and artwork on the walls create a sense of the space of a particular room. Skillfully coordinate them to make the most of your living space. Try hanging paintings and photographs in a place where the eye will naturally fall on them, but at the same time, where they will not interfere with the normal functioning of the room. Small paintings are great for narrow sections of the wall in the kitchen, but only if their frames do not interfere with opening the kitchen cabinets. The paintings look great over corner tables and chairs, giving this part of the room a stately and at the same time habitable look, but not so high that they will constantly bang their heads about them. Use common sense - think about your daily life to get an idea of where your gaze is most often directed.
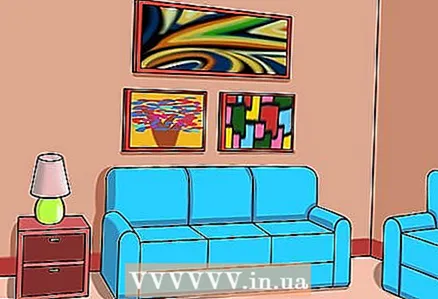
 - Follow the two-thirds rule: a piece of art placed over a piece of furniture should be at least 2/3 of the length of that piece of furniture. For example, a piece of art that is at least two meters long should be placed over a 3-meter sofa. This rule applies both to individual paintings and to groups of small paintings.
 6 Arrange the paintings according to the function of the room. For example, many living rooms have multiple sofas facing each other for people to sit on and talk to. In this case, give your guests something to look at and place pictures behind each sofa (one designer recommends hanging pictures in the palm of your hand above the top of the sofa.). In the kitchen, a few small photographs above the table can spice up your meal and serve as an interesting topic of conversation when hosting guests.
Method 3 of 3: Hang pictures
 1 Mount the painting securely on the wall. A beautiful painting or work of art can be a source of not only pride, but also a headache if it does not stick to the wall. In order not to pull out your hair later, constantly moving and outweighing problem pictures, hang the picture securely the first time. It will also save you money: if the painting falls off the wall, both the wall and the painting can be easily damaged.
 - When you hang anything on a wall, it is best to hammer a nail into the frame post (a sturdy piece of wood supporting a drywall wall). For heavier paintings or works of art, this may be necessary... However, since the posts are only 3 to 5 cm thick and spaced at fairly large intervals, they are often not exactly where you want the painting to hang. Elegant and not very heavy paintings can be hung in the space between the racks.
- Whether you are hanging the painting on a frame stand or in drywall between the uprights, drive the nail into the wall at a steep angle of 45 degrees or more. Thus, the nail will be fixed much more firmly than if it were perpendicular to the wall: the contact between the nail and the wall is greater, and this reduces the lever principle of the painting on the nail.
 2 Invest in alternative means of hanging. For many paintings, one nail is enough. However, there are different ways to hang a picture, and a variety of hooks, anchors, etc. exist specifically to hang artwork on the wall. A few examples:
 - Plasterboard Hooks - Small metal hooks that easily pierce drywall and provide a firm grip outside the frame post.
- Extra strong dowels. A small plastic case is installed in the rack using a drill, then a screw (supporting the artwork) is inserted into the case. Suitable for heavier items.
- Anchor Wing Anchor Bolts are special screws with metal "wings" that unfold when driven into a wall, providing extra grip.
- Hanging Tape - Sticky patches that are attached to the back of the painting so that the painting is glued directly to the wall. No nails required.
 3 Hang pictures straight. If you don't quite directly hang a beautiful family photo on the wall, unfortunately, instead of the charming smile of your children, guests will rather notice that the picture is sideways two and a half degrees. Use a ruler to determine the horizontal center of the painting and try to relate this point to the nail by passing it through the wire to hang it on the frame (you can make a tiny erasable pencil mark on the front of the painting to help you remember where the center is.) After hanging the painting, use level to make minor adjustments.
 - Modern high-tech tools offer new possibilities for hanging paintings with absolute precision.Try to find a laser level in a hardware store - it will draw a perfectly flat horizontal line on the wall with which you can perfectly align your paintings.


