Author:
Joan Hall
Date Of Creation:
25 July 2021
Update Date:
1 July 2024

Content
- Steps
- Method 1 of 7: Create a file
- Method 2 of 7: Adding layers
- Method 3 of 7: The Tools Panel
- Method 4 of 7: Choosing Colors
- Method 5 of 7: Adding text
- Method 6 of 7: Correcting the image
- Method 7 of 7: Saving Files
Photoshop is a graphics editor developed by Adobe that is used by both professional editors and ordinary users. The program can be used not only to create images from scratch, but also to edit ready-made images. Adobe Photoshop skills are useful and can even be profitable. Of course, you can take special courses in Photoshop, or master the editor yourself using this and many other tutorials.
Steps
Method 1 of 7: Create a file
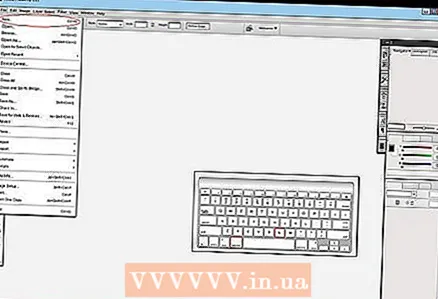 1 Create a file. To create an image, you need to open the file as soon as the program opens. To do this, click “File-New”, or press the keyboard shortcut “Ctrl + N”.
 - In the window that appears, you will see a lot of settings. With their help, you can customize the canvas to your liking. Don't worry, all of these settings can be changed after you start working on the image. Just remember that once you get started, these settings may affect the appearance of the image.
 2 Please select a size. The first set of options is for choosing the size of your canvas, or work surface. You can use a preset size (for example, 8.5x11 ”is suitable for printing on plain paper), custom size (selectable width and height), or select the" clipboard "setting (in this case, the size copied to the clipboard will be used, which is great for copying and pasting existing images).
  3 Choose a resolution. Choose the image resolution depending on what you will do with it afterwards. Resolution defines the number of pixels per centimeter in the image. The higher this number is, the more detailed the image you will get.
 - Increasing the resolution will also affect the file size. In fact, there will be other consequences. Your computer may not have enough power to process large files, and then it will freeze and slow down. Also, large files will take longer to download and upload, so you only need to upload them to the network when absolutely necessary.
- The standard web file resolution is 72 ppi. Standard photo resolution is 300 ppi. You can set any resolution for printing, but remember that if it is less than 300 pixels / inch, the image will look pixelated. Using images larger than 72 ppi on the Internet can significantly increase their load time.
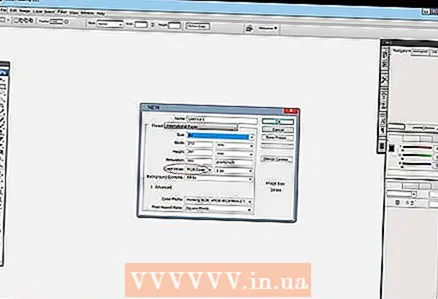 4 Select a color mode. Depending on what you are going to do with the image, select the desired color mode. This parameter determines how colors are calculated and displayed. The mode can be changed after starting work on the image, without negative consequences for the image.
 - RGB is a standard color mode. This mode is great for images that will be viewed on a computer, because in this mode computers calculate and display images.
- CMYK is another common mode. This mode is best for printing images, as CMYK is the standard color space for printers to define colors. It is best to save the file in RGB space and change it to CMYK before printing, as the PC will still display RGB colors.
- Grayscale is another parameter, the essence of which follows from the name. This mode is used only for printing black and white images.
- Regardless of the color mode, the higher the number of bits, the more colors will be displayed. Increasing the number of bits will also increase the size of the original file, so do not increase this parameter unnecessarily.
 5 Choose a background. Basically, this parameter will affect the color of the canvas - white or transparent. On a white background, the changes made to the image are clearly visible, but on a transparent background it is easier to achieve the desired effects.
 - An excellent option would be to edit the image on layers above the background, then you can quite easily change the white background to a transparent one, and vice versa.
- Start with a transparent background, which you paint over with white. Create new images on separate layers above the background. You can erase the white background color where necessary.
Method 2 of 7: Adding layers
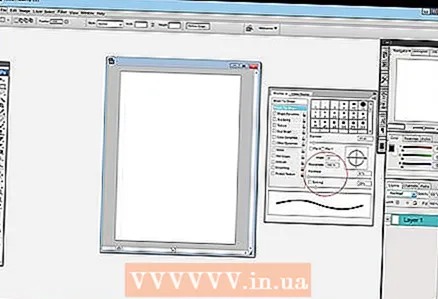
 1 Use layers. Using layers is arguably one of the most important features in Photoshop. Layers allow you to separate images from each other, as well as edit individual pieces. The more layers you use, the more control over the editing process you have. All changes made on one layer will be applied only to that layer (there are also layer modes that define transitions / connections of several layers). Always remember that the layers are in order: the layers higher in the list will always be on top of the layers below. The main thing is planning and tuning.
 - Adjustment layers will contain (regardless of order): lighting, shadows, text, background, primary colors, etc.
- You can hide or show the layer by clicking on the eye icon to the left of the layer image.
- To create a new layer, click the Create New Layer button at the bottom of the Layers window (looks like an intersection of squares), select New -> Layer from the Layers menu, or press the Shift + Ctrl / command + N key combination.
 2 Choose a layer mode. The choice of layer mode is very important when creating images. There are a large number of different modes that will change the appearance of the image on a layer, as well as how the layer is applied to the layers below it. Normal is the standard mode.
 - Experiment with layer modes and see how they affect the look of your image. Also, you can find additional lessons on this topic on the net.
 3 Adjust the "Opacity" of the layer. You can adjust the opacity of a layer (more precisely, how transparent the objects on this layer will be) using the opacity and fill sliders in the layers window. In general, both sliders have the same effect, so it doesn't matter which one you use.
 - The fill effect is only required when you apply effects to an image (such as outlines, shadows, glows, and embossing). Using a "fill" will help preserve the opacity of the effects by changing the opacity of only the objects on the layer.
 4 Pin layers. After you finish working on the layer, you will probably want to pin the finished layer. This will ensure that the layer is not accidentally deleted or changed. You can dock it entirely by selecting the desired layer and clicking on the lock button in the layers window. You can lock the transparency of the pixels, keep their colors, or lock the position of the image using the buttons next to the lock, if you do not want to lock the entire layer. If you hover over them, you can see the captions with the names.
  5 Merge layers. After, or during work, you probably want to merge the layers. This action will combine all parts of the image into one. Remember that this action is irreversible. Right-click on the layer and choose "merge with previous" or "merge layers" depending on which layers you want to merge. You can also select the option "merge visible", and the editor will merge all visible layers.
Method 3 of 7: The Tools Panel
 1 Understanding the selection tools. Selection tools work in different ways and allow you to select individual parts of an image, or an entire image. Immediately after the selection, you can copy / paste or just edit the selection. You can see a selection indicated by "running ants" around it. To deselect the selection, press the key combination "Ctrl / command + D". Do not forget that the selection is valid only on the selected layer, although you can also click "Copy merged data" from the "Edit" menu if you want to copy the selection from all layers without merging them.
 - Selecting an area: A set of shapes will open, from which you can take any by right-clicking on the icon. It works in much the same way as selecting files on a computer - hold down and move the cursor. Extend the selection of your square to a circle, or an oval, by holding down the Shift key while selecting.
- Lasso: Same selection tool, but allows freehand selection. The regular lasso is the fastest and easiest option, but less accurate. The straight lasso is similar to the normal lasso, but the selection will be drawn from the anchor points that you select. The third option is the magnetic lasso, which will “stick” to the edges of the object, creating a more precise selection. All three tools must be used with a snapping selection. To do this, end your selection by clicking on the starting point (you will see a small circle appear next to the cursor). In case of mistaken selection, you can press the "Backspace" button to delete the intermediate point.
- Magic Wand: This tool will select pixels that are similar in color. You can choose the margin of error for similar colors by changing the Tolerance parameter. Thus, you can select different areas, or whole objects.
- Quick Selection: Quick Selection is perhaps the simplest, most common and useful selection for selecting different parts of an image. This is a Magic Wand and Magnetic Lasso combined into one tool. Hold and drag the tool over the area you want to select.
 2 Dealing with brushes. Brushes are used to add pixels to an image. You can use them to edit photos, or create a drawing from scratch. Brushes have a huge number of settings from the brushes menu, as well as many different ready-made brushes and their shapes.
 - You can download more brushes for money, or for free, from various sources on the internet.
- Adjust the size, hardness and opacity of the brush as desired. A larger brush will paint over a larger area of the image, a harder brush will produce sharper lines, and lowering the opacity will allow you to layer different colors on top of each other, leaving more room for creativity.
 3 Dealing with blur, sharpness and finger. All these tools are located under one button, with the image of a drop. Select the one you need by clicking on the drop icon from the list. These tools only affect the pixels on which they are applied and can be used to achieve various effects.
 - Blur: A tool that smoothes and merges pixels - anything you touch will look blurry. How strong this blur will be depends on the "intensity" parameter from above.
- Sharpness: The opposite of blur, highlighting and sharpening individual pixels. Use it gradually, as the tool changes quickly enough.
- Finger: A tool that lets you smudge your chosen color in the direction of the cursor.
 4 We deal with the illuminator, dimmer and sponge. These tools, respectively, darken or lighten parts of the image, and the sponge adds or removes color saturation. To select them, click on the icon with a circle and a line. With this tool you can add brightness to highlights and darken shadows in certain areas of the image.
 - Since these tools work on separate parts of the image, it is best to copy the image to a new layer and anchor the original layer. Edit the copy so as not to accidentally damage the original image.
- Using the settings at the top of the window, you can change the type of tints that the dodge and burn tools change, just like sponges. Try to use light tones for lightening and shadows for darkening, so as not to affect the middle tones (unless you need to change the middle tones, of course).
- Also, don't forget that you can change the brush size and intensity in the settings at the top of the screen.
 5 We deal with the "stamp" tool. This tool, which looks like its name, is used to select an element of an image and copy it anywhere. Usually it is used to remove blemishes on the face, or protruding hair, etc. Just select this tool, hold down "Alt" and left-click the area you want to copy from, then select the area you want to copy to.
 - Do not forget that when copying, the cursor will move proportionally over the area you are copying from.
 6 Dealing with gradients. This tool will allow you to apply a gradient, or fill, to an image. It can be applied both on an existing layer and on a separate one. The style of the gradient can be changed in the settings above, and the colors of its components can be adjusted from the color menu ("replacement" and active colors).
 - To apply the gradient, draw a line (select the start and end points). The type of gradient will depend on how you draw this line, how long it will be. For example, the shorter the line, the smaller the transition areas between colors will be. Experiment with gradients to see how they work.
Method 4 of 7: Choosing Colors
 1 Open the color palette window. In order to change the active color, you need to double-click on the color icon at the bottom of the toolbar. A window will appear with various settings, the most obvious of which are a selection of a shade from the palette and a vertical bar with a selection of color (both of which are fairly self-explanatory).
 - If you see a pop-up warning when you select a color, then the color you selected may not be displayed correctly when printed, although it will display normally on the screen.
- If you see a small pop-up window in the same place, then the color you selected may not be displayed correctly on the web. Check the "Web Colors Only" checkbox as required.
 2 Use of color codes. If you need a specific color, just write down its code. This code can be seen at the bottom of the palette window, indicated by the hash icon. Enter this code to select the color you want.
  3 Dealing with color libraries. This is a numbering system for ink-based colors designed for printing images. Above all, this system is designed to more accurately print each color. Select the Pantone section from the Color Library menu, and select the desired number. Information and specification of the Pantone mode can be found on the net, as well as all the required documentation, as this is a fairly common standard.
 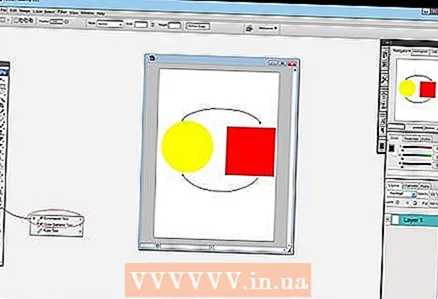 4 Using the eyedropper tool. You can select colors from your image using the eyedropper. Although this method may not be accurate, you can use approximation to more accurately select the color.
Method 5 of 7: Adding text
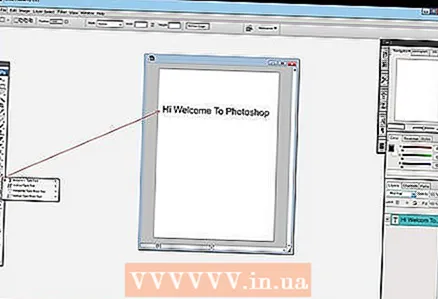 1 Using the text tool. This tool will add text on a new layer. Select it, and outline the area of your text, much the same as when you selected it. It will be easier to place each text block on a new layer, making it easier to control and adjust the line spacing.
  2 Choose a font. You can choose a font either through the text settings menu, or in the options at the top of the page.Choose a font that matches the overall style of the image and its content. The font size is also changed in the parameters at the top of the page.
 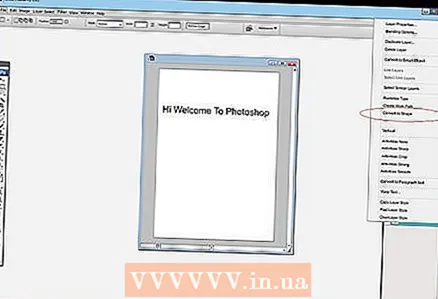 3 Converting to curves. You can convert text to curves if you need more detailed transformation of the shape and size of the text. This action converts each letter to its corresponding shape. Remember that this is an irreversible action that will not go down in history.
 - To convert, right click on the layer and choose “convert to curves”. Once converted, you can use any of the available tools for basic image editing.
Method 6 of 7: Correcting the image
 1 Using filters. Filters applied to the visible part of an image, or to a selection, can be used to achieve a wide variety of effects. After selecting a filter, a window with its settings will open. You can experiment with the filters yourself, or find tips for using filters on the internet.
 - For example, you can use the Gaussian Blur filter to significantly diffuse the pixels in the image. Add Noise, Clouds and Texture can give structure to your image. Some filters can help add volume, or distort the perspective of an image. You just need to experiment with them to understand which filter is best for a particular task.
 2 Using levels. Adjusting levels allows you to change the brightness, color balance, and contrast of an image by setting values for pure white and black. This is a more complex process and will take time and training to fine tune. You can also find many tutorials on this topic on the net. To open the Level Control, press Command / Ctrl + L.
  3 Using curves. Curves adjustment allows you to change the tints of the image. To make adjustments, choose Image - Adjustments - Curves. You will see a diagonal line squared. The horizontal scale represents the initial image, and the vertical scale represents the modified image. Click on the line to create anchor points, and move those points to change the tints of the image. With this setting, you can change the contrast of the image more accurately than from the contrast menu.
 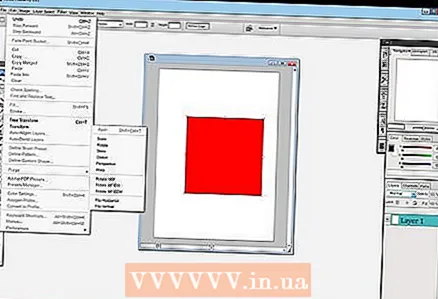 4 Using transformation tools. You can use the transformation tools to scale, rotate, skew, distort, perspective, or warp an image. Transformation can be applied to a part of an image, an entire layer, or several layers. To access these tools, choose Edit - Transform. This will bring up a submenu with various options. Choose the one that suits you best. Experiment, or watch online tutorials.
 - Remember to hold Shift if you want to keep the aspect ratio of the image while transforming.
Method 7 of 7: Saving Files
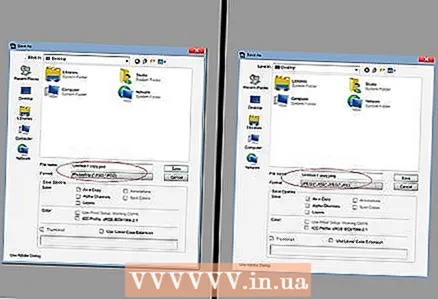 1 Select the file type. You will start saving your work not only ahead of time, but also during the creation process. Doing so will help keep your files from unexpected system shutdown. When saving, a standard file save window will appear, where you will need to select its format.
 - If you continue working on the file, then save it in PSD - Photoshop Document format, and then you will save the entire editing process. The layers of the image will remain the same.
- If you want to save the file for uploading to the Internet, or using in another program, save it as a separate copy of the image file. The most common format is JPEG, although if you choose to keep transparency, you will need GIF.
- There is also a function for saving in PDF format. This is especially useful if the image is mostly text and will be printed on standard paper.
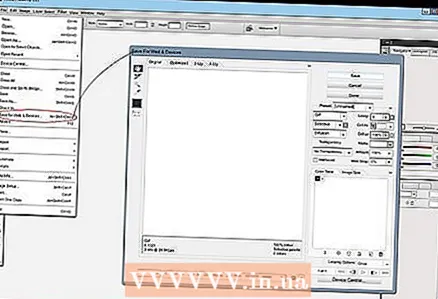 2 Save for Web. If you are going to use the image for uploading to the Internet, then this function will suit you (located below in the "File" menu). With it you can compress the image, or change the parameters of the GIF image.


