Author:
Clyde Lopez
Date Of Creation:
24 June 2021
Update Date:
1 July 2024
Content
- Steps
- Part 1 of 5: Get Started
- Part 2 of 5: Preparing the coat
- Part 3 of 5: Spindle Drop Spinning
- Part 4 of 5: Spinning the wool
- Part 5 of 5: Fixing defects in your yarn
- Tips
- Warnings
The art of spinning returns again to modern society. People are rediscovering the unique properties of wool, which are obtained by spinning the fiber. Wool is waterproof and keeps you warm even when wet. See step 1 to get started.
Steps
Part 1 of 5: Get Started
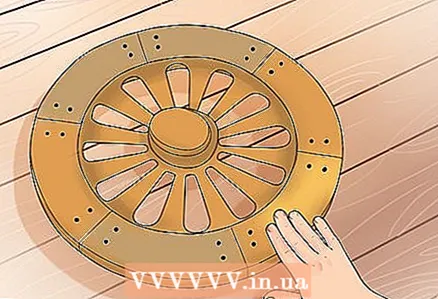
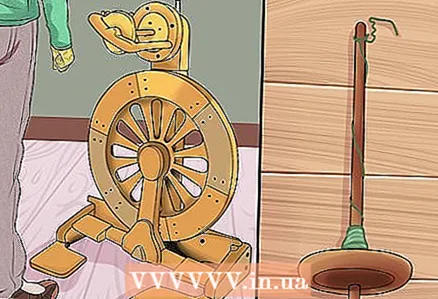 1 Select equipment. You must decide whether you prefer a spindle or a spinning wheel. Both devices have their own advantages and disadvantages. Spindle spinning is considered a good way when you are just starting out, but the spinning wheel is usually the faster way to spin.
 - Use a spindle to get started, you can easily create your own teardrop spindle. Once you have mastered the spindle, you will have mastered all the possible steps for spinning (stretching the fiber, spinning the fiber into yarn, eliminating and storing the spun yarn).
- The best type of spindle is in the form of a drop with a hook at the top. The hook must be strong enough not to be thrown to the floor when spinning.
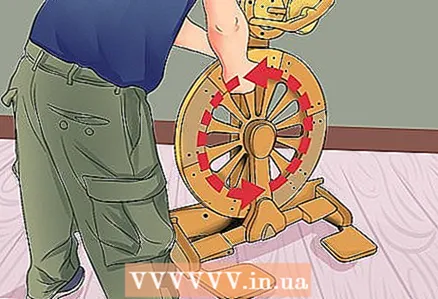
- A spinning wheel is more difficult to learn than a spindle because a spinning wheel has a speed pedal to move the wheel and has more parts than a drop spindle. However, once you learn how to operate a spinning wheel, you can spin faster than a spindle.
- The spinning wheel works by rotating the reel using the wheel. As you spin the wheel, the reel spins. Twist the fiber in your hand and wind it onto a spool. You must vary the spool speed to wind the yarn onto the spool. Different types of spinning wheels can make it easier to wrap the yarn around the bobbin in different ways.
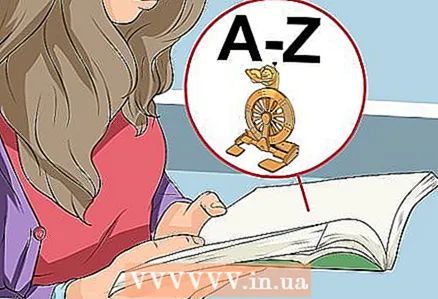 2 Learn the terminology of the spinning process. There are many words you should know when you first start spinning. You need to learn the terms for various aspects of the spinning process before you can start working.
 - A roving is a continuous rope of fibers that have already been combed and are ready to spin.
- Comb the raw wool by hand or with a carder. The carder is a mechanical device, hand-cranked or electric, that carves the fibers for spinning. The device is used for manual cleaning and usually has a large drum with 1/4-inch curved metal teeth.
- Niddy - Noddy is a double-headed tool used to twist yarn into a skein. A thread is wound into a skein from a spool.
- A skein is the length of yarn or thread that is loosely wound and knotted. When you spin, you create skeins.
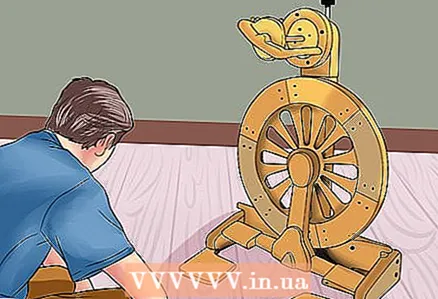 3 Understand the equipment. Spinning wheels have basically the same basic components. Some of them have more components than others, but usually the main components are the same. You must keep an eye on the parts of the spinning wheel when working with it.
 - The flying wheel is the part that rotates when you press down on the pedals, which causes the rest of the part to move. Not all wheels look the same (they might look like a typical fairy wheel), but all spinning wheels have some type of wheel.
- The wheel spins around flywheel rotation (the pulley is attached to the rotating part and drives the wheel drive.) Flywheel (A U-shaped piece of wood that has hooks; these hooks are for storing yarn on a spool.) As the wheel rotates, the yarn spins onto a spool.
- Handle tension adjusts the tension of the drive group by raising and lowering it.
- Coils this is the part that runs on the yarn storage axis. It can work with or separately from the wheel. Hole this is the part at the end of the spindle where the yarn passes and connects to the crochet hook.
- Pedal works on the wheel and is used by your feet. It determines the speed of the spinning wheel.
 4 Choose a spinning wheel. If you have decided that you want to use a spinning wheel and not a drop spindle, then you should be aware of the different types of spinning wheels. If you're just starting out, it may be best to rent or borrow a spinning wheel to decide if you need one. There are several different basic types of spinning wheels.
 - Saxony, a type of spinning wheel with a typical fabulous wheel at one end, a reel on the other, an inclined frame, and a triangular footrest. This spinning wheel is generally more expensive.
- A wheel type that has a spool over the wheel. These spinning wheels usually have a 3.4 coal foot rest and are generally more compact than other types. They are good for those with less work space. In terms of more traditional wheels, this one is the cheapest.
- Norwegian wheels are similar to Saxony. They usually have a 3.4 carbon footrest, large wheel. They tend to be in the same price range as the Saxony.
- Modern wheels can often look odd as they tend to be hybrids of other types of spinning wheels. Spinning wheels can be pre-engineered and some can even be folded! As for the price, it all depends on the wheel.
- The great thing about electric spinning wheels is that you don't have to worry about a pedal or wheel (they don't). They can be placed on the table and used by hand, and are easy to carry and store. They also tend to be cheaper than typical spinning wheels.
- The spindle does not have a coil. Instead, a sharpened lance that accumulates filament. They are also less expensive than typical spinning wheels.
 5 Learn how to choose a spinning wheel. There are certain things that you will need to consider when choosing a spinning wheel. Determine the type of yarn you will be spinning, the speed of the wheel, and how easy it is to use the pedals.
 - The speed of your wheel determines how fast the spool turns your yarn. Fine short fibers such as merino wool and angora cotton require a higher speed. For coarse fibers such as Romney or Border, slow down the speed. Better to find a spinning wheel that has a speed range.
- On idle driving wheels, the drive group goes around the wheel at the same time. The drive wheels also use one drive group, but they go around the wheel twice. The single wheel is easier to use for beginners because it has a separate braking system. Changing the speed of the reel is easier on one drive wheel. On a double drive wheel, you need to accelerate.
- Coil capacity depends on the manufacturer. The coils come in different sizes. The best way to measure a bobbin is to calculate the bobbin volume available for winding onto the yarn. Many manufacturers have a selection of different coil sizes.
Part 2 of 5: Preparing the coat
 1 Choose a fleece. Try to get a coat that has been sheared because grease makes the coat softer. There are also a few things to keep in mind when choosing a rune. These include what you will make from the yarn, what colors and breaks in the wool, breaks can make spinning more difficult!
 - Consider what you plan to do with the finished yarn. Socks? To knit? Create outerwear? Different types of wool have different levels of softness that you will need to discover when choosing a wool.
- Watch out for certain faults in the wool that will interfere with spinning.Avoid buying a rune with a break in it. If you make a sharp dash of the wool and it breaks (usually in the middle), this will cause the roving to roll. Fleece contains a substance of plant origin and is more difficult to comb and clean.
- Spread the wool and check. There are three different areas (hip, shoulder, middle, for example). You need to make sure that one area is not rougher or hairier than the other.
- The rotation of the wheel determines which type of yarn can be used. Your yarn size will depend on your wheel.
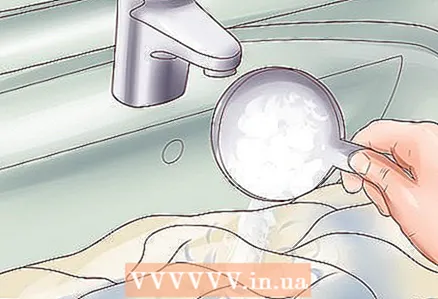
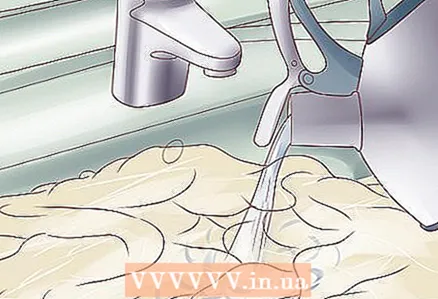
 2 Wash the fleece in hot water. You should wash the wool well before combing and spinning. This is to remove oil from the yarn, which can make it difficult for the yarn to spin. You can wash in cold water, but hot water is recommended. The water should be moderately hot in order to rinse the coat.
 - Use a large tub or pool. You can divide the wool into sections to make it easier to wash and so that the wool does not bunch up.
- Some spinners leave grease on the wool. However, leaving grease can hinder staining and destroy the carding of the fabric on the carder.
 3 Place the detergent in the vessel. You can use almost any laundry detergent that doesn't contain bleach or conditioner. Conditioner can leave a film residue on the coat.
 - Do not completely remove the oil from the wool. Removing natural oils too thoroughly can make the yarn difficult to spin (which is why some spinners spin with oils and wash later).
- You should also make sure not to use a lot of detergent, so as not to rinse 10 times. Washing too often can turn wool into felt, you must avoid this.
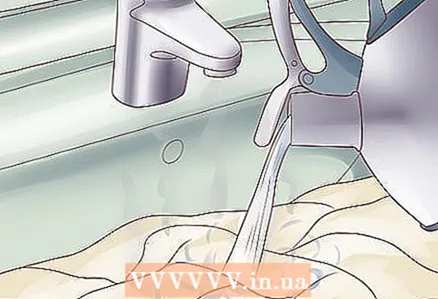
 4 Soak the fleece for 45 minutes. The wool must absorb water to get rid of dirt, oil and other impurities. Leaving the wool to absorb does not mean turning it into felt.
 - Do not allow running water to flow directly onto the coat.
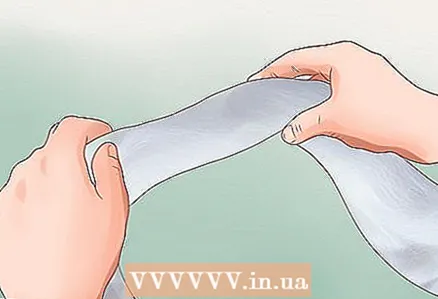
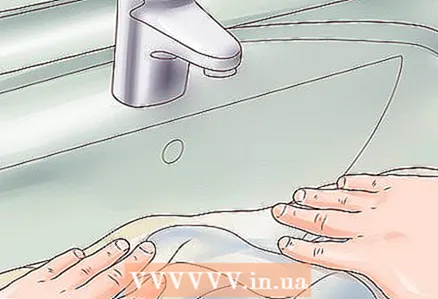 5 Squeeze the fleece gently in the water. You will need to stir the fleece gently with your hands or the wooden handle of a spoon. Remember, stirring too often will turn your fleece into felt.
 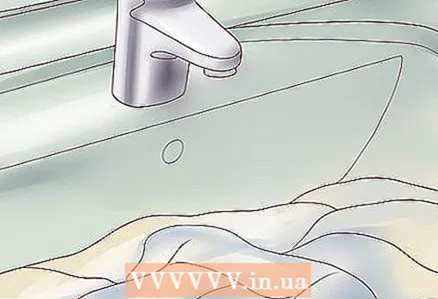 6 Rinse and repeat. Every time you wash the coat, make sure the temperature is the same as it was. The more you open the fleece in water, the fewer wash / rinses you have to go through. You may have to do more rinses depending on the degree of soiling.
 - Soak the fleece in hot water and add half a glass of vinegar for 30 minutes for the final rinse.
- Mohair, merino, rambouille and other finer wool tend to require several washes.
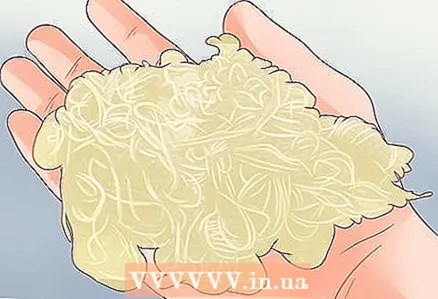
 7 Let dry. Squeeze out the wet coat lightly. Spread it out on a towel or dryer. If you can put it outside to dry, do so. The best weather for drying wool is sunny and windy.
 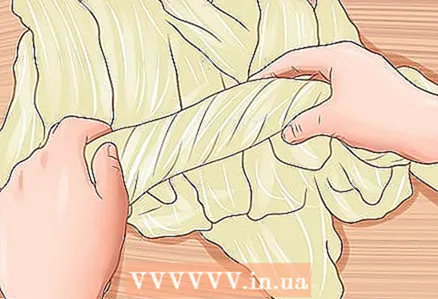 8 Carder combing can be done in several ways. Combing aligns all fibers in the same direction. You can send the wool to the mill for carding or by hand. You can use a metal dog comb, which is the most inexpensive option.
 - If you are using carder sweep, take a clean, dry piece of fleece and sweep the chunks on the carder blades in one direction. On the other paddles, you should gently slide across the fibers, aligning them in the same direction. When the fleece is fluffy and lined, set the piece aside.
- No matter what type of combing you do, the basic principle is the same. You must align the fibers to one side, you can do this with a metal dog comb or carder.
- When you're done combing the fleece on the carder. Your goal is to make the fleece presentable, fluffy, and aligned.
- Make sure the coat is completely dry.The fleece has the ability to hold water, and a wet fleece will not pass correctly on the carder.
Part 3 of 5: Spindle Drop Spinning
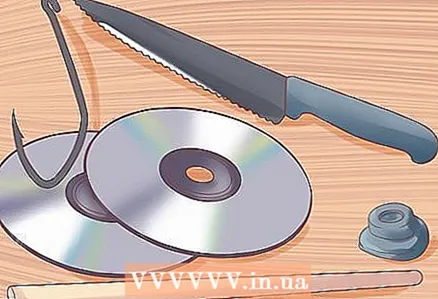 1 Collect your tools to make a drop spindle. One of the best things about the drop spindle is that it is relatively easy to make and use. If you decide to go this route, then you can make your own spindle at no extra cost. Gather the materials listed below.
 - One meter long wooden dowel. Although the size is not that important, the recommended size is 3/8 ”. The dowel will act as the main shaft for the spindle.
- A hook, or wire that can be bent into a tube. Make sure you can attach the yarn to this hook.
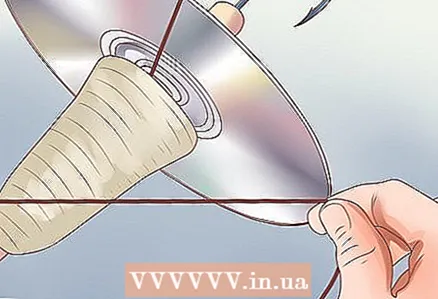
- Two heavy discs as whorls.
- Rubber grommets that match the diameter of your dowel. You can purchase them at any auto store. So if your dowel is 3/8 ", the inside of the disc hole (hole diameter) should be 3/8", the hole panel should be 5/8 "to fit the hole in the discs, the outside diameter should be about 7/8" ...
- Use a serrated knife, or a small saw and scissors to cut the dowel.
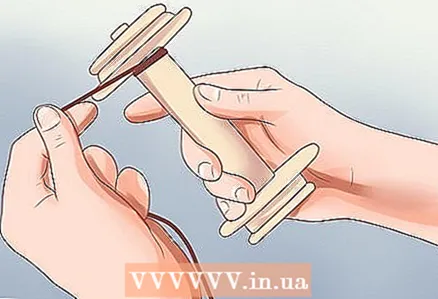
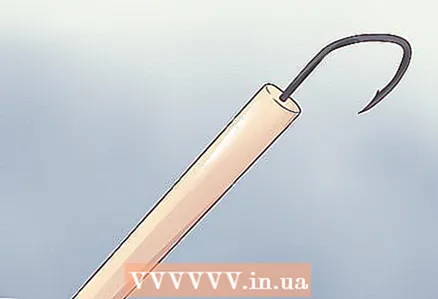 2 Insert the hook into the top of the dowel. To do this, you need to make a hole in the center of the dowel with a pushpin. Screw the hook into the hole so that it does not budge.
 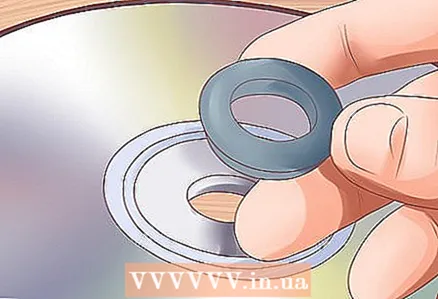 3 Insert the bushing into the hole between the two discs. The bushing should fit snugly against the center of the disc. Once you pull the edges of the hub upwards, the discs should hold well.
 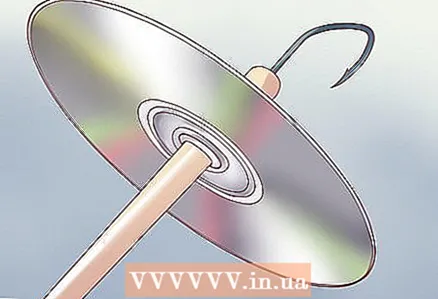 4 Insert the wall plug into the center of the bushing. Estimate the spindle size. If it does not quite fit, wrap the dowel with electrical tape and put on the discs tightly.
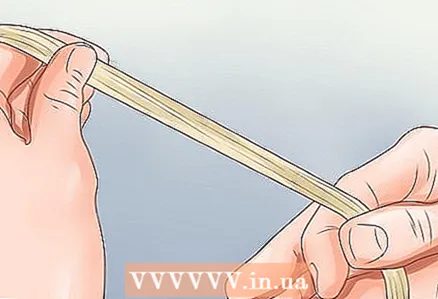
 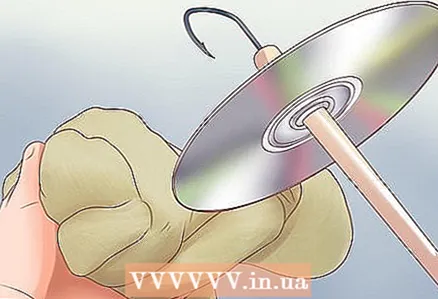 5 Prepare your roving. For a beginner spinner, one piece of roving will be too large. Tear this piece into sections that are about 12 cm long. Carefully split your roving in the middle to form two strips instead of one. This will make spinning easier for beginners.
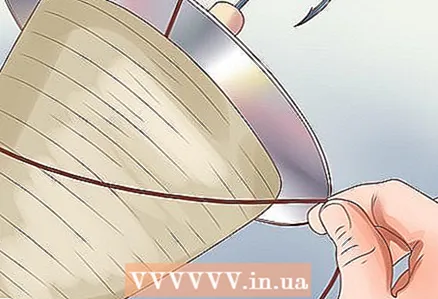
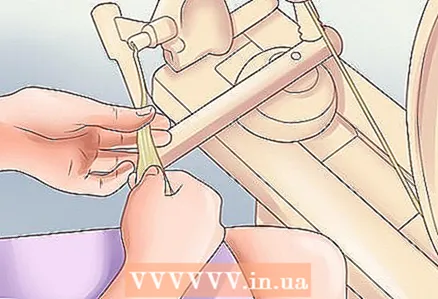
 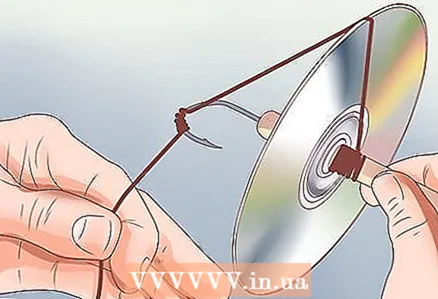 6 Work with the main piece of yarn. Tie your piece of yarn, about 18cm long, onto the spindle shaft just above the discs. Lay the yarn over the turns and wrap around the shaft. Place the yarn over the discs again and secure the end of the hook.
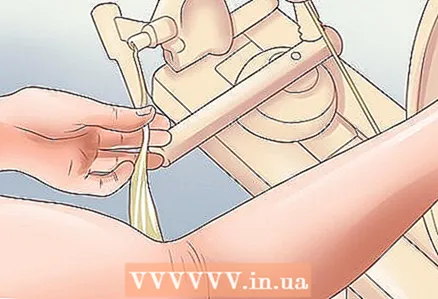
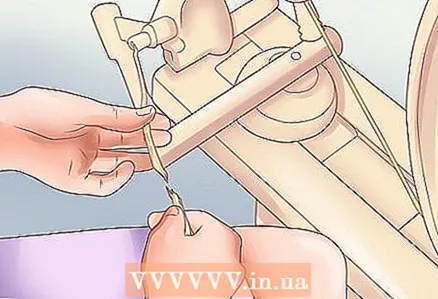
 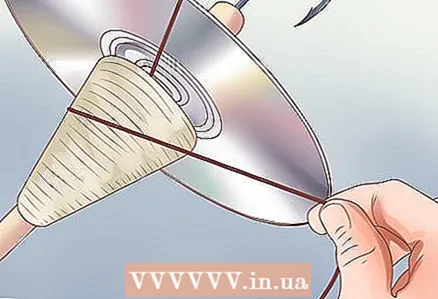 7 Rotate the fiber. Take the spindle in your right hand and the yarn in your left hand. Twist the spindle clockwise from the dowel (or shaft).
 - Repeat this process in the same direction making the spindle turns.
- Practice turning the spindle in the right direction to make the yarn.
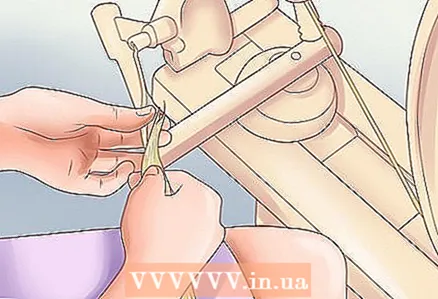
 8 Develop a new fiber. Keep repeating the process and make sure you make a sufficient turn before moving on. If the thread has been spinning long enough so that the shaft is almost touching the ground, unhook it and wrap it around the base of the spindle near the turn.
 - This is called idling. You must not allow the yarn to unwind.
- If you find that the thread is stretching or too loose, twist your spindle again to keep a lot of twist.
 9 Attach more fiber. Cover the wool with a few inches of developed fiber fluff so you can twist more into the yarn. Add more wool to the spindle, watch out for the connection of the yarn.
 - To test the connection, make another turn with the spindle and bring your right hand to where the left hand is holding the yarn. Move your left hand back about three inches, substitute more wool fibers and allow the spindle to turn several times.
- Release the yarn with your right hand and allow the fiber to move and twist upward as you did earlier. Now, gently pull away from the fiber mass, backwards from the left side, and allow the fibers to move on.
Part 4 of 5: Spinning the wool
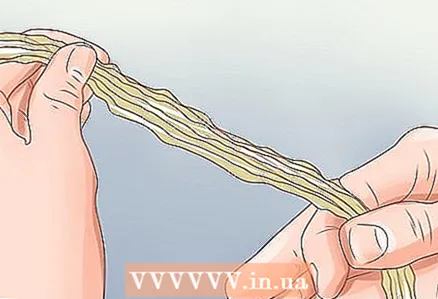
 1 When you pull fibers from a material, you shape the size of the yarn you want to spin. If you develop more fibers, your yarn will be thicker; less fibers - will be thinner.
 - If the fiber is in the form of a long, continuous, narrow strip, this form of fiber processing is called roving. If wide, folded bundles unfold into a wide rectangle, this form of fiber processing is called baht.
- Choose a strip about 12 inches long and about the thickness of your finger (doesn't have to be exact).
- Hold the fiber strip in one hand (it doesn't matter which one). Pull a few fibers from one end of your strip with your other hand. Prepare fiber of the desired thickness for your yarn.
- The fibers will spin during the spinning process. As you develop and spin, you will be able to judge the size of your wool.
 2 Tune the wool to the spinning wheel. The starter thread should be attached to the shaft of your spool. Cut a piece of thread about 36 inches and tie it to the shaft of your spool. Make sure you tie it tightly.
 - Pull the thread through the hole in your spinning wheel. Once you've done that, you're ready to start the actual spinning!
- If you are just starting to spin, practice spinning with only the starting thread so that you get a better feel for how the spinning wheel works, how the wheel spins with the pedal.
 3 Place the fibers next to the starter thread. You should overlap them by about 4-6 inches. Hold the fiber bundle in one hand, the starter thread in the other hand.
  4 Start pressing the pedals. You need to make sure the wheel is moving clockwise. This will create a "Z" twist on your one strand. Allow the starter thread and filament to spin together, hold them for a moment while they spin to keep them safe.
 - Make sure the wheel is spinning the fibers, this will develop more fiber.
 5 Start spinning. Hold the fibers with your non-dominant hand and turn the wheel clockwise. This will rotate the fiber, making yarn.
 - Make sure your working hand is between the fibers and the hole in your spinning wheel. You don't have to keep your hands close to the hole while you rotate.
- Make sure to turn the wheel clockwise.
 6 Apply more wool to the starter thread. Move more fibers with your hand to work out. The best thing is, when you are just starting out, stop spinning, develop the fibers and then spin again, then stop and develop again. As you become more experienced, this process will turn into one continuous movement.
 - Be careful not to stray the fibers in different directions when turning.
- Your non-dominant hand should be closer to the wheel, and your dominant hand should be closer to you.
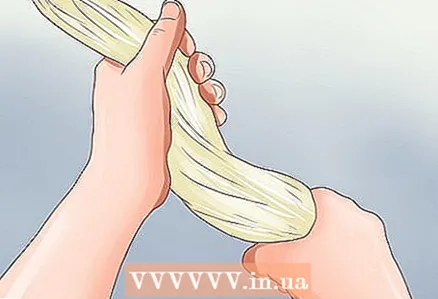
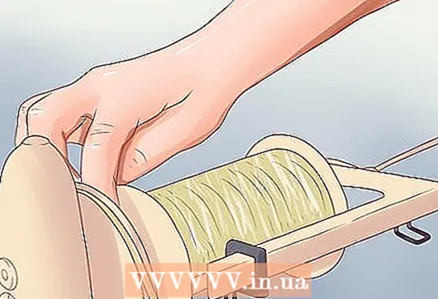 7 Relax your yarn and make a skein. Do this when the spindle is full. Wrap acrylic threads around your arm and elbow, just like laces and a tie, at intervals.
 - You can use "niddy-Noddy". Wrap the yarn from the spool onto the niddy. This will create a large loop in a small space, which you then knit by sliding the niddy.
 8 Make twists. Do this by soaking the skein in hot water and letting it dry. You can use a plastic hanger, or hang it on a dryer.
Part 5 of 5: Fixing defects in your yarn
 1 Avoid tangled yarn. Sometimes your yarn gets tangled in a spool. This basically means that you are not pedaling correctly (which happens often the first time!). Pull out the yarn, plug it back in, and start over.
 - This can also happen because the spool is too full, allowing the yarn to wrap around the edges of the spool and curl around it. Clean the coil as usual and start over.
 2 Find your lost end. Sometimes when you spin, you lose the end. Do not worry! Sweep the coil around several times. Often the end is on the hook.
 - Try using a piece of duct tape to mark your loose end so you don't lose it. This method saves about half of your time.
- If not, pick the most likely end and draw out enough yarn for a new starting thread so you can start over.
 3 Do something with your lumpy stream. If the yarn is lumpy and bumpy, it means you haven't been twisting it all the time. You might be pulling out too much fiber. If so, then you must work at a consistent spinning rhythm.
 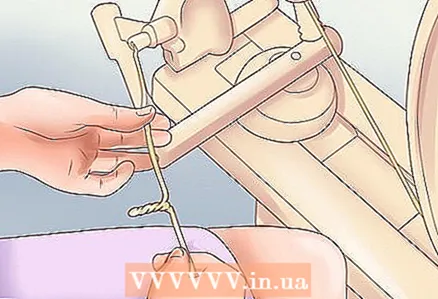 4 Take off your hand-spinning by yourself. Some problems can occur with the spinning wheel, so fix the yarn with your hands. There are other ways to fix the yarn.
 - Rotate the spindle away from you. If the spindle is spinning away from you, a mass of fibers is collected, stop the spindle and unwind the masses of fibers. Then start development again. This is a very common occurrence for beginners.
- If you have thick and thin spots in your yarn (known as clumps), you can leave them for a specific knit (for example, for knitting scarves). If not, you can remove the clumps by pinching the yarn with your hands on either side of the clump and spinning until the fibers have slightly parted.
- Twisted yarn is a common problem for a beginner. Your yarn may be too curled. To fix this, you can bend the strand back towards you. To do this, loosen the twist by working out the fibers.
Tips
- Practice with a spinning wheel before starting your first project. Learn to adjust the tension correctly.
- Talk to other hand spinners about the advantages and disadvantages of different types of wheels. Some shops allow you to rent a spinning wheel for a short period of time to try it out.
Warnings
- Knowing how to work a spinning wheel, even a hand spindle, is not something you can learn to do in one day. Practice is required.


