Author:
Eugene Taylor
Date Of Creation:
10 August 2021
Update Date:
1 July 2024
Content
- To step
- Part 1 of 3: Start sketching
- Part 2 of 3: Drawing subjects from simple shapes
- Part 3 of 3: Studying drawing
- Tips
- Warnings
Drawing is an enjoyable artistic skill to learn and can be a great hobby. When you start with this, the quality of your drawings can be a major hurdle for you. You may think you need professional lessons to be able to make something good, but this is not true. Just drawing for fun can save you money and improve your skills. Sketch with short lines, hatch your shadows, draw from simple shapes and practice as much as possible, and you don't have to take any class.
To step
Part 1 of 3: Start sketching
 Choose a topic you see. If possible, choose something that makes sense to you, such as your dog or your favorite flower. It is probably easier for you to draw from life in principle than from your imagination, so you will be able to work more focused if you draw something you like.
 - When you start out, you don't need any special art supplies. Pen, pencil and paper are sufficient.
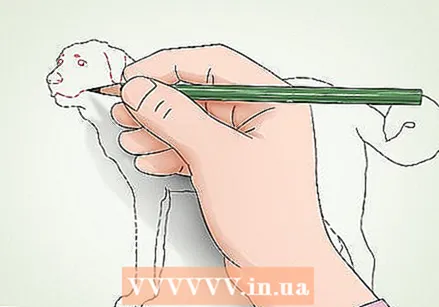
 Draw with short lines. Lightly press your pencil against the paper. Concentrate on the line you are going to draw and forget what the subject is. Don't think about your dog. Instead, you start with an outline. Your dog's edge is a line between the dog and the environment. Draw with short lines.
 - The shorter your lines, the more regular the drawing will appear.
- Don't be critical of your work right away. Act quickly and hone your skills.
 Fill in the details. Once you've made a simple sketch of your subject, start filling out the drawing. Look for any notable features on the subject, distinctive markings such as a dent in a cup or a tuft of hair on your dog, that will give you an idea of where to place surrounding lines.
  Shade the shadows. Hatching is a bit more difficult, but gives your drawings a sense of light and depth. Pay attention to the direction from which the light falls on your subject. Start with a clean, sharp pencil and draw even lines where you want to add partially dark areas. If the pencil point becomes less sharp, continue with the (half) shadow. Press harder to draw darker lines.
 - You can practice this by making a hatch bar. Start at one end of the paper. Move your pencil back and forth as you move across the paper. Apply more pressure to transition to darker markings.
- Value bars are also good exercises. Divide a bar into five pieces. Leave one end white. Darken the other end as much as you can. Draw lines on top of each other in the remaining squares to make different shades of gray.
Part 2 of 3: Drawing subjects from simple shapes
 Practice drawing shapes. Retracing is useful but limits you. If you can master shapes, you can start drawing from the imagination and improve your sense of perspective in all your drawings. Start drawing three-dimensional shapes. For example, by drawing a curve in a circle, you create spheres from different perspectives, depending on where you draw the line.
  Combine the blocks into figures. Place blocks behind each other to form the outlines of objects. Start with simple or imaginary objects. You can make a table from a series of rectangles and cylinders, or make a snake from a number of circles. Once you recognize the underlying basic shape (s) of an object, you will be able to draw them without using an example.
 - Spend time observing subjects to identify the underlying basic shapes.
 Create a reference page. Arrange your basic shapes to create the shape of the subject. In the process you erase and refine the lines, so that the subject takes shape. After you are done, draw the subject from different angles. For example, a square nose with a circle for the cheek and a triangle for the ears can form a side view of a horse, but there are many other perspectives.
 - Refer to these sketches later to improve your other drawings.
 Draw the subject again. During another session (after correcting any mistakes in your reference sheet), draw the subject again. Initially you can use your reference sheet. Use basic shapes to create a simple outline of the subject, then start refining the details and correcting mistakes. With a little more practice you will be able to make poses by heart.
 - Simplifications are okay and can create your own style. For example, it would be too time consuming to learn every muscle in the body.
Part 3 of 3: Studying drawing
 Research drawing techniques. The public library may have books on different drawing styles, from realism to Japanese manga. You can also buy this in the store. Search YouTube or art websites, such as How to Draw It or Drawspace, for ideas and demonstrations.
 - Anatomy books are also an option to learn how to draw realistically. Sketch skeletons and muscle diagrams.
 Practice with other tools. Usually it is better to stick to one medium, such as pencil on paper, until you are comfortable with it. However, as soon as you start, you may find that there are alternatives that you find more comfortable and that lead to your own style, such as crayons or charcoal. In addition, there are various types of pencils available that can help you broaden your possibilities during hatching.
 - For pencils, HB (# 2) is standard. Pencils in the H series are harder and create lighter lines. Pencils in the B series are softer and create dark lines.
- Pencils go from HB-HB9. With H pencils, 9 is the maximum hardness. With B pencils, 9 is the maximum softness.
- Vinyl and gum erasers are softer on paper than rubber erasers, and they don't smudge the color. Kneading eraser is moldable for removing small details.
 Imagine how you would draw something. When you are not drawing, observe what is around you. Imagine how you would turn this scene into a pencil drawing. Imagine shading around someone's eyes and outlining the iris and pupil, for example. This visualization gives you insight into how to make lines and form your own style.
 - The goal is to see the details instead of the labels. Instead of thinking about the eye, think about the lines and colors that are going to fill in to form the eye.
 Practice. Drawing is a skill in many ways, just like playing an instrument or riding a bicycle. When you have free time, start sketching. Practice shading and other techniques. Create your own reference sheets. Divide your time between drawing sessions with topics so you can learn more without burning yourself out.
Tips
- Make it a habit to draw daily. When you make it a habit, it will take less effort for you to exercise, and you will get better faster.
- Don't get frustrated with perceived mistakes. Perception stops many aspiring artists. Don't forget that even experienced artists are still learning.
- Hand coordination takes time to master. Keep practicing the small lines and basic shapes, and you will gradually improve.
- You don't have to buy expensive materials. Drawing pads and regular pencils are enough to learn it.
- It also takes time to teach yourself to see details instead of objects, but this will eventually improve your drawing skills.
- The great benefit of drawing, for a beginner, is that it requires less materials than you think. So use a pencil and sketchbook (or notebook), which you already have.
Warnings
- Others (or yourself) may try to discourage you. Never listen to someone who says you are not talented. Drawing is a learning process and if you enjoy it, you will make progress.


