Author:
Eugene Taylor
Date Of Creation:
10 August 2021
Update Date:
1 July 2024

Content
Spray paint templates come in many different types, from simple hearts or circles to intricate cityscapes and realistic portraits. Homeowners can create templates to give new life to an old piece of furniture with spray paint or create a trim in a room. Artists are typically more interested in creating intricate templates to fully represent their thoughts or ideas.
To step
Part 1 of 3: Designing a template
 Think about your overall design ideas. Think about what you will use the template for - for example, a small decoration on a box or a pattern for your walls. How will the way you will use the template affect the image you can use? Here are some specific points to consider:
 - Determine the size of the template. If you are going to make a large template, you can add small details. If you are going to make a small template, you should go for a simpler design.
- Consider how many colors of paint you want to use to create an image with the template. You can use multiple templates, and with each template you use a different color of paint. These factors determine how many materials you will need and how many templates you will need to make.
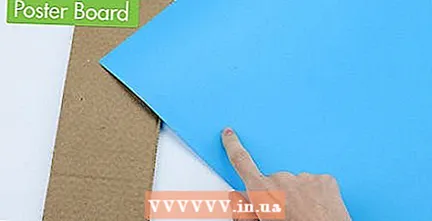 Choose which material you want to use for the template itself. There are several materials that are suitable for use as a template, but you also need to consider how often you will use the template (once or more?) And how easy it is to work with the material.
 - Cardboard and foam board are suitable for large, simple templates to be used on flat surfaces.
- Paper is suitable for a single use stencil on a flat or curved surface.
- Drawing board is stronger than paper and can be used on flat or slightly curved surfaces.
- Plastic or clear acetate is suitable if you are making reusable templates for flat or curved surfaces.
- Masking film, a transparent film with a slightly adhesive back, is suitable for flat and curved surfaces.
Part 2 of 3: Making the template
 Draw the final image with clean lines and clear contrast. The image should be clear so that you can easily cut it out of the material.
 - If you are drawing an image yourself, clearly draw the contours of the parts that you will be cutting out of the material for the template. Remember to indicate the outer border and details of the image, otherwise the template will not reflect your original drawing.
- If you are using a photo or an image from the internet, you will need to use software that allows you to adjust the contrast and brightness of your image so that you have clearly distinguishable dark and light areas. It is probably easiest to make the image completely black and white.
- Make sure your current design is suitable to use as a template. If you are trying to create an intricate image with patterns or shadows, avoid cutting entire sections of the template through the design. Adjust the image so that the template remains one whole.
- Photos also work best if you remove the background first. This is probably the part that takes the most time.
 Print the final image on a plain sheet of printer paper (if necessary). After you have printed the image, it is a good idea to trace any areas where the contrast is not very clear. You must have a clear image that you can cut out for the template.
  Remove the template and view your work. It's common for some paint to get under the edge of the stencil (no matter how hard you try to avoid this), so it's best to see how the image looks. You will probably need to touch up the image and apply paint to areas that are not well covered.
 - It may be a good idea to try out the template on a test surface before actually using it. This will give you an idea of what the image will look like, and you can also see if paint has gotten under the edges of the stencil. That way you can better stick it to the surface to be painted when you start working on it.
Tips
- Make sure to use the utility knife on a safe surface, such as a cutting board.
- If you are creating a template from a photo or image, it is useful to adjust the image to create a suitable template. Sometimes you have to draw outside edges or cut out some dark areas to create a template that properly reflects the original image.
Necessities
- Drawing or picture for template
- Photo editing software
- Printer
- Printing paper
- Cardboard or foam board
- Drawing board
- Plastic or transparent acetate
- Masking film
- Masking tape (painter's tape)
- Tracing paper
- Creasing knife
- Glue spray
- Spray paint (if you are using a stencil)
- A different kind of paint (if you don't have or can't find spray paint)


