
Content
Mountain biking can be a very exciting and rewarding sport, but without a suitable route, mountain biking can be far from inspiring.
Steps
 1 Get permission. Nothing spoils a mountain biker's reputation more than illegal routes. It is imperative to resolve this issue before starting the routing.
  2 If illegal routes are found, the forestry (commission) prohibits their further use.
 3 Follow the order of construction procedures. A good resource on this topic is IMBA. (http://www.imba.com/resources/trail_building/sustainable_trails.html)
  4 Find a large construction site. A good option is the forest, but you definitely need a trail. Forests are suitable for laying routes primarily because there are already prepared obstacles.
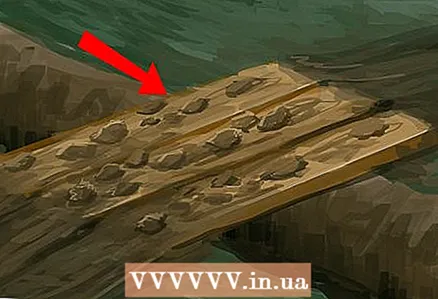
  5 When you find a good place to build, try building some jumps from wood or dirt. Provide a fairly large height, but not crazy, about 30-90 cm from the ground. Before you skate, make sure you have enough braking space after the jump - you don't want to drive straight into a tree, hill, or mud.
 - 6 After you've made your jumping board, you can add a few more fun things.
- Dig a space in the ground about one and a half meters deep.

- Find some logs or other large pieces of wood.

- Saw them down to 45 cm long.

- Place the logs in the ditch you dug and cover them with some sand so that they don't tip over.

- Make the intervals between them so that they spring as much as possible. But don't go too far or your tires will end up boxy.
- Dig a space in the ground about one and a half meters deep.
Method 1 of 1: Avoid 10 Common Building Mistakes
Since people have started to follow different routes, the same mistakes have been made on them. However, our missteps - whether they lead us into the stomachs of saber-toothed beasts or force us to wander around in search of a way out on the trail - usually only affect ourselves. When mistakes are made by track builders, those mistakes affect everyone. Riders, landlords, vegetation and wildlife all feel the blow of a well-meaning but inexperienced builder. Traveling often sees the same mistakes over and over. But the good news is, they can be avoided. To bury them next to dinosaurs in an evolutionary graveyard, we present you with the Top 10:
 1 Refusal of the land manager. We know, we know: you just want to build a track. But consider that nothing is more important before starting construction than the approval of the landowner. In our experience, failure to obtain clearance is one of the main reasons for piste closures.When it comes to building a highway, asking for forgiveness is not the best option, it is much wiser to ask permission at the very beginning.
  2 The collapse of the descent line. Simply put, breaking a track line is an erosion nightmare. They increase natural and artificial erosion by exposing stones and roots, and this leads to their release and rolling. To build a trail, use the rule of half: the trail should not be more than half a degree of incline or steepness; and the 10% rule: the total slope of the trail must be 10 percent or less.
  3 Inaccurate estimate of the degree of inclination. No one, regardless of their experience, can estimate the slope of the track "by eye". It's fun to try it, of course, but use an inclinometer to confirm the quality every time you plot the track. If you don't have an inclinometer, it is recommended that you invest in this must-have and essential tool.
  4 Abrupt transitions between sections of the route. Even on racetracks, where sometimes sharp transitions are deliberately worked out in order to knock the rider off the rhythm - this approach is considered "not comme il faut". All track builders should observe "smooth transitions". Poor processing of transitions from one stage to another, especially too sharp turns, changing the distance at which speed develops, is the main cause of user injury. Thinking about the transitions as you build is the key to enjoying the route.
  5 An unworked slope is a failed track.The only time you can afford to skimp on slopes on a track is in two cases: (1) When the slope of the side of the slope is 80 percent or more, the slope is more than 180 cm in height. (2) When your track design forces you to build it close to a large tree. In both cases, a proper wall must be built to support your partially stepped alignment, and as with all alignments, the slope should be 5-7 percent of the road.
  6 Climbing West Virginia. Our friends in West Virginia have affectionately given this name to some of the steep descent lines. If you want your ascent to be bearable, build them on an embankment no steeper than 10%.
  7 Construction of a straw house. Remember the little pigs who built their house out of straw. The wolf ate some piglets. The use of inferior materials in construction makes you and other riders similarly vulnerable, as a result of reduced safety and durability of the route. This is a direct route to pain, guilt, and even lawyers. Build the route correctly! Keep the wolves at bay!
  8 Completion of construction ahead of time. We wholeheartedly support the quality of the track after completion, but some new track builders are in a hurry to start new ones as soon as possible: bigger, cooler, better - and do not pay enough attention and care to them. Resist the temptation to build more. Don't finish building early and always correct past mistakes.
 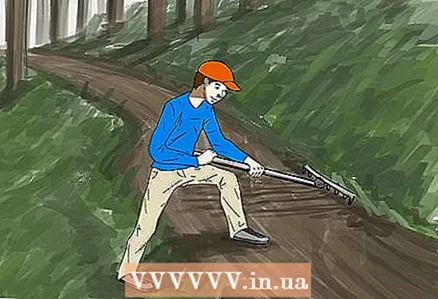 9 Laying too dangerous a route. This is the so-called obsession of some builders to use as many logs as possible. A properly constructed track should not need them. In fact, the lining of round log routes can impede stream flow and increase erosion.
  10 Ignoring old mistakes. As cyclists, we may think our scars are cool, but the scars on the ground left by the closed tracks are causing damage that needs to be healed. Always regenerate the soil. In eroded areas, construct erosion control dams from natural obstructions, such as round logs or stones, that can divert the flow of water and soil. Close old routes by replanting native vegetation. Rejoice in the splendor of the great routes built, but don't leave ugly construction scars.
Tips
- Dense the track with your jumps and make the shoulder really hard, otherwise your wheels will slip to the side
- Try to get creative. Don't be afraid to try different things.
- Another trick: find long, thin logs of 30 cm in a circle. You should prop them up with pieces of wood at each end, trying to get a small ramp, then try to ride it. This will be difficult and will take some practice.
- Don't jump too high or you need a lot of speed to jump up the tree.
- For a good slope, try to find logs about 60 cm wide. Place them horizontally across the path and secure with sand on both sides. Make sure the sand packaging is really tight so that the logs don't roll as you jump on them.
- Never do a vertical ramp for small jumps (no more than 4 meters high). It is eaten away by dirt right at the jump point, and this will badly affect the rear wheel.
Warnings
- Always wear a helmet. If you make big jumps or throw things in the air, you may fall and be injured.
- If you are making a trail for other people, then use warning signs to alert riders to impending hazards, such as ramps, falls, bomb pits.
- Do not violate safety precautions when training difficult jumping elements.
What do you need
- Nice mountain bike
- Bicycle helmet
- Pieces of wood (logs)
- Large travel area
- Protective mechanism (helmet, gloves, elbow / knee pads if you need them)
- Friends to ride (much more fun with the company)
- Shovel
- Gloves
- Crushed stone

 quickly")

