Author:
Alice Brown
Date Of Creation:
23 May 2021
Update Date:
1 July 2024

Content
- Method 2 of 3: How to Put the Strap on Your Acoustic Guitar
- Method 3 of 3: Using Streplocks
- Tips
- Warnings
- What do you need
- Material - Many of the most affordable belts are made from the aforementioned harness-style material, but with a little extra cash, you can buy a durable leather belt.
- Size is usually not the main issue because the vast majority of guitar straps are adjustable, but you still need to make sure the strap is at least long enough to allow yourself to play comfortably while standing.
- Padding - Some guitar straps have padding that fits over the shoulder for a more comfortable playing experience. It is usually made of polystyrene foam, but sometimes leather or other materials.
- Color - Guitar straps come in a wide variety of colors and designs. Choose the one that best suits the "sound of your guitar".
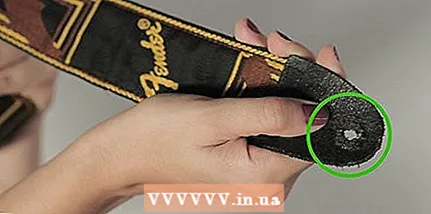 2 Locate the holes at both ends of the strap. Guitar straps usually have leather or faux leather ends in the shape of rounded triangles. There should be a small hole at each end with a slit running away from it. These holes will support the weight of the guitar as you play.
  3 Attach the strap to the head at the base of the guitar body. Almost all electric guitars have two small heads that fit into the holes on the strap. The first one is at the base of the guitar body - in other words, if you place the guitar upright, it will be at the very bottom of it. The head usually protrudes from the body by 1.25 cm depending on the type of guitar you have. Slide the knob into the strap hole farther from the adjuster on the strap.
 - For comfort while playing, be sure to thread the knob through the strap hole with the edges of the adjuster facing outward. Otherwise, it may bump into the shoulder.
4 Thread the second head through the other hole on the strap. Check where the neck of the guitar connects to the body. Almost all electric guitars will have a second head somewhere in this place. Insert the knob into the hole closest to the regulator. The other end of the strap should be on the other head. 5 Slip the strap over your shoulder. Congratulations, your guitar is now girded. Now it's time to check the belt. If you are right-handed, place the strap over your left shoulder so that the guitar hangs in front of you so you can strum with your right hand and help with your left. If you are left-handed, do the opposite - throw the belt over your right shoulder. 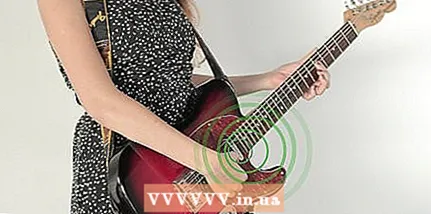 6 Check your belt in action. Play a few simple chords or songs to make sure your belt fits comfortably and doesn't restrict your movement. Try to play in different positions - standing, sitting, lying down, and even on your knees. 7 Adjust the strap length as needed. When you play guitar with a strap, you want your playing to be as easy as without it. This means that your strap should allow the guitar to hang high enough that you can strum like you normally would. Use the strap adjuster to adjust the strap length as needed for comfortable play.
 Method 2 of 3: How to Put the Strap on Your Acoustic Guitar
 1 Use a short rope. Unlike electric guitars, most acoustic guitars only have one strap head. Therefore, you will have to use a string or something to tie one end of the strap to the head of the guitar. It doesn't matter what the rope is made of, as long as it is thin enough to fit the strings behind the head.
 - If you don't have a suitable rope, try using an old lace. Shoelaces are usually of the right length and thickness, and are surprisingly durable.
- 2 Attach one end of the strap to the head at the base of the guitar. The first part of attaching a strap to an acoustic guitar is no different from the process described above for an electric guitar. Slide the head, located at the base of the acoustic guitar, into the hole in the strap farther from the regulator.
- As above, be sure to thread the knob through the strap hole so that the edges of the adjuster are facing outward and not dig into your shoulder while playing.
- 3 Slide the string through the hole on the other end of the strap. Since an acoustic guitar only has one head, the other end must be tied to the head of the guitar. First, insert the rope through the free hole closest to the regulator.
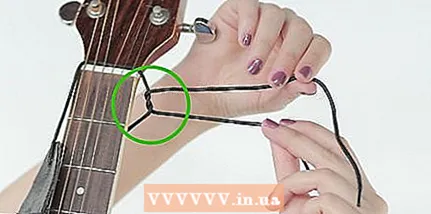
- 4 Pass the string under the strings and around your head. Take one end of your rope and thread it under the strings just behind your head (the piece of wood or plastic at the far end of the neck that separates the strings). Wrap the end of the string around the bottom of your guitar's head. The rope should fit perfectly under the guitar's head.
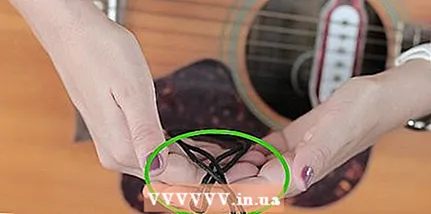
 5 Tie a tight knot. Then tie the ends of your rope together. If the rope is very long, you can fold it in half to reduce the distance between the belt and your head. Use a strong knot (or knots). You don't want the rope to come loose while you play.
 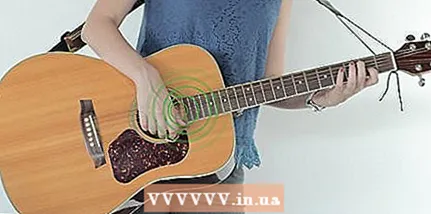 6 Check your belt and adjust if necessary. Congratulations, your acoustic guitar is now ready to play in a new way! Test the strap by trying different positions (see above). Use the adjuster to adjust the strap length as needed. Listen to the sound of the guitar - the rope tied around the head of the guitar should not muffle or otherwise interfere with its normal sound.
 - If the length of the rope is not suitable for comfortable play, you can untie it and adjust it to the desired length.
 7 Attach the second head at your own risk. Some guitarists prefer to mount a second head on an acoustic guitar over a rope. Typically, the head is mounted where the neck meets the body (to mimic the position of the heads on an electric guitar). This method should only be used if you have experience in modifying guitars. Improper installation can permanently ruin your guitar by splitting it in half.
Method 3 of 3: Using Streplocks
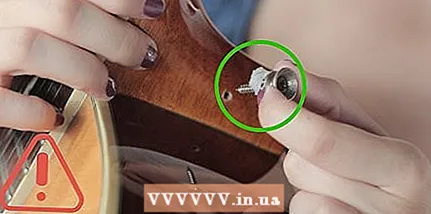
 1 Purchase a belt clip from your local music store. One of the most commonly used strap accessories that can potentially save you a lot of headaches (not to mention the amount of money you save) is the harness. The bindings are usually in the form of simple plastic or metal caps that are attached to the guitar heads after you thread them through the holes in the strap. This handy tool will keep your guitar from slipping out of the strap while playing, which in turn prevents the risk of possible permanent damage and potentially saves you hundreds of dollars in repair costs. Mounts are available in a wide variety of styles and can be purchased from most local record stores for a fairly low price - often as low as a few dollars!
 - 2 Install regular plastic mounts. Conventional, inexpensive plastic belt clips are often in the form of small discs with holes in the middle and a set of ridges on the rotating top. You can install them by pushing the guitar head through the center hole and setting the mount securely with combs. Once the bindings are installed on each head, the strap should stay in place no matter how much you twist and tighten it while playing.
 3 Use a set of metal mounts for added security. A dedicated set of interlocking metal fasteners is a premium option among fasteners. This type of strap attachment is slightly more expensive than conventional plastic straps and requires modification of both the guitar and the strap, but offers you complete protection in return. To use this type of lock, you need to replace the guitar heads that are specifically designed for the mount. You will also need to secure the locking mechanism inside the holes of your guitar strap. When everything is in place, the fasteners should make a click when placing them on the heads. Once the fasteners have been installed, the strap cannot be removed unless intentionally removing each fastener.
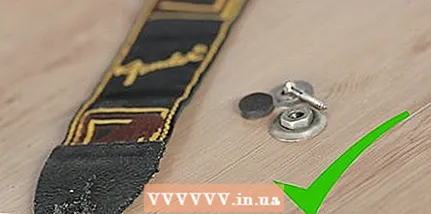
 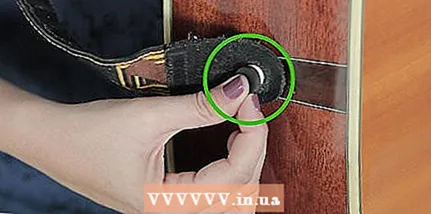 4 Create a makeshift set of belt anchorages using rubber pads. While mounts are generally quite cheap, free alternatives do exist. For example, place a tight rubber pad over each head after placing the guitar strap on top of them. The rubber pad will hold the strap in place as you play, making it difficult (but possible) for the strap to fall off the guitar.
 - You can find rubber gaskets at your local hardware store. Size 5/16 gaskets are suitable for you. Alternatively, you can use an old-fashioned beer or soda bottle gasket.
Tips
- It is convenient to play not only when you are standing, but also when you are sitting.If you're playing in a seated position, make sure the strap is taut so that the bar sticks out slightly.
- Belt mounts are available in a huge number of different styles and brands. These attachments protect your belt from unexpected slipping, which can cause significant damage to your musical instrument.
Warnings
- Do not overload the strap on your guitar. So, you can damage the guitar and also break the strap.
What do you need
- Guitar
- Strap for guitar
- Rope (for acoustic guitar)
- Mount (optional)


