Author:
Judy Howell
Date Of Creation:
2 July 2021
Update Date:
1 July 2024

Content
- To step
- Method 1 of 3: Make a paper clip magnet
- Method 2 of 3: Making an electromagnet
- Method 3 of 3: Make a compass magnet
- Tips
- Warnings
You can make magnets by exposing ferrous metals such as iron and nickel to magnetic fields. When these metals are heated to a certain temperature, they are permanently magnetized. It is also possible to temporarily magnetize the metals using various methods that are safe to try at home. Learn how to make a paper clip magnet, an electromagnet, and a magnet that you can use as a compass.
To step
Method 1 of 3: Make a paper clip magnet
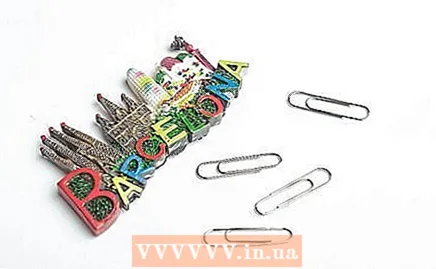 Gather your supplies. You can make a simple temporary magnet from a small piece of metal, such as a paper clip, and a fridge magnet. Grab these supplies, as well as a smaller metal object such as an earring clasp or a small nail, to test the magnetic properties of the magnetized paper clip.
 - Experiment with paper clips in different sizes, as well as paper clips with and without plastic coating.
- Grab some smaller items of different sizes and made of different types of metal to see which items will stick to the paperclips.
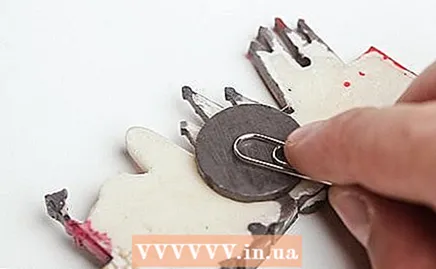 Rub the magnet over the paper clip. Keep moving the magnet in the same direction instead of rubbing it back and forth. Use the same quick motion as when lighting a match. Rub the paper clip 50 times as quickly as possible.
  Touch the smaller metal object with the paper clip. Will the smaller metal object stick to the paperclip? If so, you have succeeded in magnetizing the paperclip.
 - If the metal object does not stick to the paperclip, rub the paperclip another 50 times with the magnet.
- Try to pick up other paper clips and larger objects to check the strength of the magnet.
- Think about writing down how long the paperclip will stay magnetized after you rub it a certain number of times. Experiment with different types of metals such as pins and nails to see which metal you can make the strongest magnet that lasts the longest.
Method 2 of 3: Making an electromagnet
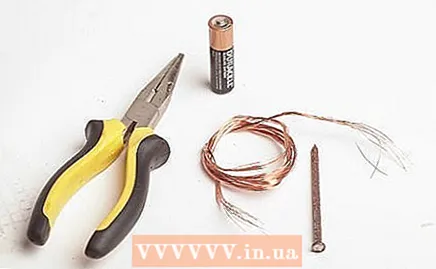 Gather your supplies. An electromagnet is made by passing an electric current through a piece of metal to create a magnetic field. You can do this on a small scale with the following supplies that you can get at a hardware store:
 - A big iron nail
- 1 meter of thin copper wire
- One D battery
- Small magnetic objects such as paper clips or pins
- Wire stripper
- Masking tape
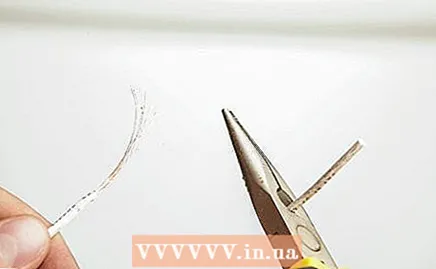 Expose the ends of the copper wire. Use the wire stripper to strip away a few inches of insulation from both ends of the copper wire. Wrap the non-insulated ends around the ends of the battery.
 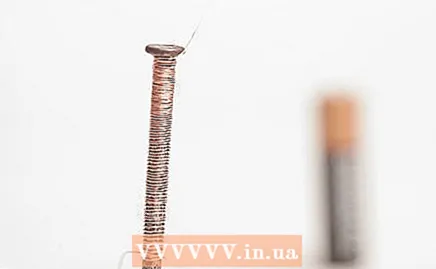 Wrap the copper wire around the nail. Start about 8 inches from the end of the copper wire and wrap the wire tightly around the nail. Make sure each loop touches the previous one, but don't let the thread overlap. Continue wrapping until the nail is covered from head to tip.
 - Make sure to wrap the copper wire around the nail in the same direction. To create a magnetic field, the electricity must flow in the same direction.
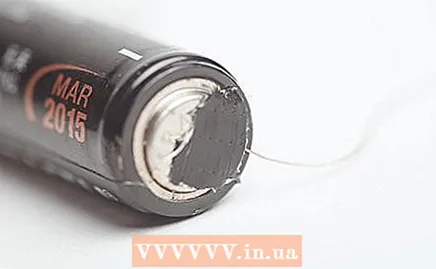 Connect the battery. Wrap one end of the exposed copper wire around the positive terminal of the battery and the other end around the negative terminal of the battery. Use small pieces of masking tape to secure the copper wire on both sides.
 - It doesn't matter which end of the copper wire you attach to which pole of the battery. The nail will be magnetized anyway. The only difference is that the polarity changes. One side of the magnet is the positive pole and the other side is the negative pole. By interchanging the ends of the copper wire, you also interchange the poles.
- When the battery is connected, the copper wire will become hot because electricity flows through it. So be careful not to burn yourself.
 Use the magnet. Place the nail near a paper clip or other small piece of metal. Because the nail is magnetized, the metal will stick to the nail. Experiment with different sizes and weights to see how strong your magnet is.
Method 3 of 3: Make a compass magnet
 Gather your supplies. A compass indicates north with a magnetized needle that is under the influence of the earth's magnetic field. Any metal that can be magnetized can also be used for a compass. A needle or straight pin is a good choice. In addition to a needle, collect the following supplies to make a compass magnet:
 - A magnetizer. Find a magnet, a nail, or even some fur to magnetize the needle.
- A slice of cork. Cut a slice off an old wine cork to serve as the base for the compass magnet.
- A bowl of water. By submerging the compass in water, the magnetized needle can be tuned to the magnetic poles of the earth.
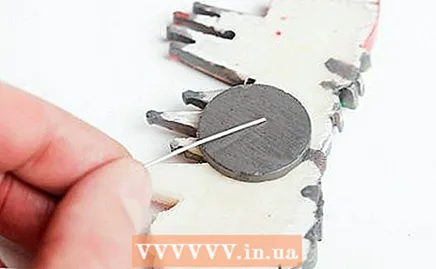 Magnetize the needle. Rub the needle with a magnet, nail, or some fur, creating a small electrical current.Rub the needle at least 50 times in the same direction to magnetize it.
 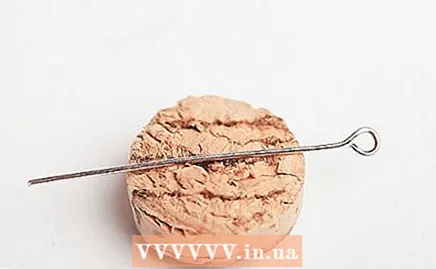 Put the needle through the slice of cork. Slide it through horizontally so that the needle goes in on the side and comes out on the other side. Keep pushing until the needle protrudes the same amount from the cork on both sides.
 - If the needle you are using is too big to push through the cork, you can just put it on top of the cork.
- If you don't have a piece of cork, you can use another light and floating object, such as a leaf.
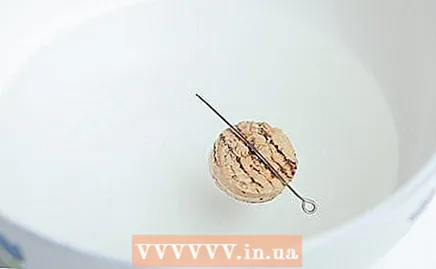 Let the magnet float. Place the magnetized needle on the water surface in the bowl. You will see the needle move from north to south in the direction of the poles. If the needle does not move, remove it from the cork, rub it 75 times with the magnetizer and try again.
Tips
- Try to pick up something small with your magnet.
- Make sure to keep rubbing the object in the same direction.
- The more often you rub the paperclip with the magnet, the stronger your homemade magnet will become.
- If you drop the paperclip it probably won't work and you will have to start over.
- Make sure to only rub in the same direction.
- The copper wire can get hot when you make an electromagnet. Be careful when working with copper wire.
Warnings
- Magnets can be bad for televisions and monitors, although this probably won't be the case with the paper clip magnet you made.
- Magnets can also erase your phone's SIM card, so be careful.


