Author:
Florence Bailey
Date Of Creation:
22 March 2021
Update Date:
1 July 2024

Content
- Steps
- Method 1 of 5: Making Cream Ice Cream
- Method 2 of 5: Making a Custard Ice Cream
- Method 3 of 5: Making Ice Cream Without an Ice Cream Dish
- Freezing in the freezer
- Method 4 of 5: Using freezer bags
- Make a freezer pot
- Method 5 of 5: Use an ice cream scoop
- Tips
- What do you need
Next time you want ice cream, make it yourself instead of buying it. Making ice cream is easy and fun to do with your kids. Read on for more details.
- Prep time: 10 minutes
- Cooking time: 5 hours, 50 minutes (active cooking time: 15 minutes)
- Total time: 6 hours
Steps
Method 1 of 5: Making Cream Ice Cream
 1 Mix the base. It is very easy to make a wide variety of ice cream to your liking using vanilla ice cream as a base. Custard ice cream is slightly colder and lighter than custard ice cream. This is a recipe for one serving of ice cream, but if you want more, double it. Combine the following ingredients in a saucepan.
- 2 cups heavy cream
- 1 full glass of milk
- 2/3 cup granulated sugar
- 1 teaspoon vanillin
- Optional: Add 1/2 cup cocoa powder for chocolate ice cream
- 2 Heat until sugar dissolves. Place a saucepan over medium heat and heat the mixture, stirring constantly, until the sugar is completely dissolved.
- 3 Cool the mixture in the refrigerator. Pour the cream base into a bowl, cover, then refrigerate for an hour or two.
- 4 Freeze ice cream in an ice cream pan. Pour the chilled base into an ice cream pan and freeze according to the manufacturer's instructions. The freezing process may take two hours or more, depending on the cooking form you have.
- 5 Add the ingredients to the mixture. When the ice cream is partially frozen, add your favorite flavors. The vanilla base tastes great with any fruit, candy or nuts. Add a glass (more or less, to taste) one or more of the following ingredients:
- Chopped strawberries
- Chopped cherries
- Sliced peaches
- Chopped chocolate bar
- Chopped chocolate bar
- Butterscotch
- Crushed toasted coconut flakes
- Peanut butter
- Candied fruit
- Chopped pistachios
- 6 Finish freezing the ice cream. Turn on the ice cream maker to complete the freezing process, then place the ice cream in the refrigerator to harden for about 3 hours. Enjoy your ice cream as soon as it hardens and becomes creamy.
Method 2 of 5: Making a Custard Ice Cream
- 1 Mix the base. The custard base is prepared with egg yolks. It is more velvety and richer in flavor than a cream base (although cream is used in both cases). The custard base makes an ice cream identical to the "gelato" and tastes delicious with any flavor added.Whisk the following ingredients in a bowl to prepare the base:
- 4 egg yolks
- 1/2 cup granulated sugar
- Optional: Add 1/2 cup cocoa powder for chocolate ice cream
- 2 Heat one glass of milk over low heat. Don't bring to a boil - just heat over medium heat until the edges start to bubble.
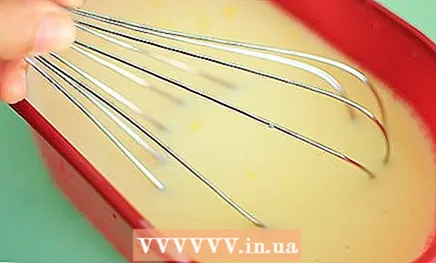
- 3 Combine the hot milk in the egg mixture. Stir the mixture continuously and slowly with a whisk and slowly add the milk. Pouring milk too quickly can cause the eggs to turn into scrambled eggs!
- 4 Pour the mixture back into the pot and heat it up. Stir constantly over low heat until the mixture thickens and sticks to the back of the spoon as you remove it. The thickening process will take 8-10 minutes; if you check the temperature with a thermometer, it should fluctuate between 74 and 82 degrees Celsius. This thick mixture is custard.
- Make sure the mixture is not boiling. If it boils, it will curdle and form lumps. If this is the case, beat in a blender until smooth again.
- 5 Cool the custard. Pour it into a bowl, wrap it up and freeze it in the refrigerator until it is completely solid.
- 6 Add one glass of heavy cream and additional ingredients. Finish with a glass of heavy cream and stir well. Your creamy ice cream base is ready to fit into the mold! Before freezing, add a glass or more of the following:
- 2 teaspoons vanillin
- 1 teaspoon almond extract
- 1/2 teaspoon mint extract (for chocolate mint ice cream)
- Chopped strawberries, cherries, plums or peaches
- Chopped chocolate bar or bar
- Butterscotch
- Toasted coconut flakes
- Peanut or almond butter
- Candied fruit
- Chopped pistachios
- 7 Freeze ice cream in an ice cream pan. Pour the chilled mixture into ice cream tins and freeze according to the manufacturer's instructions.
Method 3 of 5: Making Ice Cream Without an Ice Cream Dish
- 1 Make a custard base with your favorite toppings. If you don't have an ice cream maker, you can freeze ice cream in the freezer. The custard base produces a smooth, creamy texture after freezing. If you use a cream base instead of a custard, your ice cream will most likely harden and be firm rather than creamy.
Freezing in the freezer
 1 Freeze ice cream in the freezer. Simply pour it into a deep, safe freezer container and place it in the freezer. Open the freezer every 45 minutes and stir it thoroughly. This will help it freeze slowly and produce a soft, creamy texture instead of frozen ice cubes. Continue stirring the ice cream until it is completely solid. This method takes 4 to 5 hours.
 - If you like soft ice cream, you can eat it when it reaches the consistency you want.
- For traditional ice cream, leave it in the freezer overnight after the last stir. The next day it will have a store-like texture.
Method 4 of 5: Using freezer bags
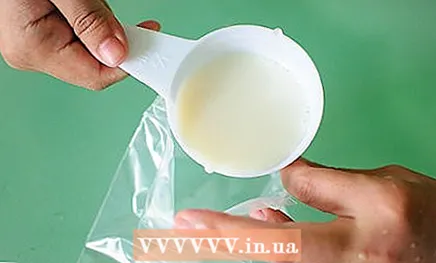 1 Pour the base of the custard into a 1/4 cup bag. Make sure it's reliable.
  2 Fill a larger bag with ice and salt. Take about two quarters of the ice, crush it if possible and place in a large bag of rock salt (also known as coarse salt). Ideally, the large bag will be about half full with the ice and salt mixture.
  3 Place a small sealed pouch in a larger pouch. Make sure the bags are sealed. Do not let the contents shuffle at any time.If the pouches are not well sealed, seal the top of both pouches to make sure they do not break open during shaking.
 - If you prefer, you can use two jars instead of two freezer bags. Take coffee jars of different sizes: fill the smaller one with the ice cream base, and fill the larger one with ice and salt and put the smaller one in it. Make sure both jars are sealed.
 4 Shake it up. Mix gently by shaking the sachets for 15-20 minutes. During this time, the contents of the large sachet will begin to turn into hardened ice cream. It is important to stir the contents of the main bag, but not so much that it breaks the main bag or breaks with ice. Double packing prevents this from happening.
 - If you are uncomfortable with your hands getting cold, use a towel or old T-shirt while shaking the bags; the bags will be cold enough and may become slippery due to condensation.
- You can use gloves while holding the top if there is no towel or something suitable at the moment.
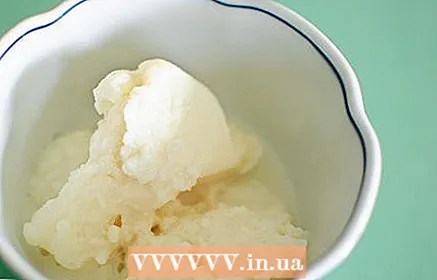 5 Remove the finished ice cream from the bag and serve.
Make a freezer pot
- 1 Fill a large container with ice and rock salt. These are the necessary materials to create a pot that looks like an antique freezer pot. This is how ice cream was actually made before the advent of modern refrigeration using ice from lakes and ponds. Handmade ice cream machines are a variety of sorbetière (closed bucket with a handle attached to the lid), which is the French method of freezing in a pot.
 2 Place the ice cream base in a bowl. Use a custard base and top off with your favorite flavors.
 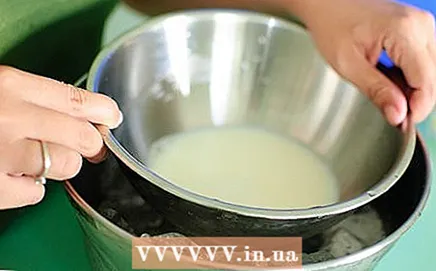 3 Place the bowl in a tub filled with ice and salt. Make sure the water and salt mixture does not spill over the edges or into the bowl.
  4 Mix the ingredients thoroughly in a bowl. The ice water will absorb heat from the mixture, bringing it to the freezing point of water and turning the mixture into ice cream. It is important to stir very thoroughly to prevent ice chunks from forming. You can use a whisk, or better yet, a hand mixer.
 - Freezing ice cream in this way will take several hours, but as a result, it will never be as hard as store-bought.
 5 Remove ice cream from bowl and serve.
Method 5 of 5: Use an ice cream scoop
- 1 Buy an ice cream scoop. It is a commercial product that mixes ice cream using a special double chamber bowl.
- 2 Prepare it for freezing. Fill the edge of the ice with 1/2 cup rock salt and ice (3/4 cup if using a large ball) and cover with your hand.
- Standard ice cubes may not work. You may need crushed ice.
- You will most likely need at least 10 containers of ice.
- 3 Place the ice cream mixture at the end using a metal cylinder. Leave one inch (2.5 cm) at the top for expansion and cover with your hand.
- 4 Shake, roll up, and let the ball sit for 10-15 minutes. The ball will probably be heavier than you expect.
- 5 Check out the ice cream. Open the end with the plastic wrap that comes with the ball. If it is still soft and liquid, scrape the edges of the cylinder with a plastic or wooden spoon (metal can damage the cylinder). Close the lid with your hand. Then keep throwing the ball for another 15-20 minutes.
- Since the chamber is narrow and deep, it can be difficult to stir the ice cream. Use a wooden spoon or spatula if necessary.
- 6 Check the end of the ice. Make sure you have enough ice to freeze the ice cream. Open the lid with a plastic opener. Drain and add more ice and, if necessary, up to 1/3 tbsp. rock salt. Close the lid with your hand.
- 7 Scrape the ice cream out. If it tastes good to you, scrape it out and eat it.
- When scrubbing ice cream, make sure it doesn't spill over the curly ridges or get into crevices - this can make it difficult to clean up later, especially if you're using chocolate chips.
- Ice cream tends to be "runny" in the middle and hard at the edges.
Tips
- If you prefer a low-calorie ice cream that's not as high in calories, use artificial sweetener instead of sugar. You can also experiment with other types of milk.
- You can use coarse salt (rock salt). The coarse salt takes longer to dissolve in the water, allowing the ice cream to cool more.
- For larger groups, mix several scoops of ice cream at once and arrange them in sachets, it's more rational than each child individually stirring their own (so much mud).
- Make sure ice and salt are not mixed; you can burn your hand!
- Make sure you have gloves or other protective equipment while whipping the mixture.
- The flavor combinations are almost endless. Chocolate syrup is the main choice. Don't be afraid to add your favorite fruits or nuts! The various flavors that are available in the baking section of your grocery store can lead you to more exotic variations. Try mixing peppermint extract with chocolate, or add fine chocolate chips.
- If using blueberries, chop them first. Whole blueberries are more likely to turn into stones than mix with ice cream.
- For high school students: Link ice cream making with colligation.
- If you are using a mixer with a removable container, place the container in the freezer overnight. Then place it directly into the mixer and the mixture into the container while it is very cold. This will crush the ice crumbs to create a smooth ice cream.
- For the first method, add 1.5 tablespoons of nutella; keep adding it to enhance the flavor.
What do you need
- Ice Cream Maker
- Ice cubes
- Rock salt
- Plastic bags (multilayer and freezer size)
- Coffee cans (large and small)
- Stainless steel bowls (or deep baking dish)
- Spatula, whisk, hand mixer
- Commercial ice cream bowl, if possible


